Configuring temporary filtering options for App users
You can enable or disable the ability for App users to apply temporary filters to published versions of your View and the individual components within the View. These temporary filters can be set per user, with any filters applied by the user being persisted and applied the next time they load the View.
You can configure advanced filters for your View when in Edit Mode by clicking View Settings, allowing you to enable and configure attribute and process filters (limited availability only):
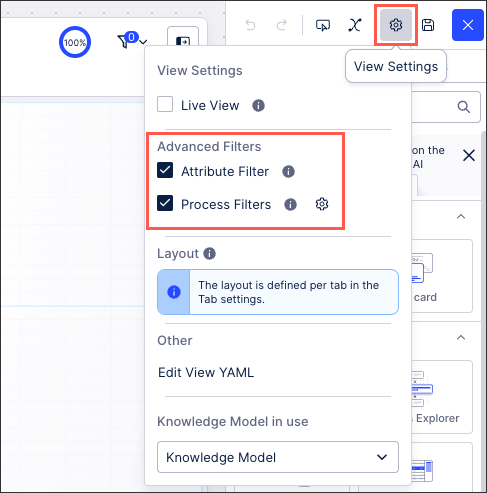 |
Attribute filter: This filter allows users to select objects based on specified attributes, like country "Belgium" or start date "February 2, 2015". See: Enabling and using attribute filters
Process filters: By enabling process filters, users can filter based on:
Process flow filter: Select objects where an event is or isn't followed by another, e.g., "Invoice sent" followed by "Invoice canceled".
Event filter: Select objects based on their flow through specified events, such as objects starting with or including "Create Order".
For more about process filters, see: Enabling process filters
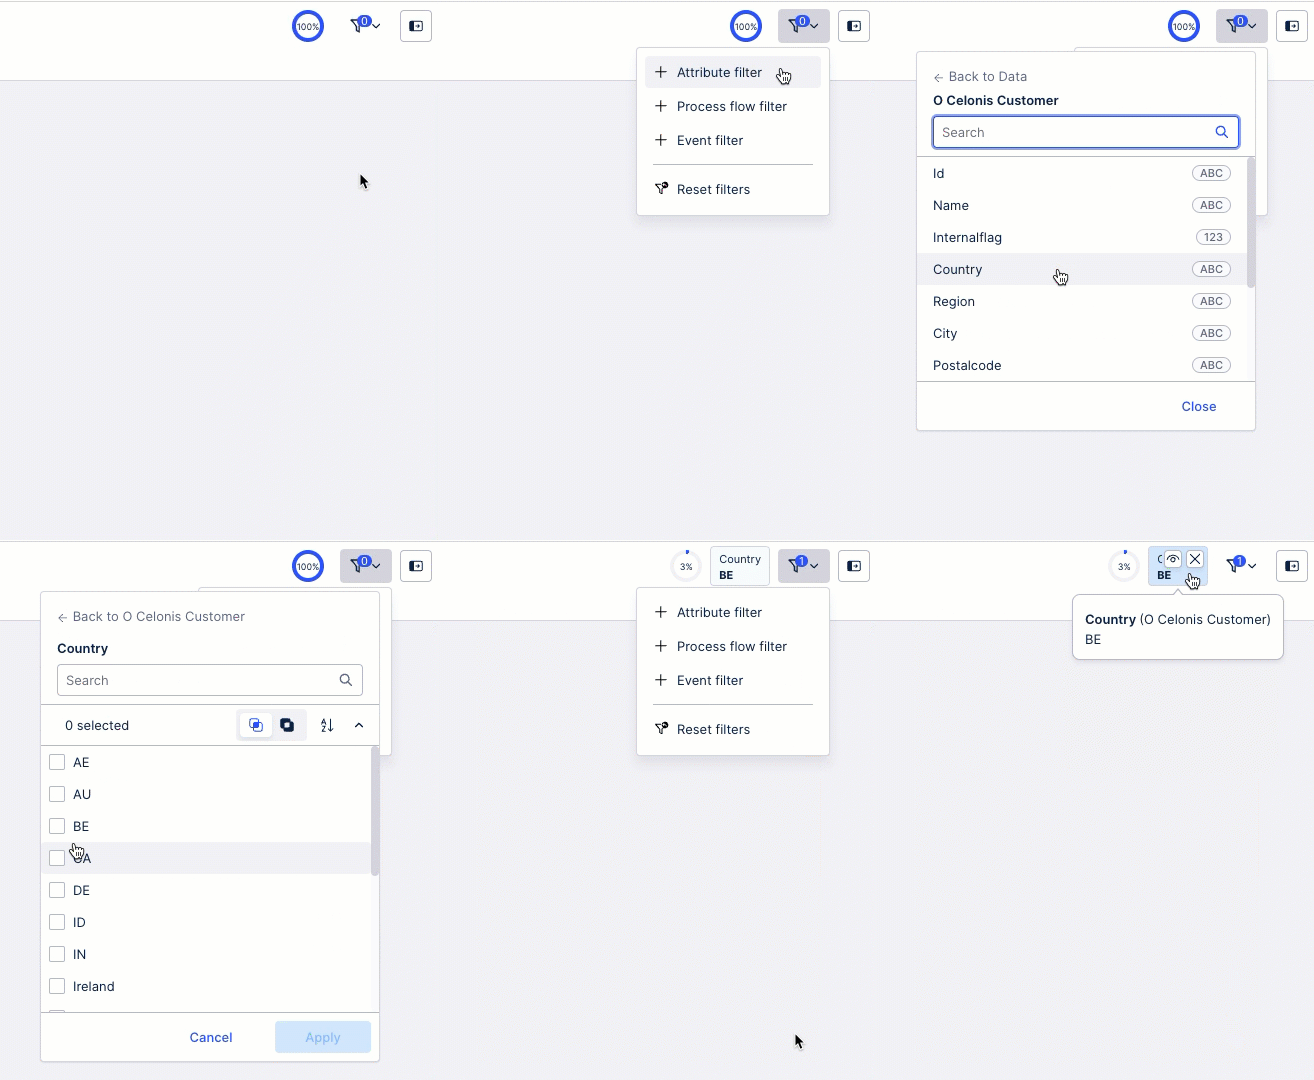
When an attribute filter is enabled, the user can click Filters - Attribute filter and select from the available Data Model tables and columns to apply a filter.
For example, filtering on customers based in Belgium:
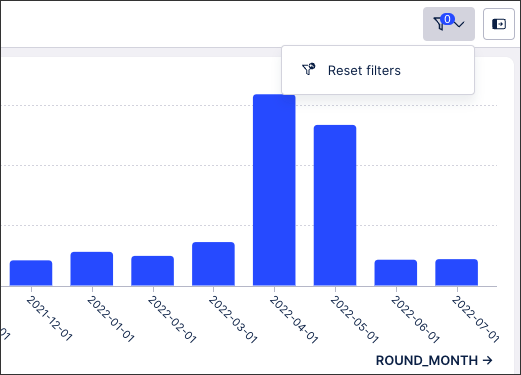
When attribute filters aren't enabled (or are disabled), the app user can still apply filters (such as component filters as shown in the example), however the attribute filter option is not available:
 |
Search based filters
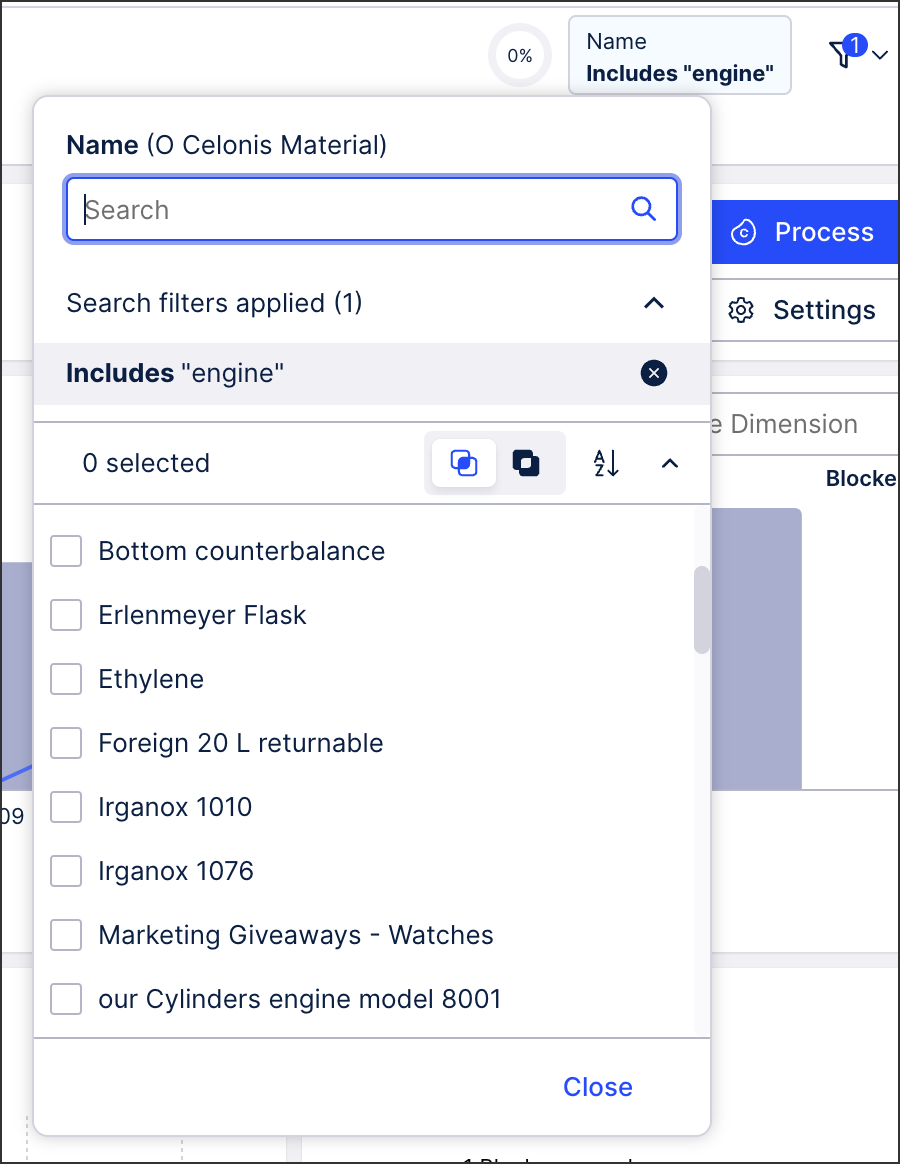
Users can also configure more advanced filters for their View by using the Search feature. This gives users the ability to apply filters based on terms to include, exclude, and apply AND / OR conditions that are independent of the events listed.
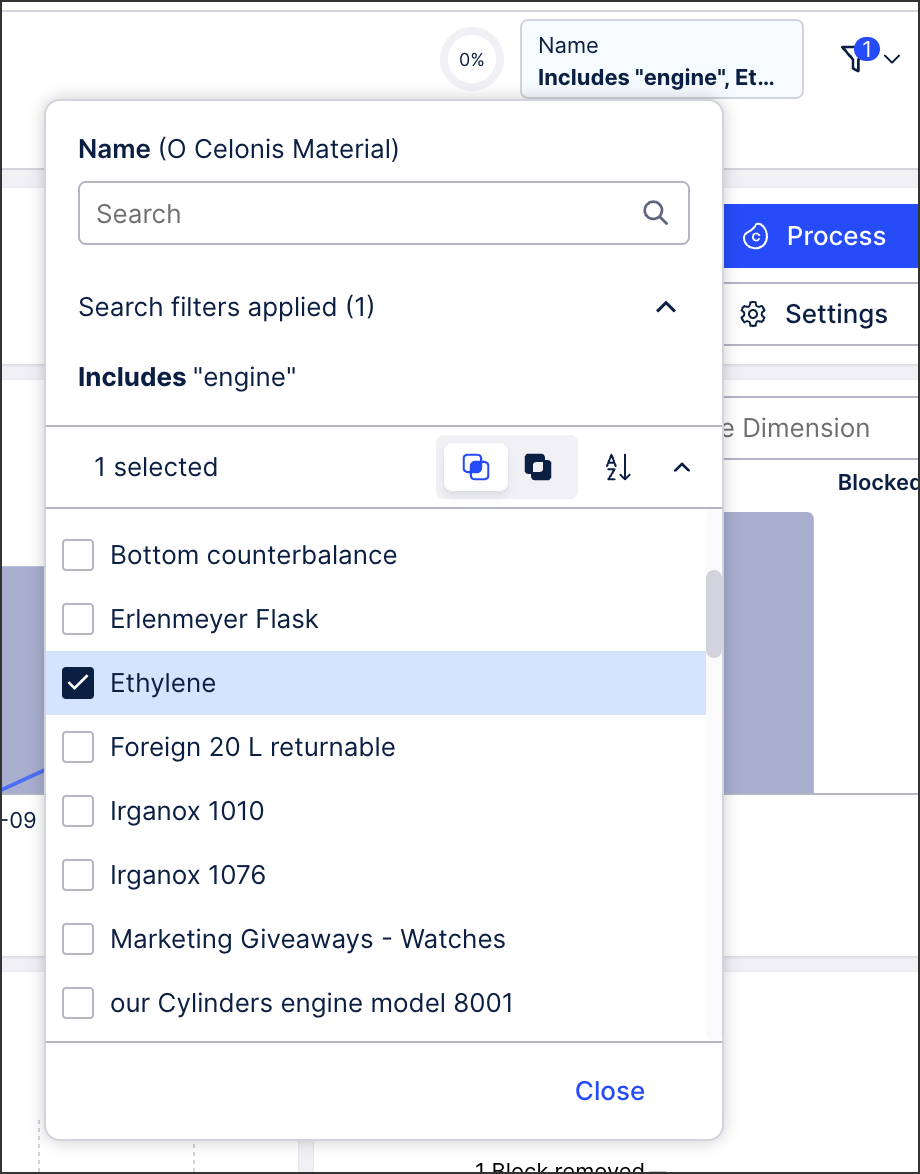
In this example, the search feature is used to filter the view to show where 'engine' as listed as a material type:
 |
Search filters can also be combined with selecting from the event list, creating an OR filter. In this example, the filter will return data where either 'engine' or the selected 'ethylene' material type are used:
 |
By enabling process filters, users can filter based on:
Process flow filter: Select objects where an event is or isn't followed by another, e.g., "Invoice sent" followed by "Invoice canceled". See:
Event filter: Select objects based on their flow through specified events, such as objects starting with or including "Create Order". See:
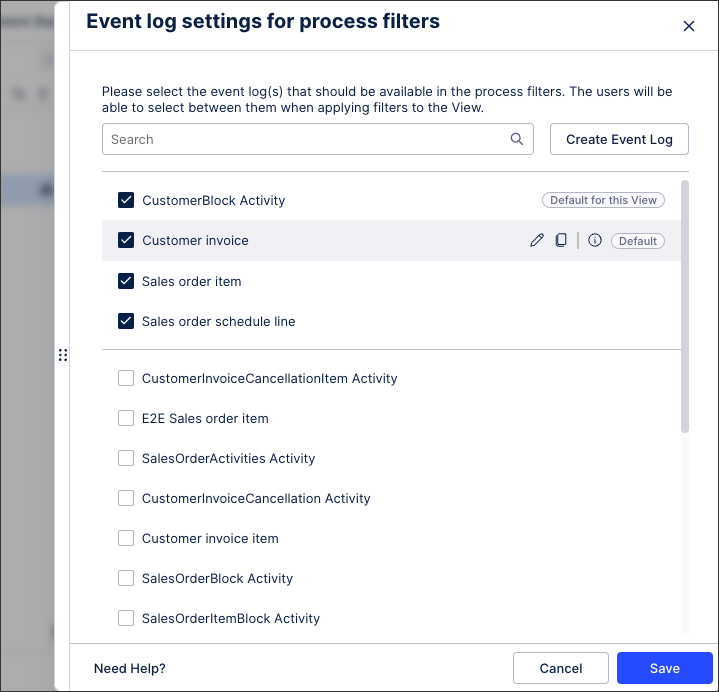
Process filters require at least one event log to be selected, with the option to select from existing event logs in the same Knowledge Model as this View or create a new event log using the PQL editor. For more information about event logs, see: Event logs.
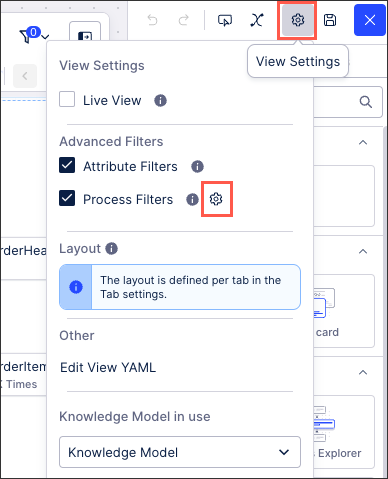
By default, only the default event log as defined in the Data Model will be selected. You can change the default and add more event logs by clicking Settings:
 |
You then have the following options:
View and select existing event log: View and select from existing event logs in the same Knowledge Model as the view.
Set as default: If multiple event-logs are selected, the default one will be used first when filtering a process.
Edit event log: This edits the existing event log in the Knowledge Model. By editing existing event logs, you may impact other content where this event log is being used.
Duplicate event log: This creates a copy of the event log within the Knowledge Model.
Create Event log: This opens the in-line event log creator, with any event logs created saved to the Knowledge Model.
 |
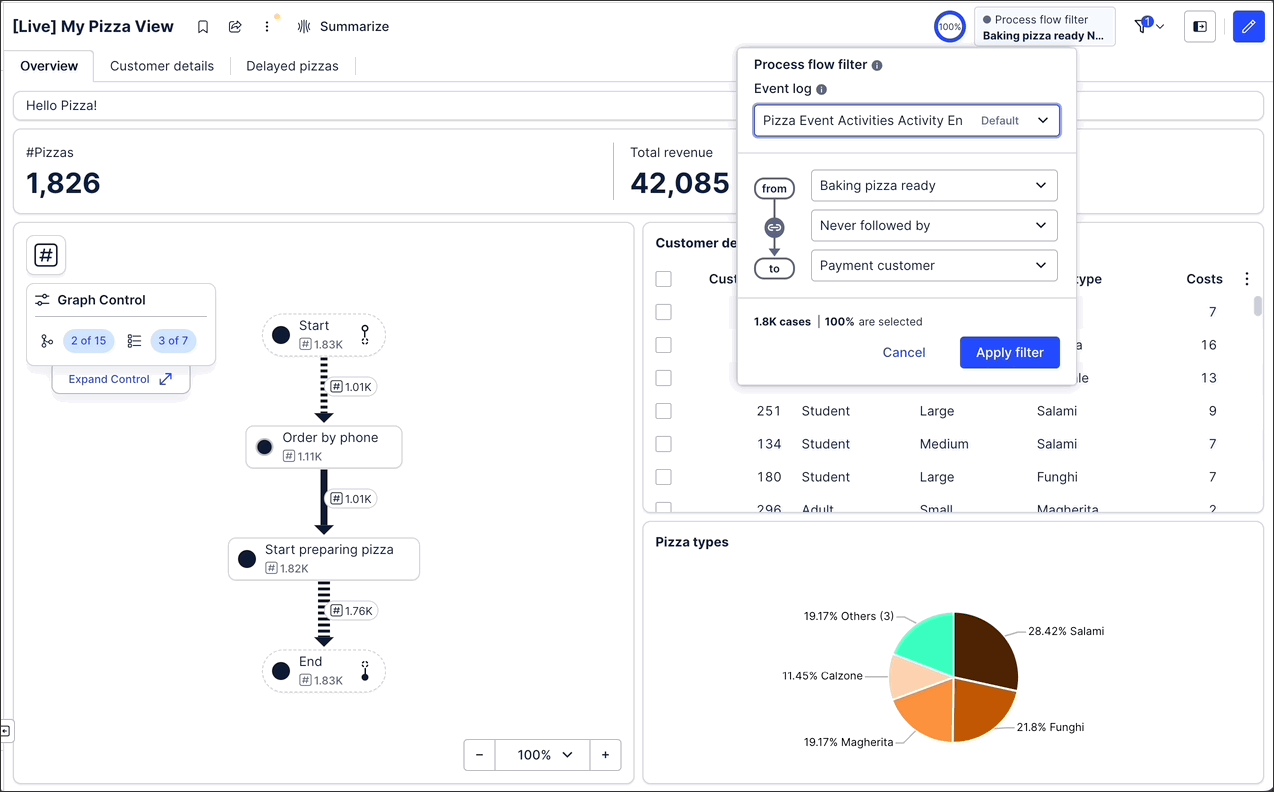
When process filters enabled, users can apply process flow filters by clicking Filters - Process flow and then selecting the event log to use, the From and To events, and the connection between the two events:
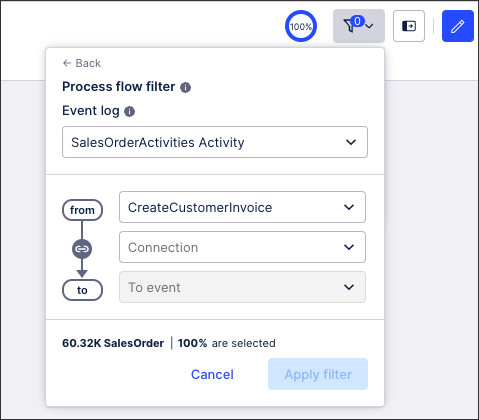 |
The following connection types can be selected:
Directly followed by
Followed anytime by
Not directly followed by
Never followed by
In this example, a process flow filter is being used to show only data where an order is received, the item is ready, but the customer hasn't paid:
 |
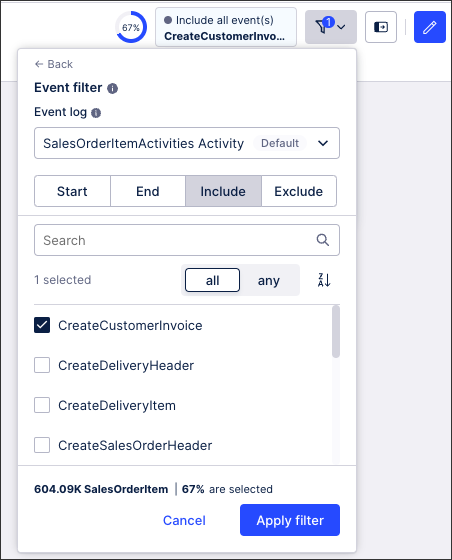
When process filters are enabled, users can apply event filters by clicking Filters - Event filter and then selecting at least one event to filter the view by.
In this example, the view will be filtered to only show sales order item results that include a create customer invoice event (which in this case is 67% of the cases in the current view):
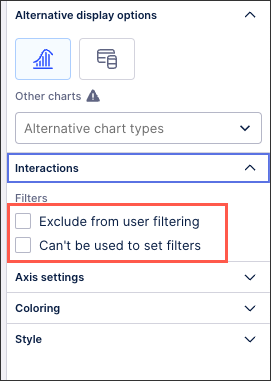
In the Interactions section of your component settings, you can enable and disable whether users can set temporary filters when interacting with that component.
Exclude from user filtering: When enabled, this prevents the app user from apply a temporary filter to the data within the component.
Can't be used to set filters: When enabled, this prevents the app user from using the component to set temporary filters for the whole View.
 |
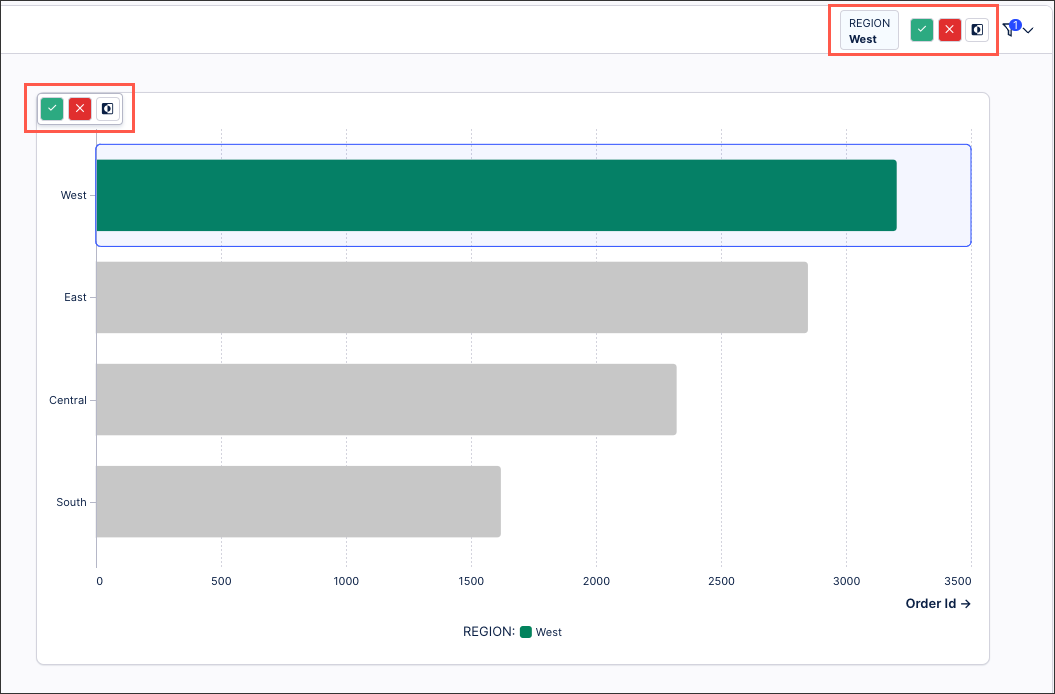
Enabled: In this example, the chart has been configured to allow the user to click a region and filter their View based on that region. In addition to updating the component itself, the filter is then applied to the whole View and a filter chip is added to the toolbar.
 |
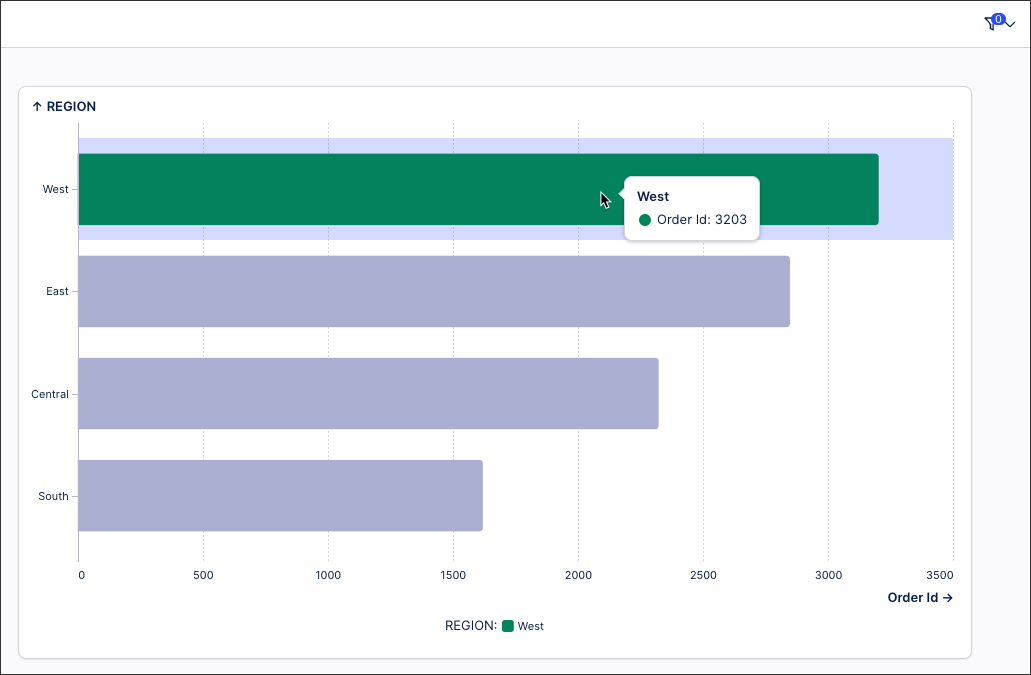
Disabled: And with the same chart, the filtering options have been disabled and the user can't set a filter when clicking on a region:
 |
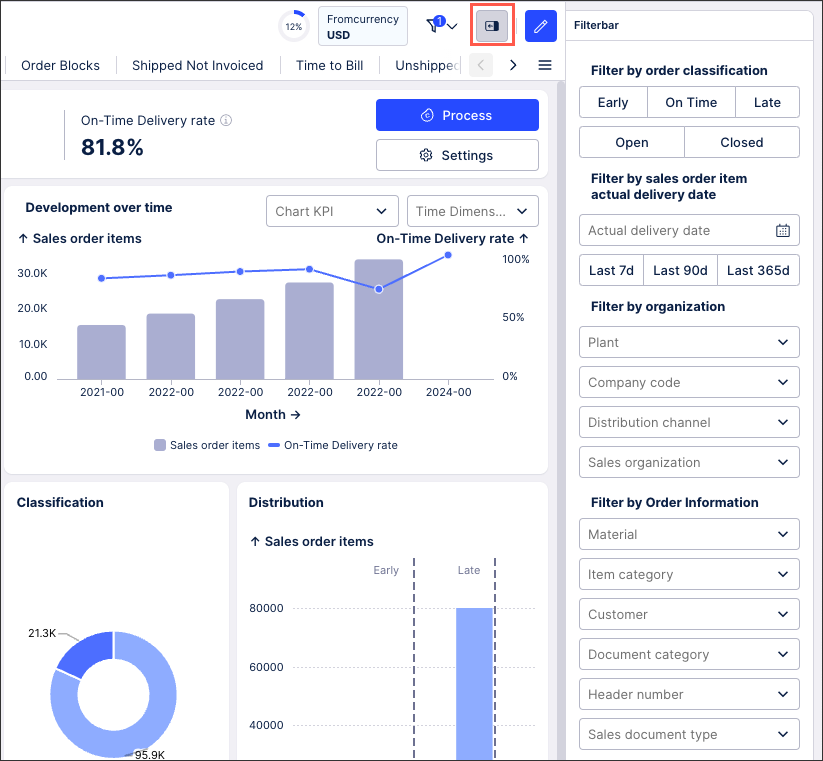
You can also add a filter bar to your View, giving users the option to open a side panel in your published View and select from your configured components. These are also temporary filters for individual users, with any filters applied by the user being persisted and applied the next time they load the View.
To learn how to configure a filter bar for your View, see: Configuring a filter bar for your View.
An example of a configured filter bar in a View:
 |