Managing your system notifications
As an administrator, you use system notifications to maintain team security and ensure all your users receive critical information directly within the Celonis Platform. These tools allow you to automate the monitoring of technical changes and deploy high-visibility communication for general updates.
As an administrator, you use system notifications for two primary reasons:
To maintain team security: You can set up automated alerts to keep a close eye on high-stakes changes. This ensures you are immediately notified if new admins are added, SSO configurations are modified, or users are removed from your team.
To deploy high-visibility communication: You can broadcast critical information directly to your users' screens through banners. This allows you to ensure that all users see your message, which remains visible until they personally acknowledge it.
There are two types of notification:
Event notifications (formerly email notifications): You can use event notifications (formerly email notifications) to maintain security and oversight of your team environment. You can choose to have these sent to selected admins when significant actions occur, such as:
Security and access: Receive alerts when a new admin is added, a user is removed, or your SSO configurations are changed.
API management: Track when new application keys are created or when personal API keys for admins or analysts are modified.
Privacy: Monitor any updates made to your team privacy settings.
Banner notifications: You can set up banner notifications to display messages directly on all your users' screens. This is helpful for:
Broad communication: You can ensure a specific message is visible to all users until they manually acknowledge it by clicking the "X" icon.
Tracking engagement: You can use the dashboard to view version history and see exactly how many acknowledgments (clicks) each notification receives.
Organization: You can categorize your notifications to report on frequently used topics and measure the average duration your banners remain active.
By using these tools, you ensure your platform remains secure through automated alerts while maintaining a direct way to broadcast important information to your entire user base.
System notification emails can be sent to selected admins when a critical change occurs in the team.
To enable system notifications:
Click Admin & Settings - Notifications.
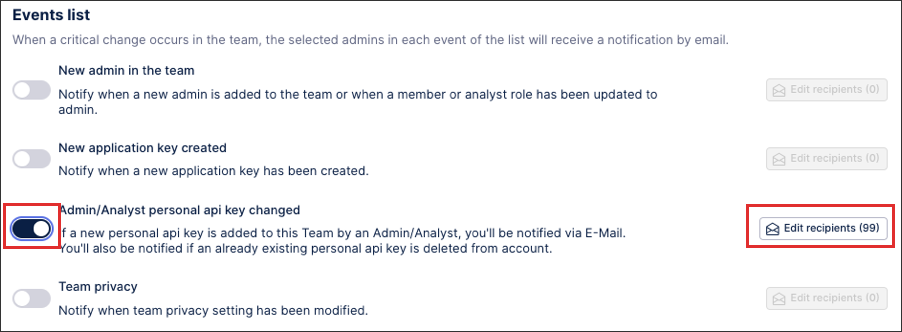
Toggle the switch to enable the events you want to send notifications for.
Click Edit recipients to choose which users receive these notifications.
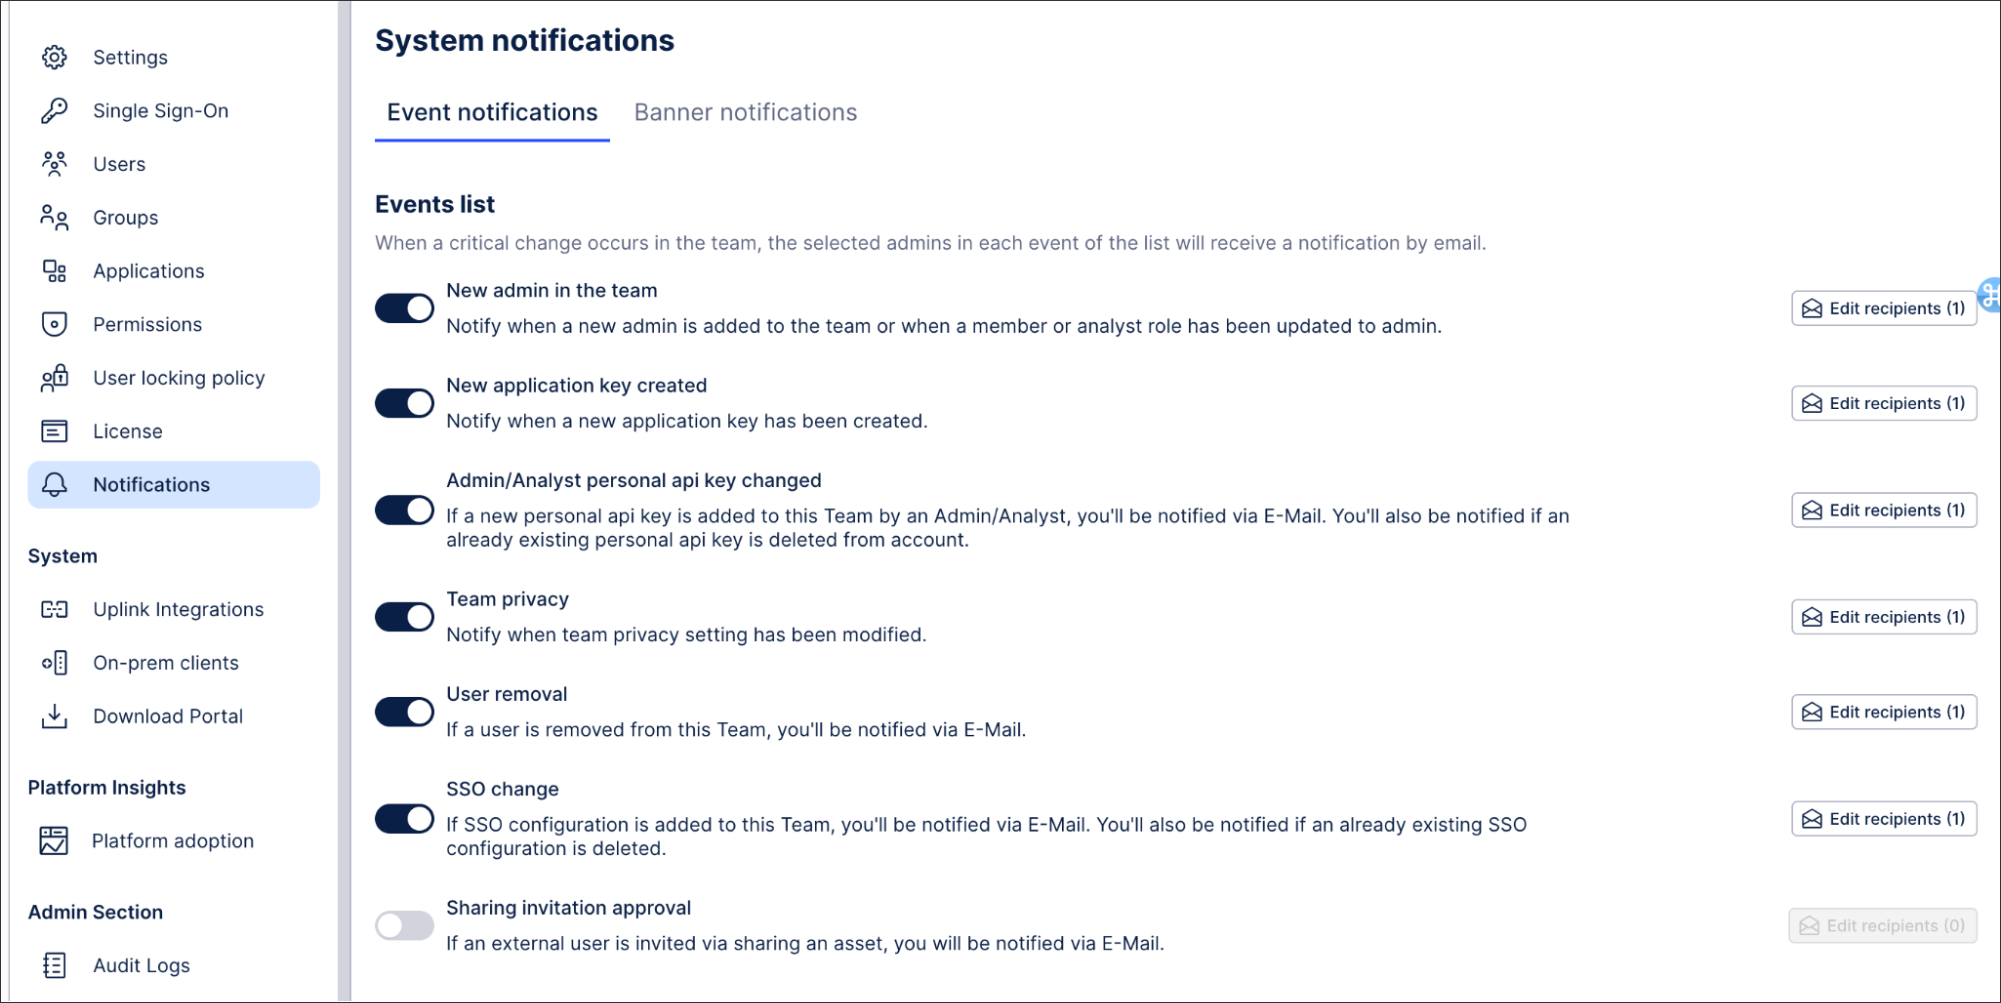
System notification event types
When enabling system notifications, the following events are available:
New admin: Notify when a new admin is added to the team or when a member or analyst role has been updated to admin. See: Permissions
New application key: Notify when a new application key has been created. See: Application keys
Admin / Analyst personal API key changed: If a new personal API key is added to your by an Admin/Analyst, you'll be notified via E-Mail. You'll also be notified if an already existing personal API key is deleted from account. See API keys
Team privacy: Notify when team privacy setting has been updated. See: Team privacy
User removal: If a user is removed from your team, you'll be notified via E-Mail. See: Managing existing users and User locking policy
SSO change: If SSO configuration is added to your team, you'll be notified via E-Mail. You'll also be notified if an already existing SSO configuration is deleted. See: Signing in and Account management
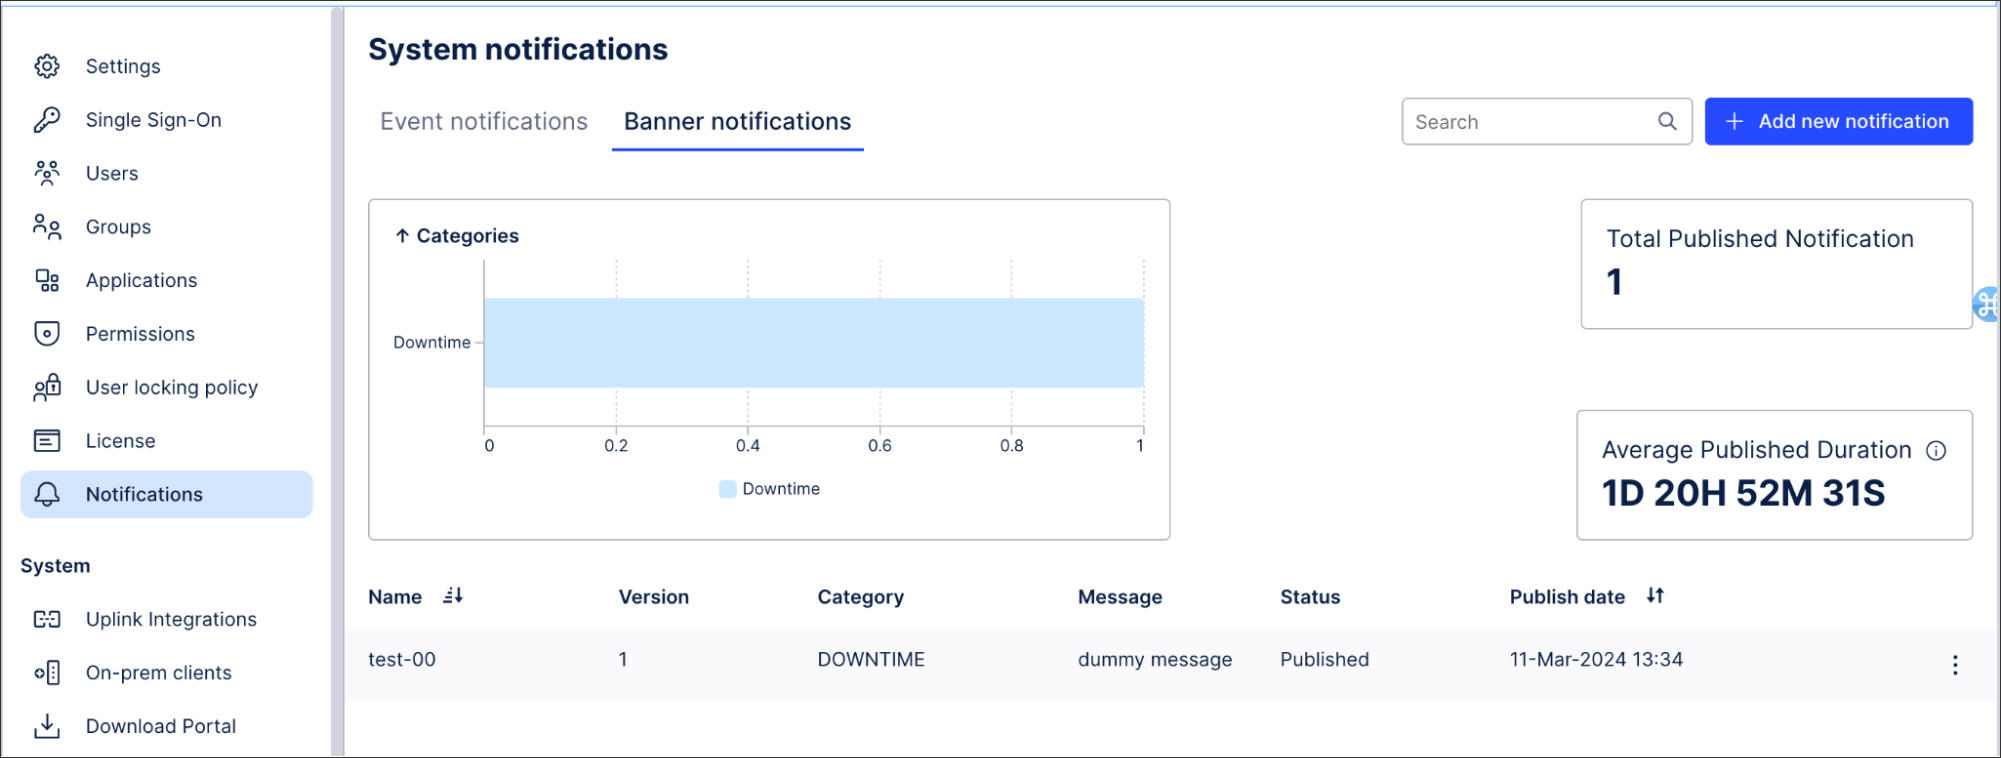
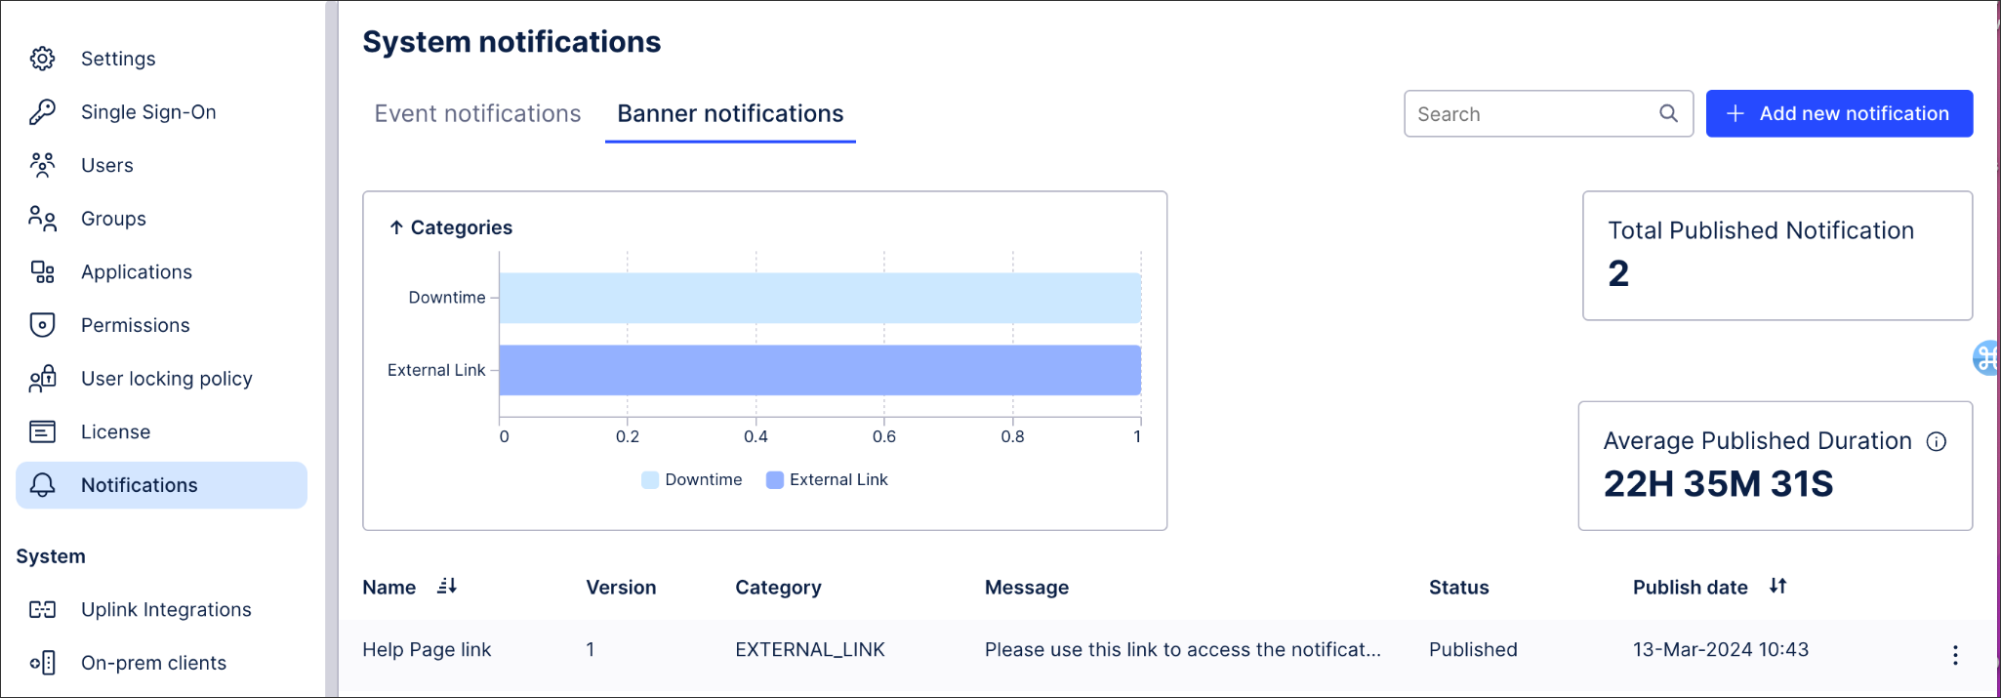
You can set up banner notifications to display messages directly on all your users' screens. This includes access to a dashboard, giving you the ability to see the impact the message has, including:
Categories: As part of creating the notification it’s mandatory to add the notification category. This allows the dashboard to report on most frequently used categories and then counts the quantity of publish events for each notification.
Total published: This is simply a count of total notification where a publish event has occurred.
Average publish duration: This shows in Days, Hours, Minutes and Seconds the average duration for all published notifications.
 |
To add a new banner for your Celonis Platform team:
Click Admin & Settings - Notifications.
Click Banner notifications.
Click Add new notification and populate the template that appears.
Name: This is an internal label used to identify the notification within your dashboard and version history.
Category: You are required to select a category for every notification. This is essential for your reporting, as it allows you to track which topics you use most frequently.
Message title: This acts as the headline for your notification and is the first thing your users will see in the banner.
Message: This is the body of your notification. You can use this space to provide the full details of your announcement (up to 500 characters).
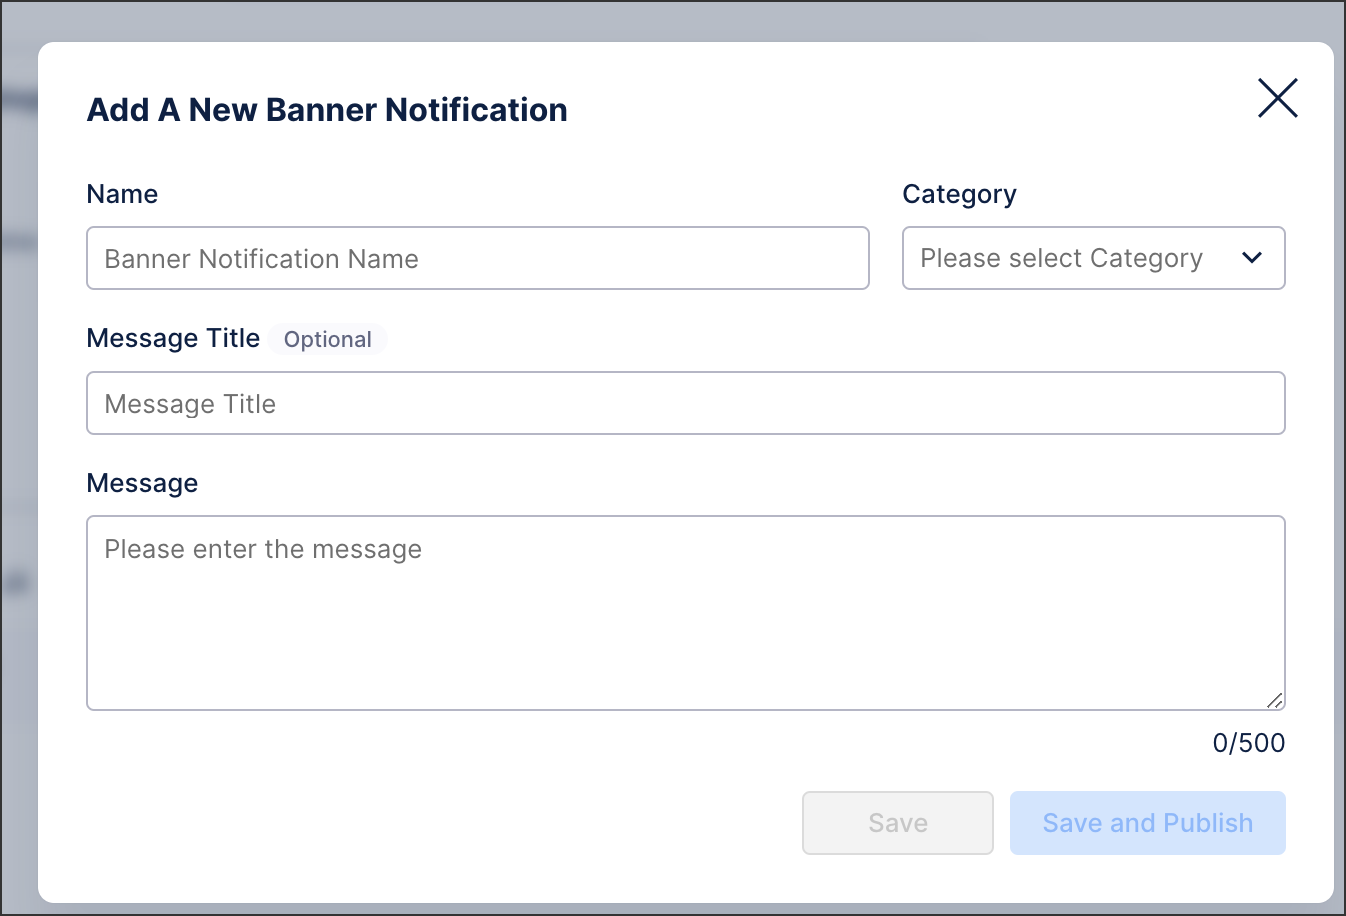
Click Save and Publish.
Confirm that the banner should be punished.
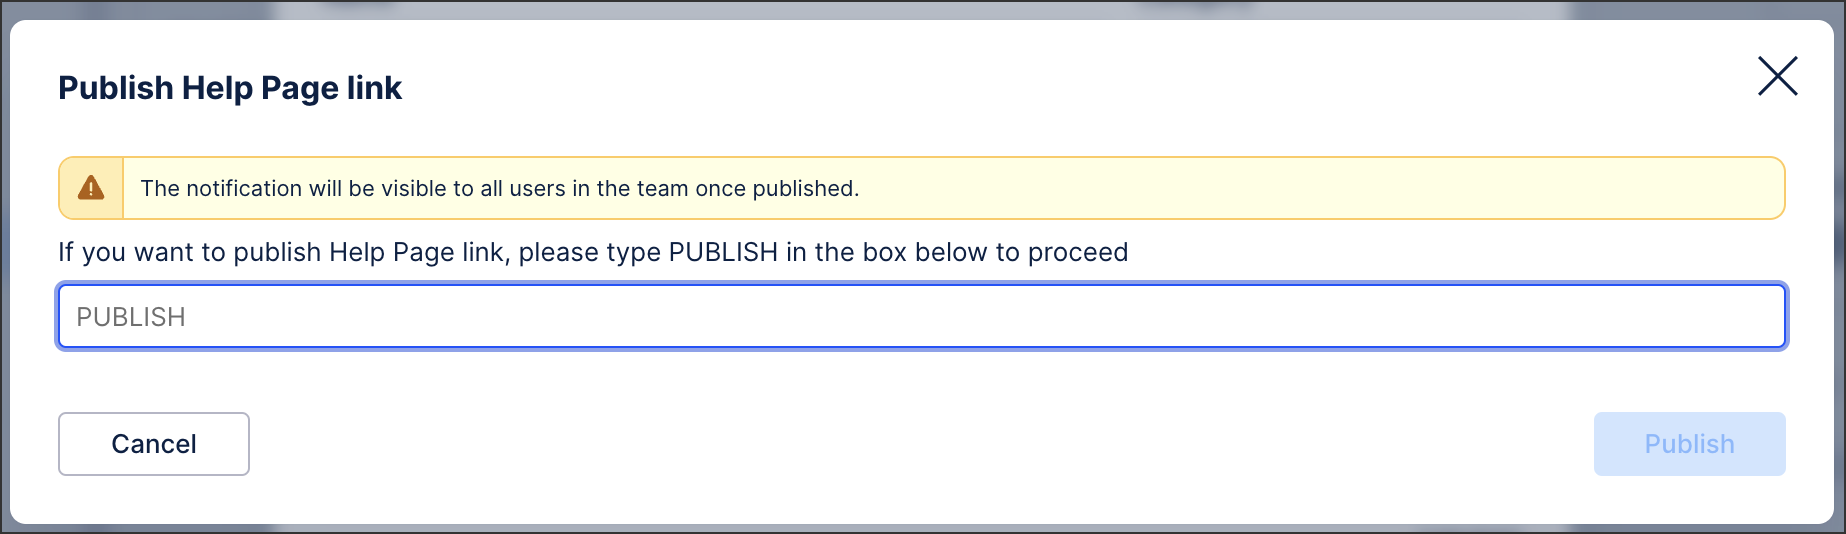
The banner is then visible to ALL users and remain present until the user clicks the X icon.
 |
Once the banner is published the dashboard is updated and the new banner notification appears as a line item showing a summary of the notification, such as status and publish date.
 |
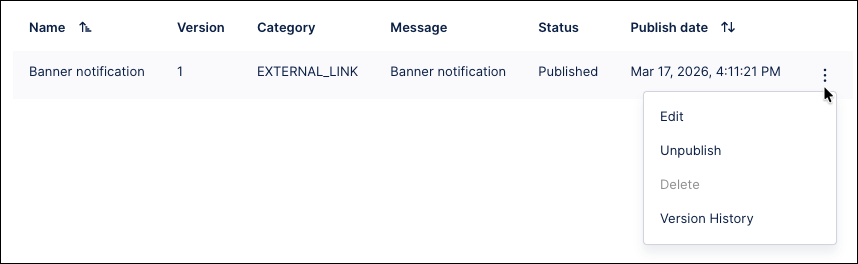
Managing existing banner notifications
Once published, banners can be edited, unpublished, deleted, and you can view the version history:
Click Admin & Settings - Notifications.
Click Banner notifications.
For each banner notification, click Options and then select from the following:
Edit: Modify the content or settings of an existing notification.
Unpublish: Remove a live banner from all user screens without permanently deleting it.
Delete: Permanently remove the notification from your team.
Version history: Review a log of previous changes and track how the notification has evolved over time.