Activating and configuring live data
You can set up a live data connection between your knowledge model in Celonis Platform and Celonis Process Management. This allows you to use features such as the Process Cockpit. Once the connection is established, you must then configure the data in Process Designer (in the form of KPIs and tasks), which can then be viewed and used in process models in Process Navigator.
Before you begin, ensure you have completed the following steps or meet the requirements listed below:
A Celonis Platform license
Access to the Celonis Knowledge Model API
Knowledge model set up in the Celonis Platform (for information on how to do this, refer to Creating knowledge models)
Administrator role in Celonis Platform
Administrator role in Celonis Process Management
Access to Process Navigator
KPI limitations
The main KPI and any child KPIs must:
Have the same Celonis Platform knowledge model key at task level.
Be assigned to the same Best Practice Task in the Celonis Platform at task level.
Before you can set up the connection between the Celonis Platform and Celonis Process Management, you need to have a knowledge model set up in the Celonis Platform. For information on how to do this, refer to Creating knowledge models.
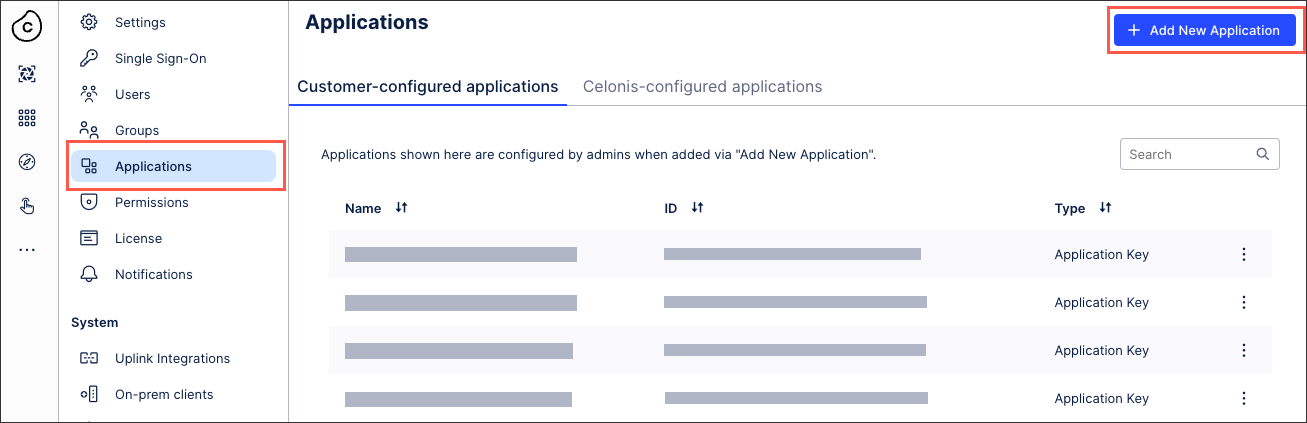
It's easiest to set up the connection by having the Celonis Platform open in one tab, and Process Designer open in another. Start by logging into Celonis Platform and navigate to Admin & Settings - Applications. Click Add New Application and select OAuth Client from the dropdown.
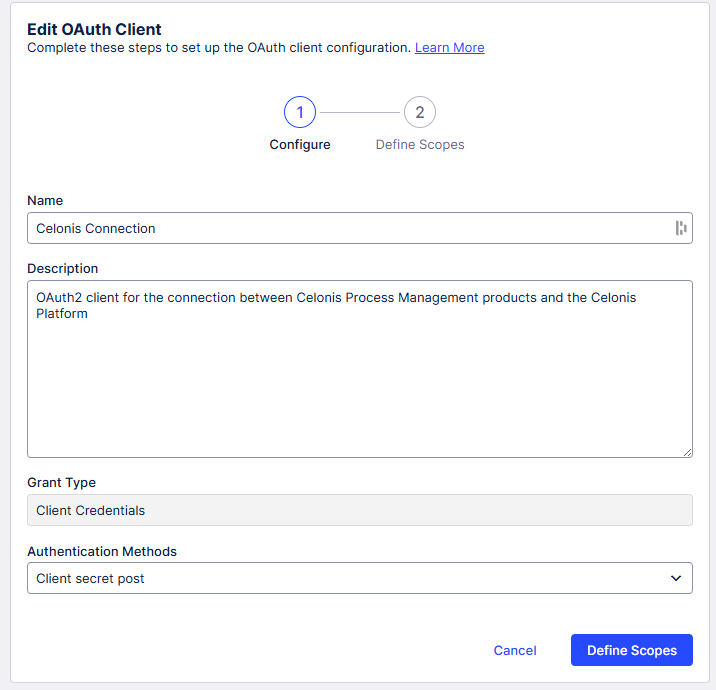
Fill out the form with details for your OAuth client. For Authentication Method, select Client secret post from the dropdown. Click Define scopes when finished.
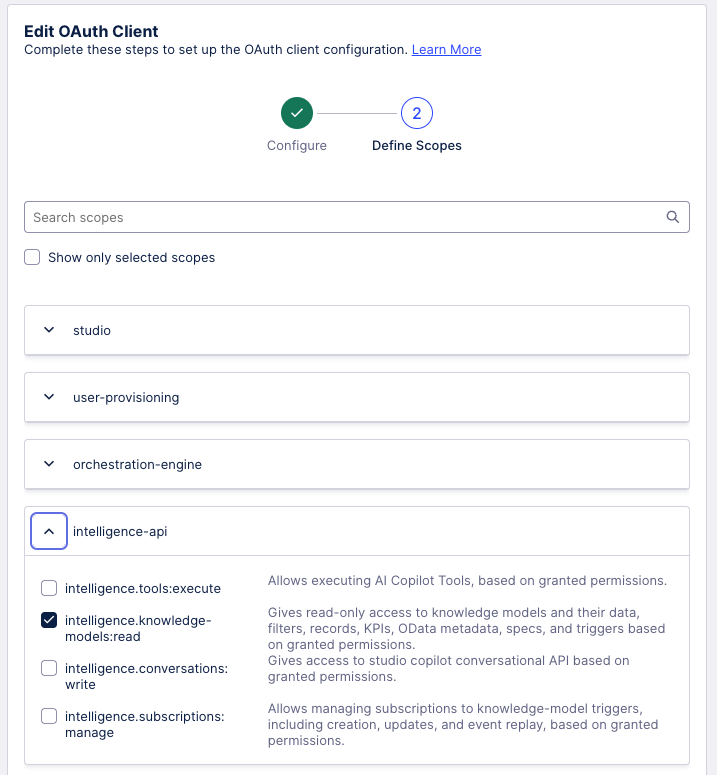
Search for "intelligence-api" in the Scopes search bar, and check the box next to intelligence.knowledge-models:read in the results. Click Create when finished.
Note
You can only view these credentials once, so make sure to save them as soon as you create them. Otherwise, you'll have to create a new one.
Open a new tab. Log into Process Designer. Make sure you're in Editor mode (click the blue pencil icon) and from the top menu click the gear icon to access the Settings area. Under Services, click the SSO Configuration tile. Click Connectivity on the left-hand side.
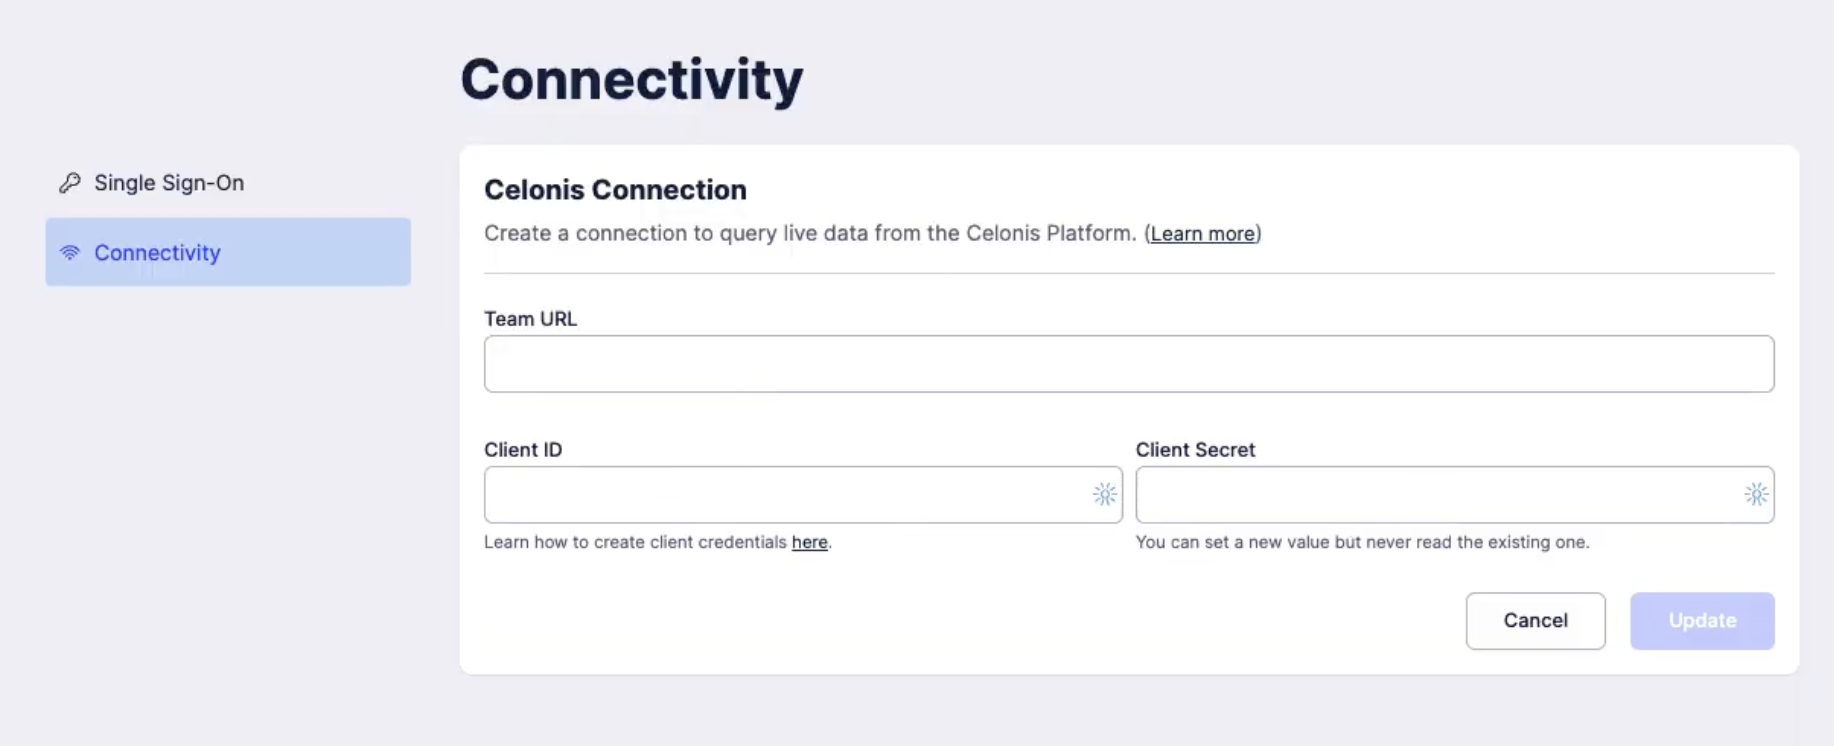
Paste the OAuth client ID you created in steps 1 - 3 into the Client ID field, and the OAuth client secret into the Client Secret field.
Switch back to your Celonis Platform tab. Look at the browser bar. It should say something like http://celonisphere-24-pam.eu-1.celonis.cloud/ui/team/applications. Everything in front of "/ui" is your team URL. Copy this part.
Switch back to your Process Designer tab. Paste your URL segment into the Team URL field and click Update. You should see a success message.
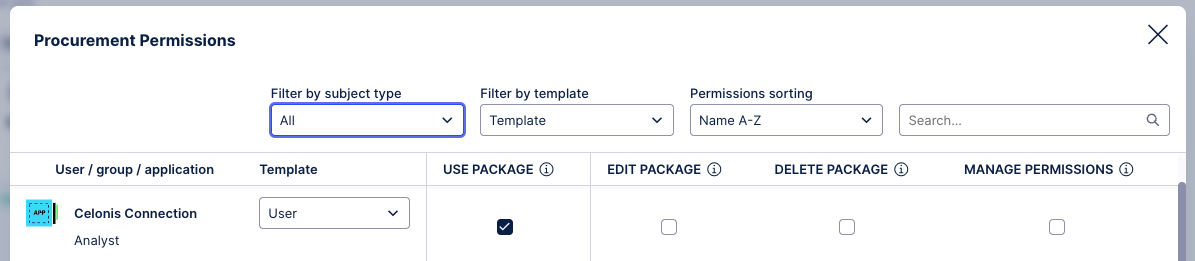
Switch back to your Celonis Platform tab. Navigate to Studio. Look for the package you just created, and click the triple-dot icon next to it. Click Permissions.

Within the permissions modal, look for the OAuth client you just created in the list. Assign it the User template and check the box for the Use Package permission next to it. Click Save when finished.
Switch back to your Process Designer tab. Go back to the Settings area and under Configure click the Features tile.
You'll be brought to the Features page. Under Method: Live data feature, set Activation to Activated.
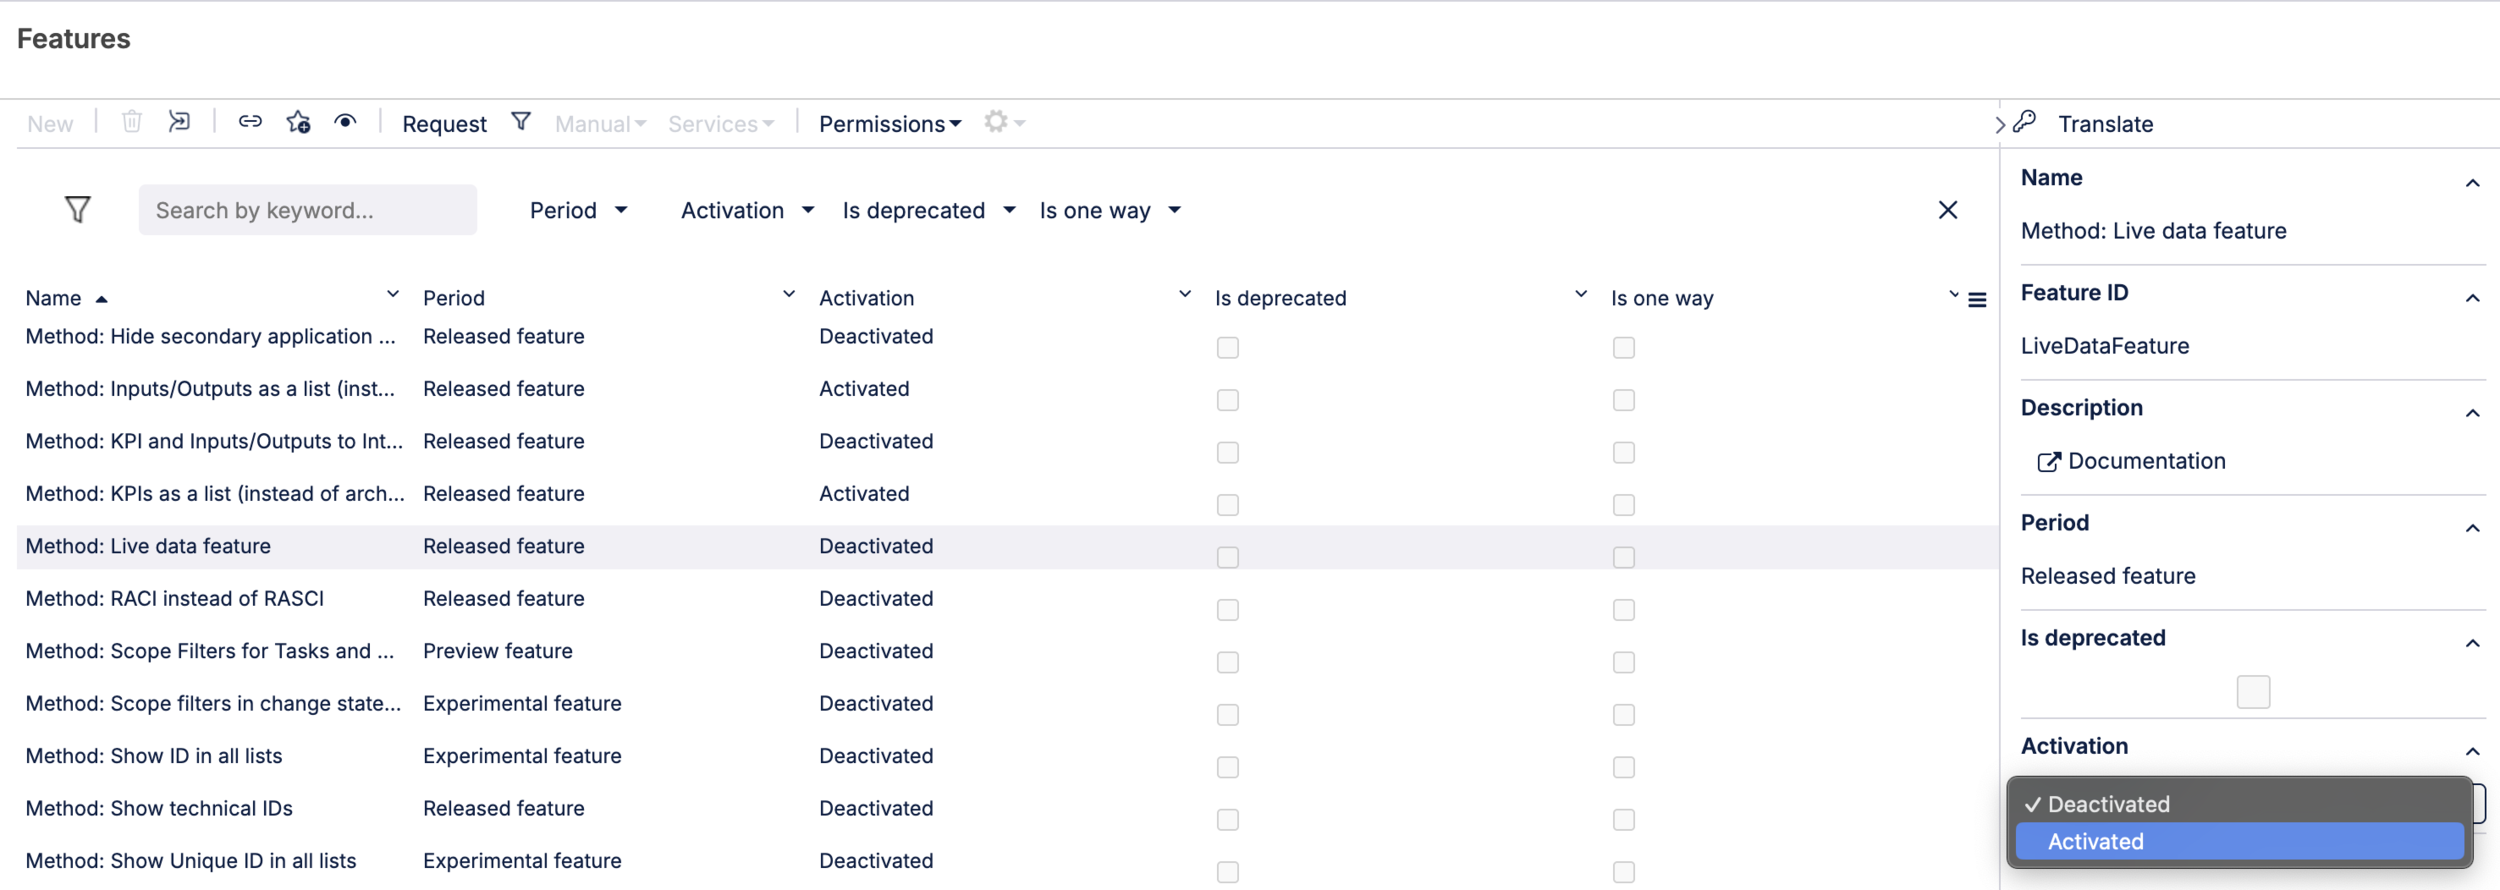
Note
If you want to activate live data at task level, you must also set Method: Best Practice Tasks to Activated. To use hierarchical KPIs, you must set Method: KPIs as a list (instead of architecture) to Deactivated. If you can't see any live data provider options after feature activation, contact Support.
Click Systems in the top navigation. Select a building block from the list or create a new one, and create a new system (Application) to hold your data from the Celonis Platform. Click the newly created system to open the details panel.
In the details panel, under Live data provider, select your live data provider.
Release the system.
With the live data connection activated, you need to configure it before you can start viewing it in process models. You do this by preconfiguring KPIs and assigning them to tasks or processes.
Create KPIs in Celonis Platform
In your Celonis Platform tab, navigate to Studio and select the knowledge model you want to use.

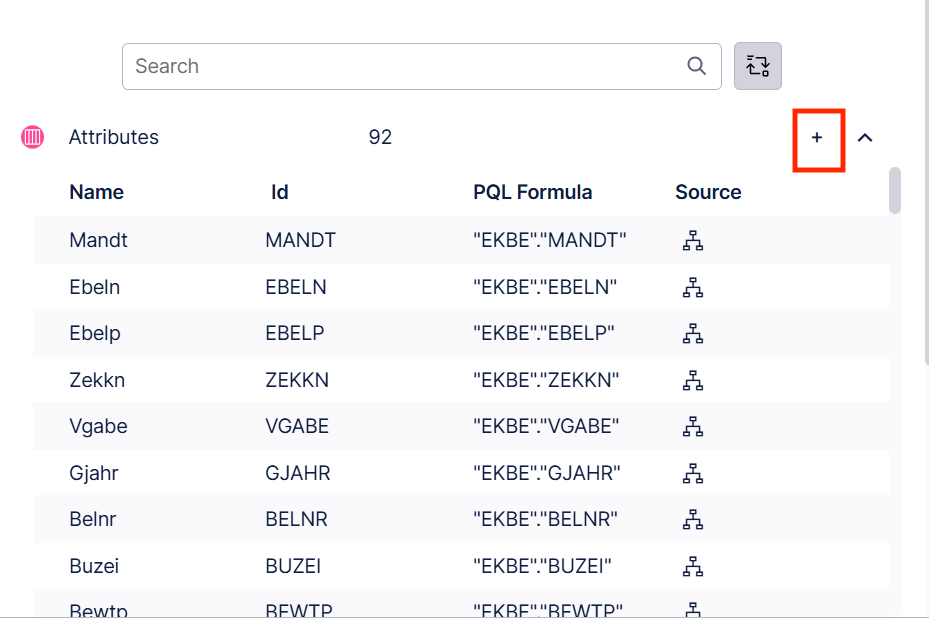
Select Records from the navigation, and then from the resulting list choose the record you want to set up the KPI in. In the right-hand panel select Attributes.
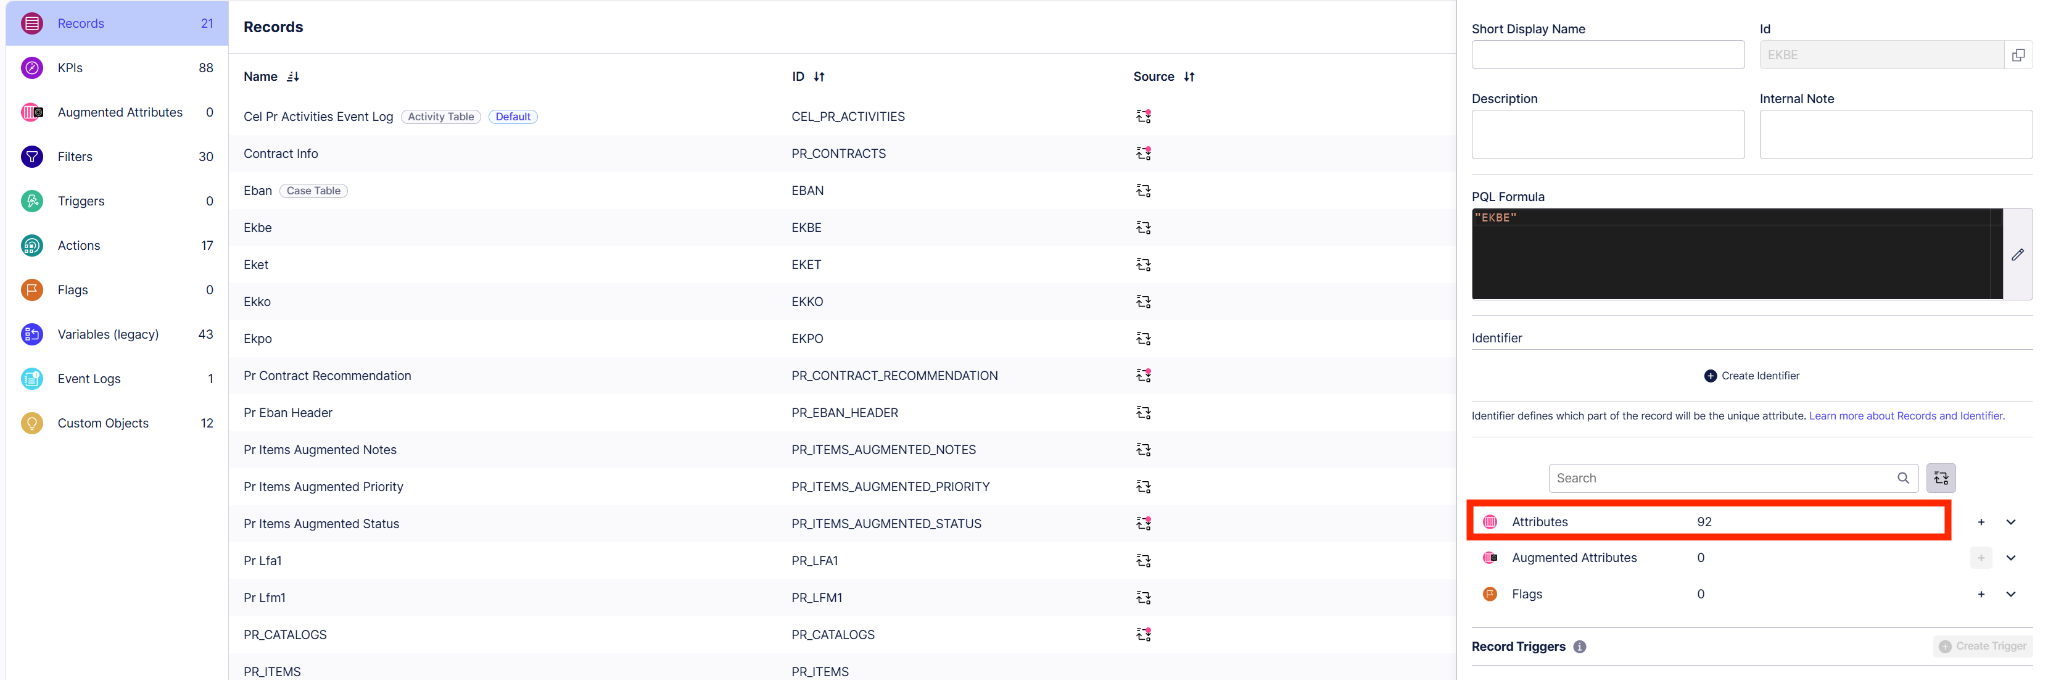
Click the plus sign at the top of the list.In the Create Attribute form, fill out the fields using PQL (you can also copy and paste PQL from an already existing KPI). Click Save when finished.
Now you need to publish your changes to the knowledge model. In the top navigation, click Publish. Select the knowledge model you just edited and publish your changes.

Create KPIs in Celonis Process Management
In your Process Designer tab, click KPI in the top navigation. (If you have hierarchical KPIs activated, you'll find it under Strategy > Key performance indicators.)
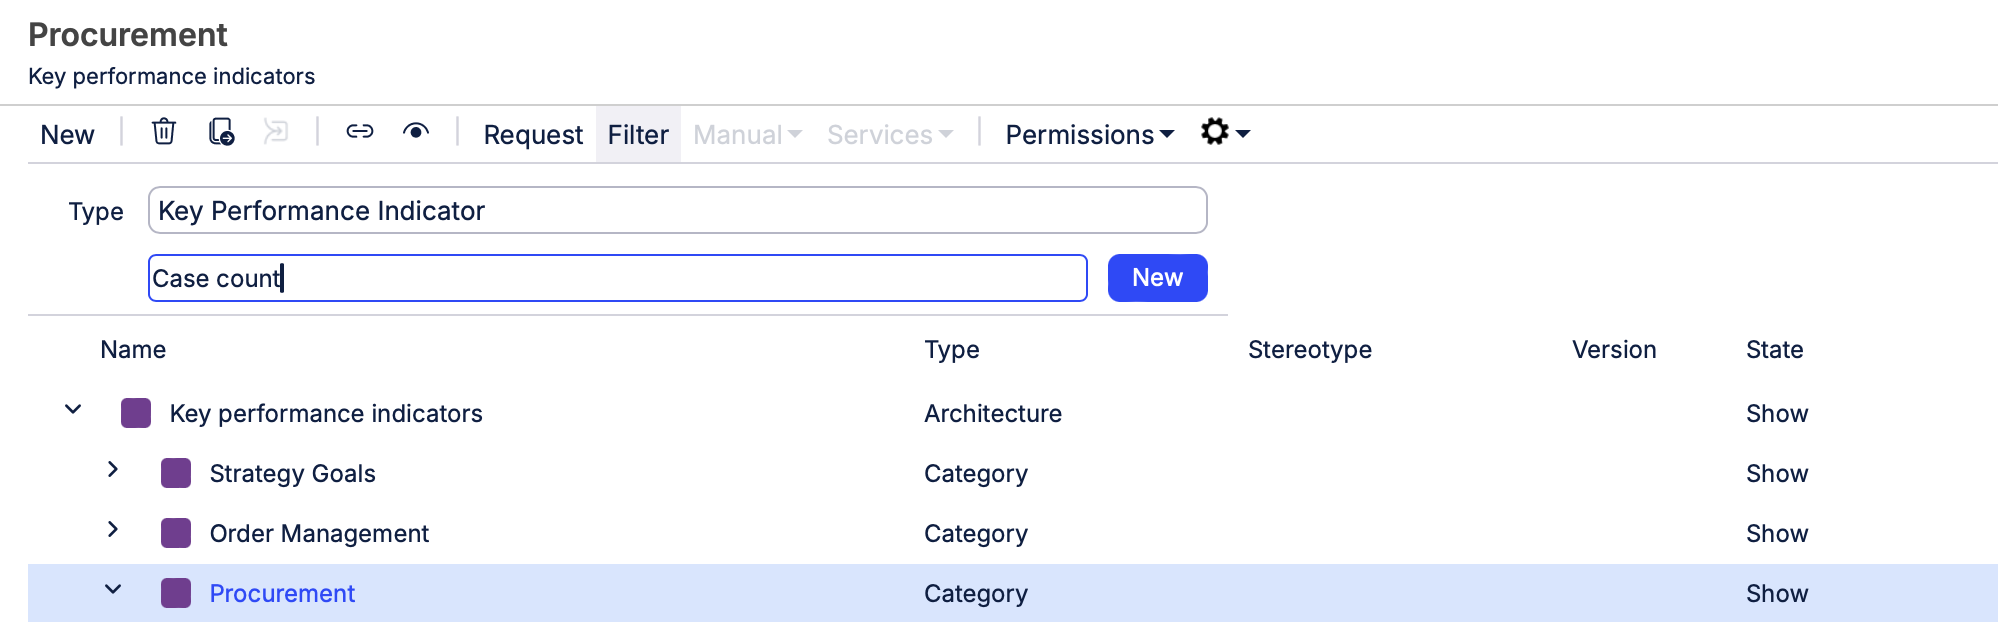
Select a category. Click the white New next to the trash icon. Select Key Performance Indicator from the dropdown. Type the name of your new KPI and click the blue New to save it. In the screenshot below, we're adding a new KPI called "Case count" to an existing category called Procurement.
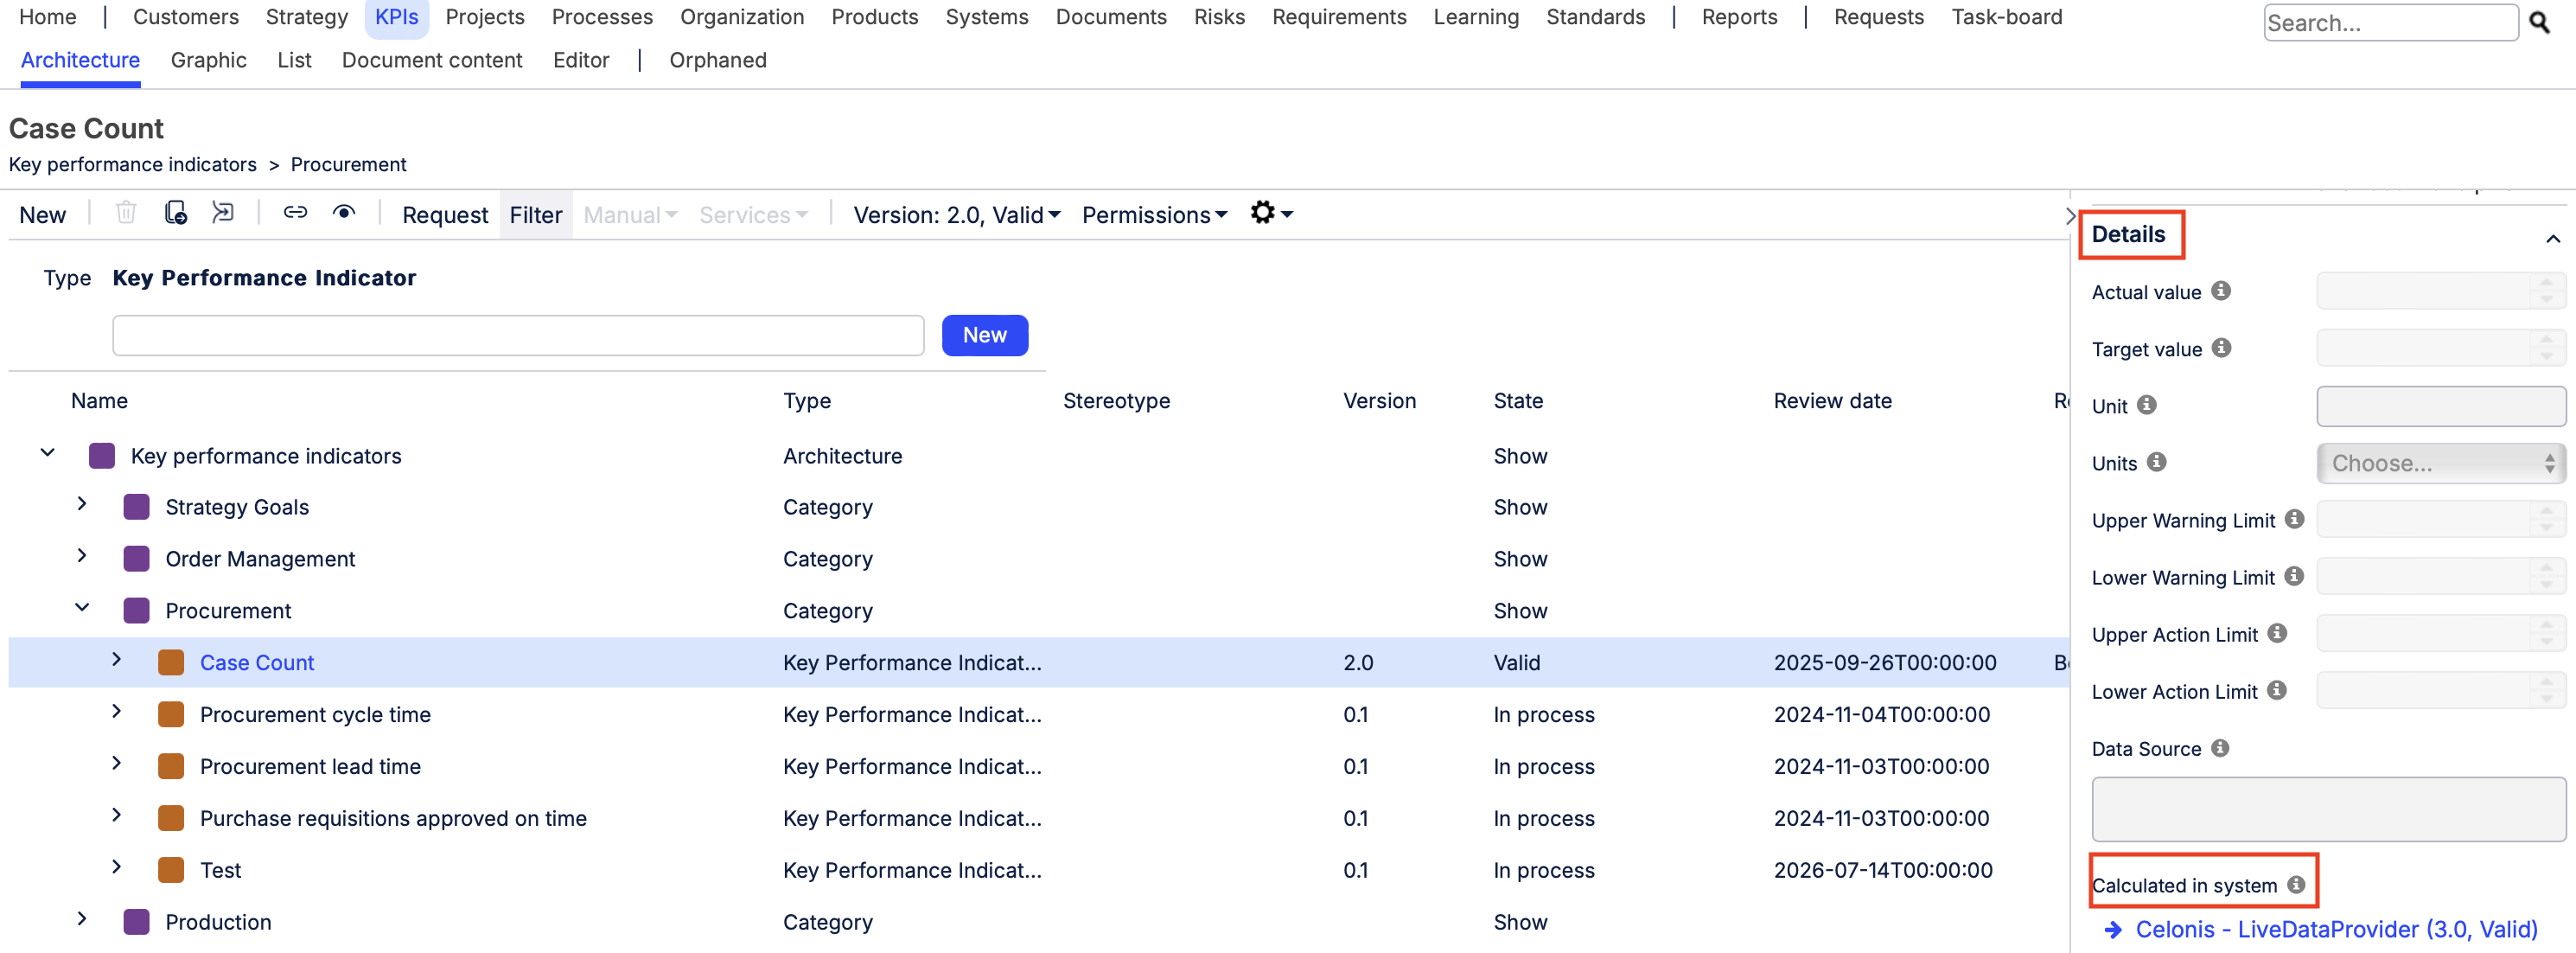
Click your newly created KPI, and in the sidebar scroll down to Details. Under Calculated in system, select the system you created in the previous section to hold your live data.
If desired, you can also set warning limits under Units to control when the live data indicator switches from green to yellow (warning) and red (action) in your process model.
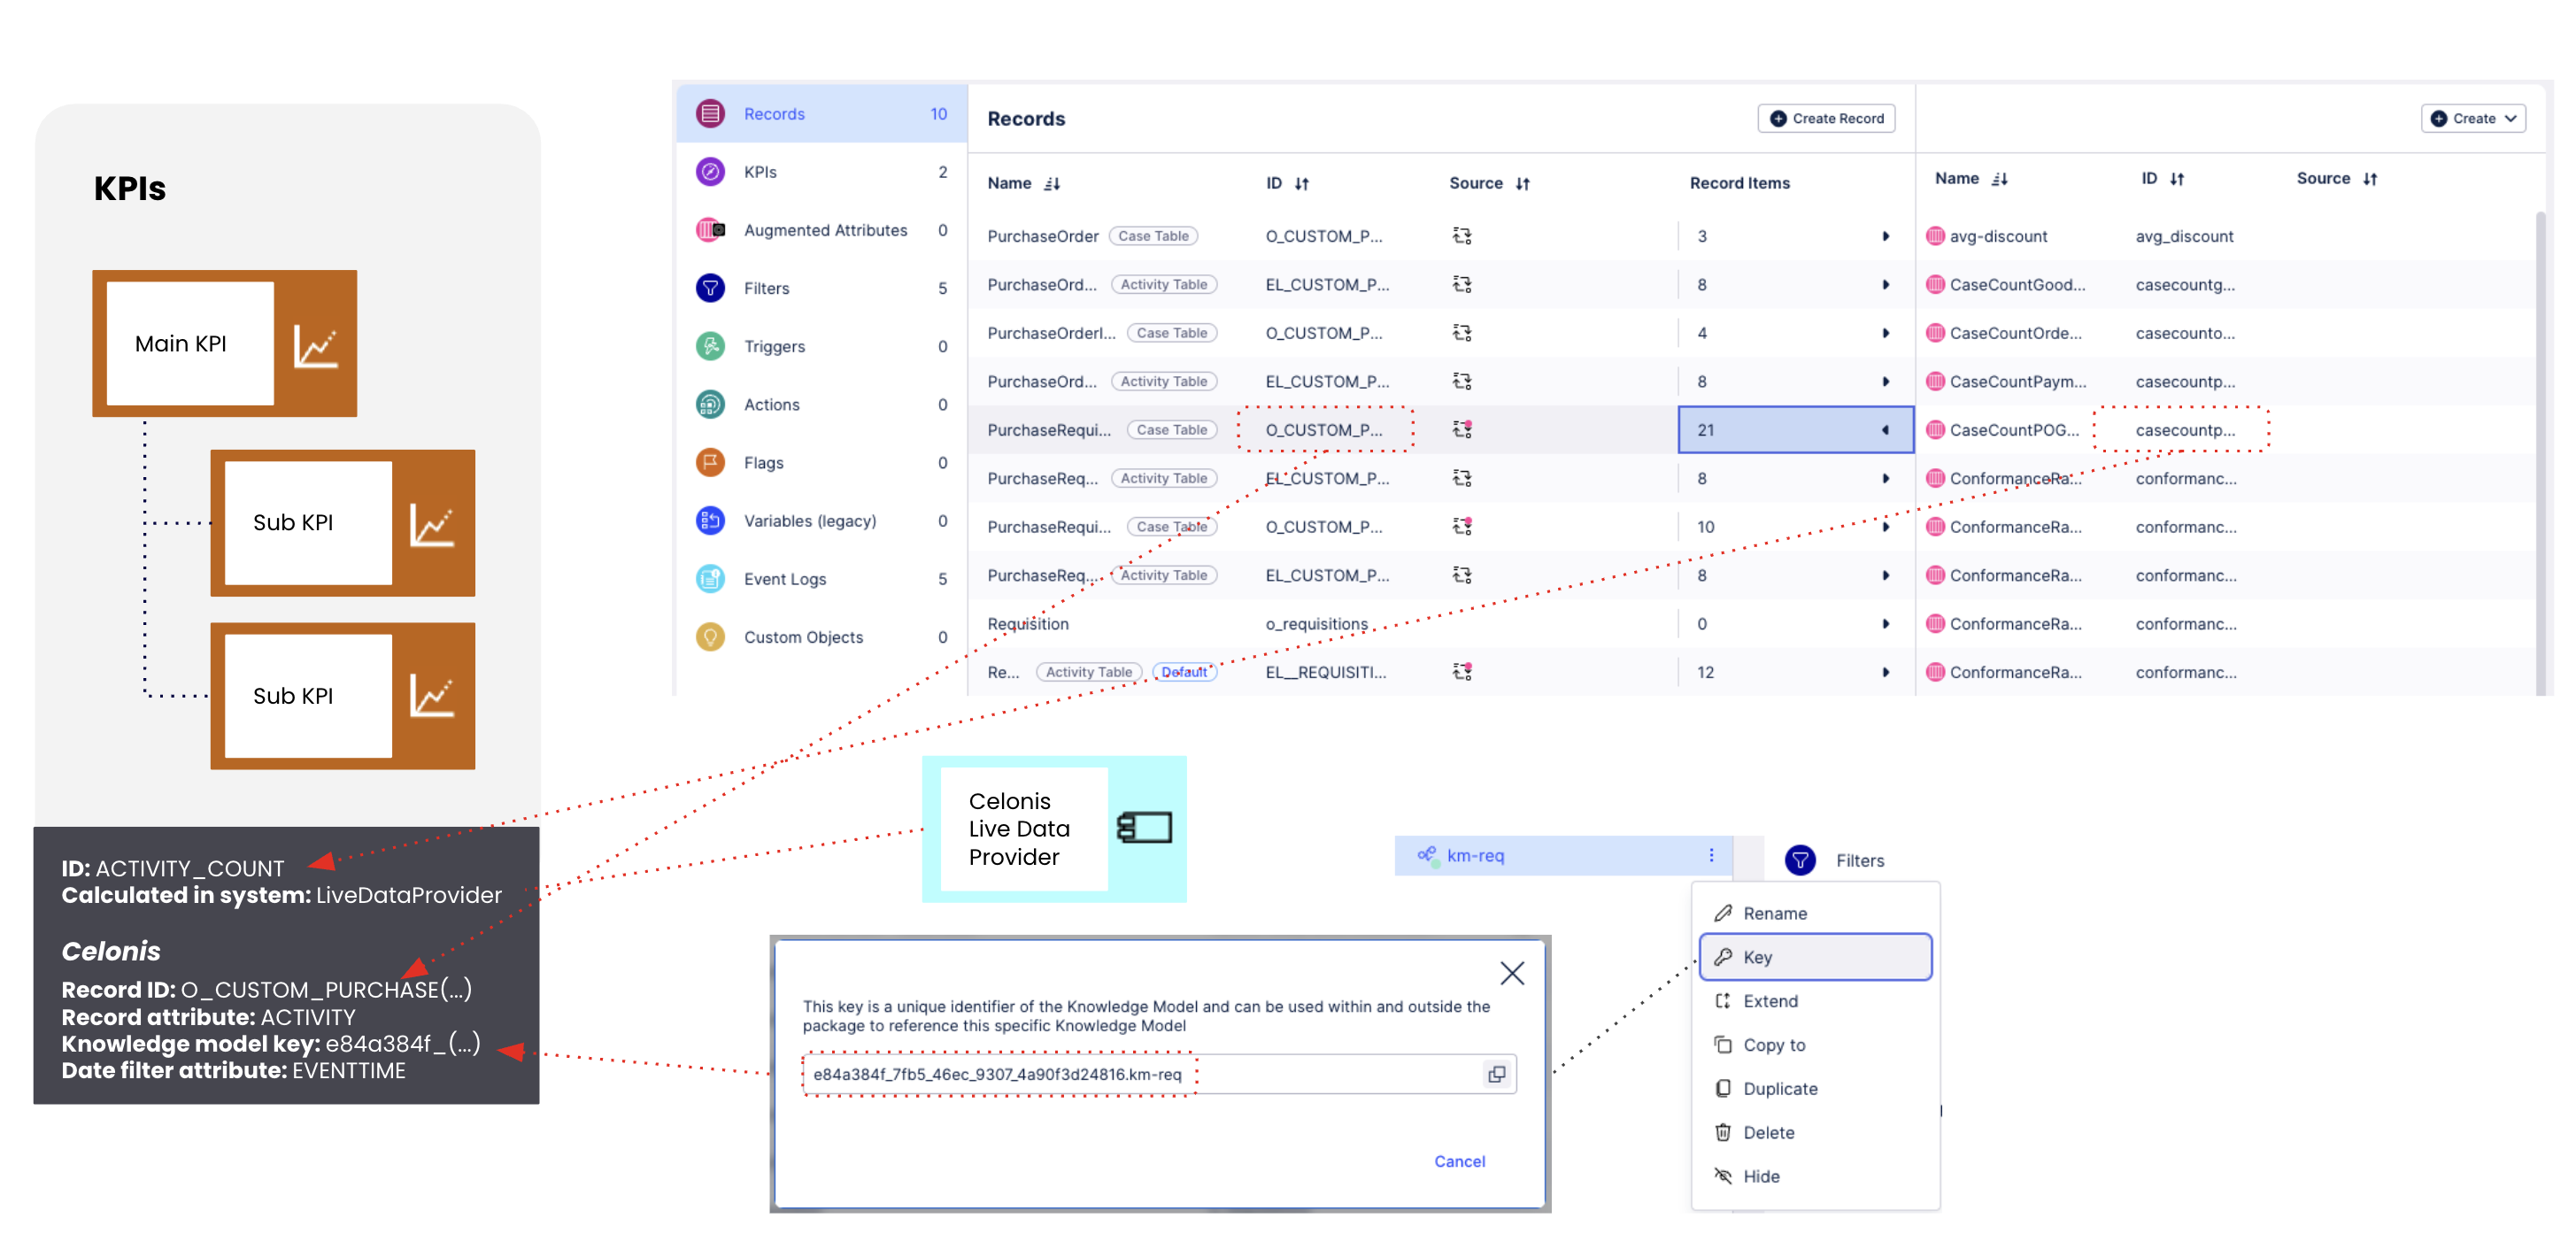
In the sidebar, scroll down to Celonis Platform Attributes, and enter the following from your Celonis Platform knowledge model:
Knowledge model key
Record ID
Record attribute
Date filter attribute (default is EVENTTIME)
The graphic below shows where to find the necessary attributes in your Celonis Platform knowledge model.
Note
The date filter attribute requires a date attribute for your record in the Celonis Platform. The type should be set as Date & Time and the format should be set as Y-M-D H:M.
Assign the KPI to a task within your process. Don't release the KPI yet.
Note
The follow section explains how to create Best Practice Tasks manually in Process Designer. If you import your knowledge model from the Celonis Platform using Process Adherence Manager, you can skip this step.
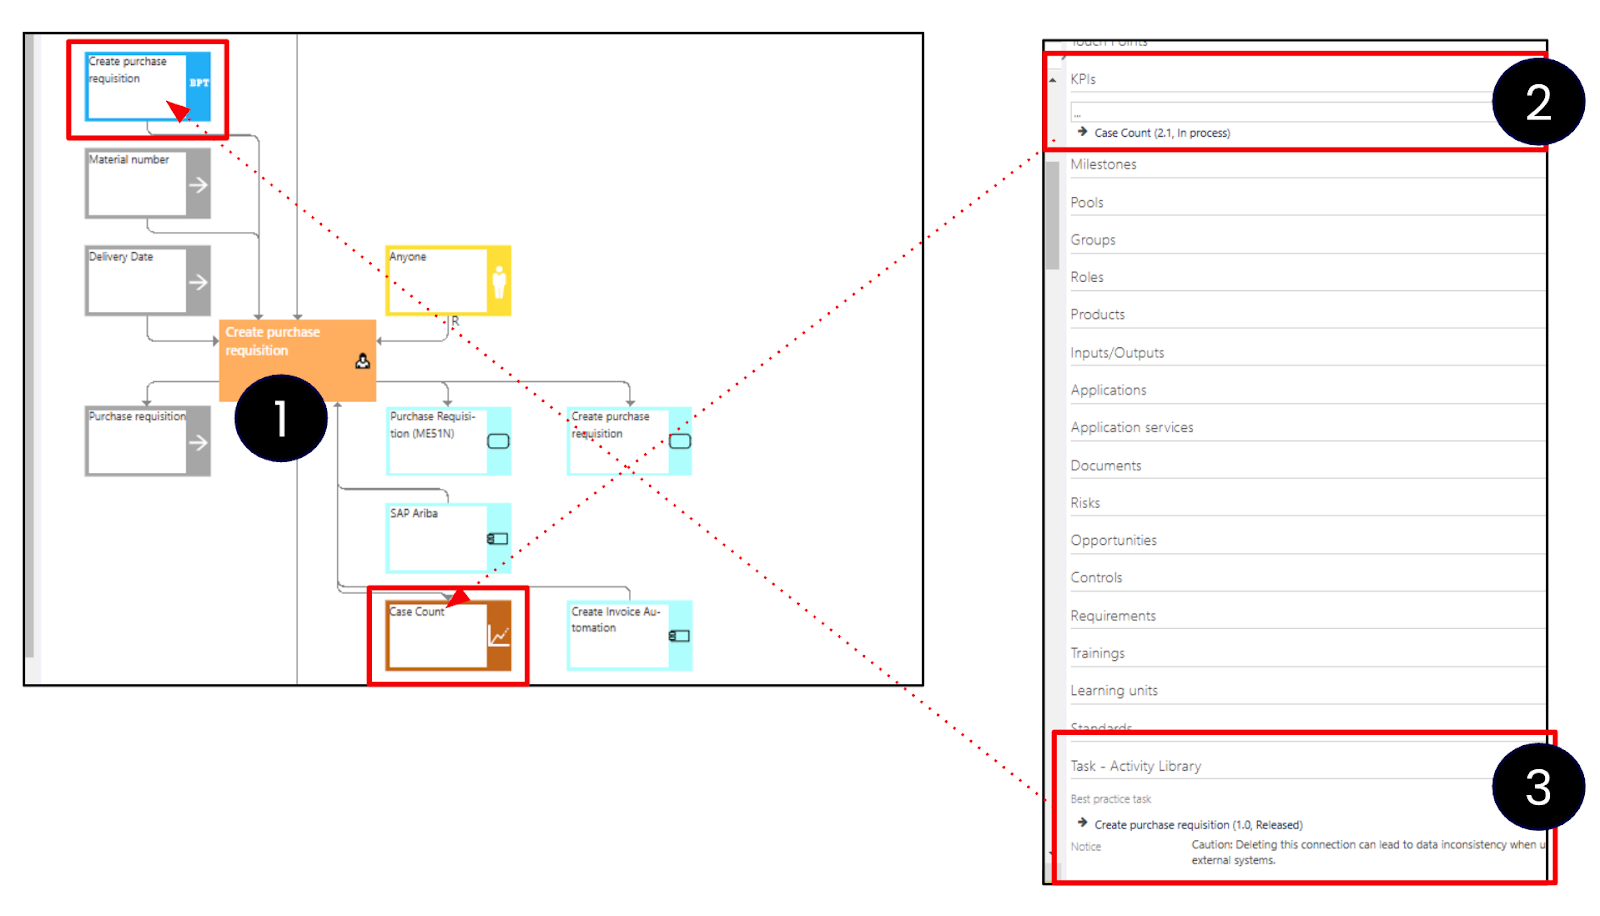
To use live data at the task level, you need to create a Best Practice Task to use as a repository object in your process model.
Click Processes in the top navigation, then click Best Practice Tasks.
Configure the Best Practice task by setting its ID to match the ActivityID in the knowledge model in the Celonis Platform. Don’t release the Best Practice Task yet.
With all your data configured, the last step is to add your KPIs and Best Practice Task to either a task or to a process.
Adding data to a task
In Process Designer, click Processes in the top navigation. Select the process you want from the list, then click the Task you want to display data for.
In the details pane that opens, under KPIs, select the KPI you just created.
Under Best Practice Tasks, select the Best Practice Task you created.
Adding live data to a process
In Process Designer, click Processes in the top navigation. Select the process you want from the list.
In the details pane that opens, under KPI, select the KPI you just created.
Check your configuration.
Select the task or process you assigned the KPIs to.
In the Detail content panel, navigate to Live data check and select Check.
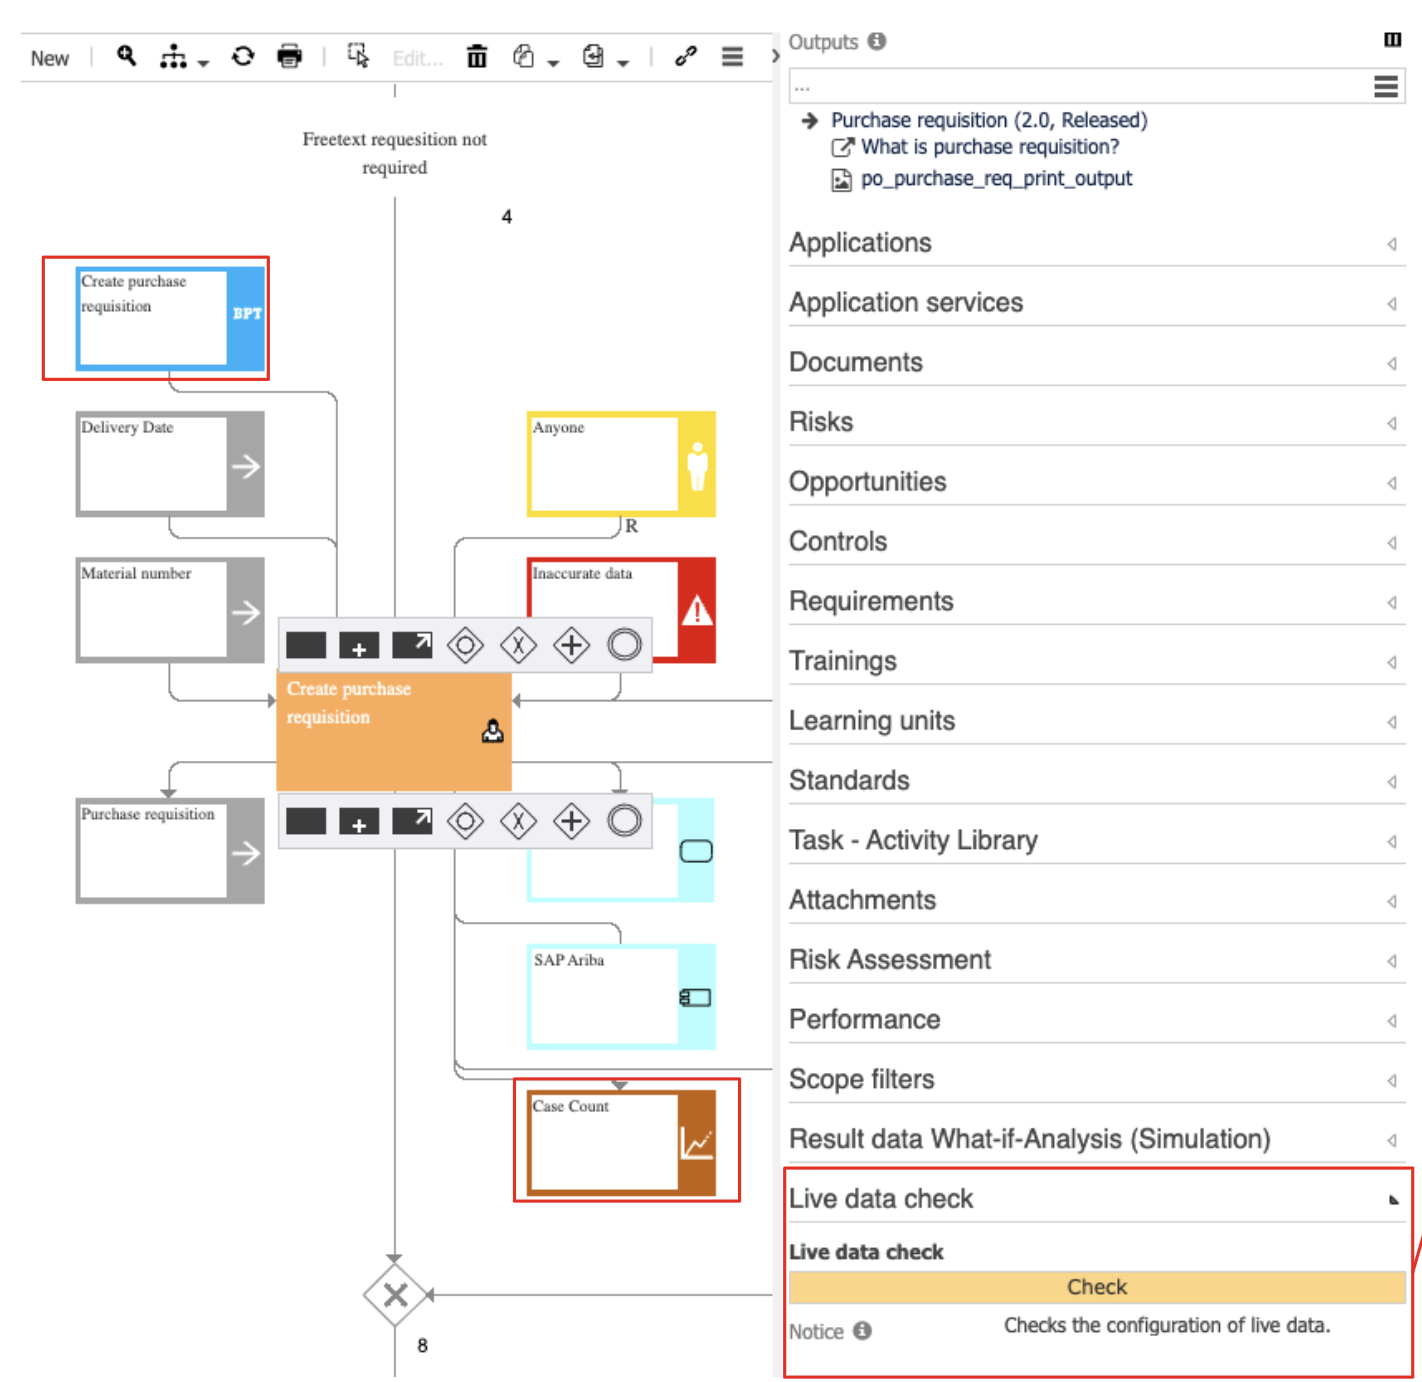
If your configuration is correct, you'll see a preview of the live data. Any configuration issues will be flagged by warning or error messages indicating that your system or KPI isn’t connected or your Best Practice Task/system/KPI hasn’t been released.
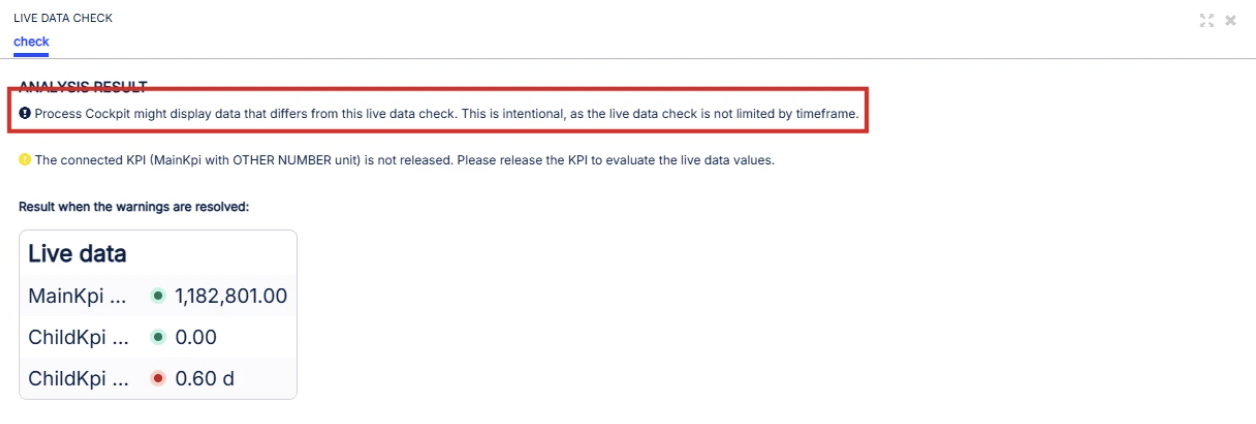
Where necessary, fix your configuration using the message information for guidance.
When the configuration is correct, release your KPIs, Best Practice Task, and process.
If you’re already using Process Cockpit, you’ll need to make a small change to your current setup in order to take advantage of the new connectivity workflow as described in this tutorial. This is because the new connectivity workflow uses OAuth authentication. This will have no impact on the live data provider assigned in Process Designer, or on how live data is shown in Process Navigator, but it will help keep your data secure.
Set up a new live data connection with Celonis by following steps 1 - 9 in this tutorial section.
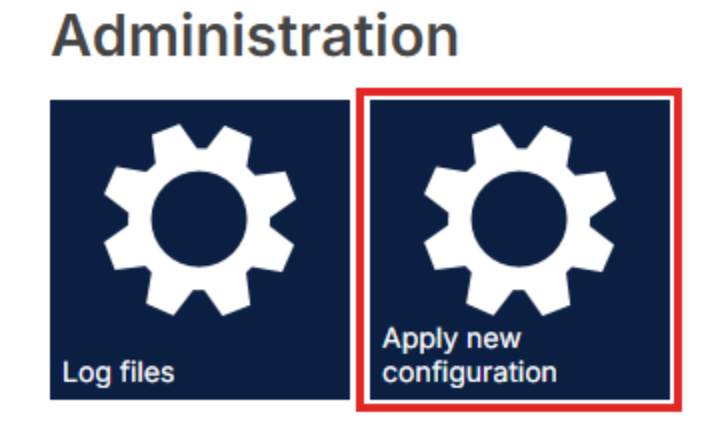
Next, navigate to Process Designer by going to the Admin settings and clicking the Apply new configuration tile to save your changes.