Creating custom transformations
Custom transformations take your extracted business data and map it into the Celonis Platform so that objects, events, and relationships can be used in analyses. They can include scripts for object and event attributes, many-to-many relationships, and (for objects only) changes to object attributes over time. These transformations ensure that your extracted business data is structured correctly so Celonis features and analyses can use it effectively.
Custom transformations populate the tables in the OCPM Data Pool that store:
Object tables: Object attributes and, optionally, changes to objects over time.
Event tables: Event attributes, which can come from raw source data or transformed object data
Relationship tables: One-to-one or one-to-many relationships are stored in foreign key columns; many-to-many relationships use dedicated relationship tables
Each transformation can include scripts for different purposes:
Attribute scripts: Populate object/event attributes and one-to-many relationships.
Change scripts: Populate changes to object attributes (only for objects).
Relationship scripts: Populate many-to-many relationships.
You can create a new transformation from scratch or by starting from an existing template.
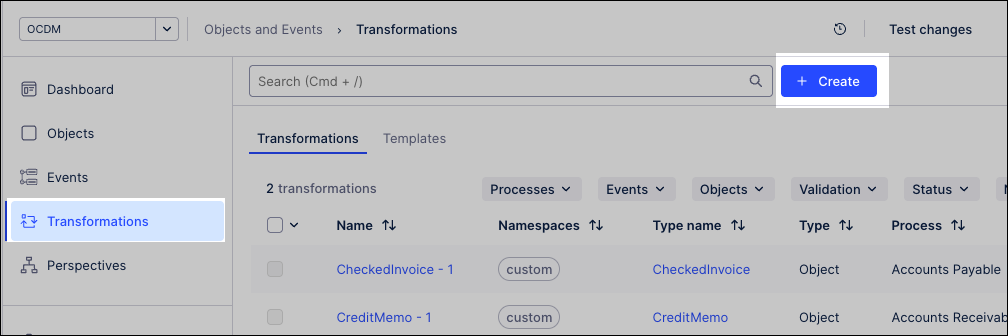
To create custom transformations for either objects or events using the Objects and Events dashboard:
Click Transformations.
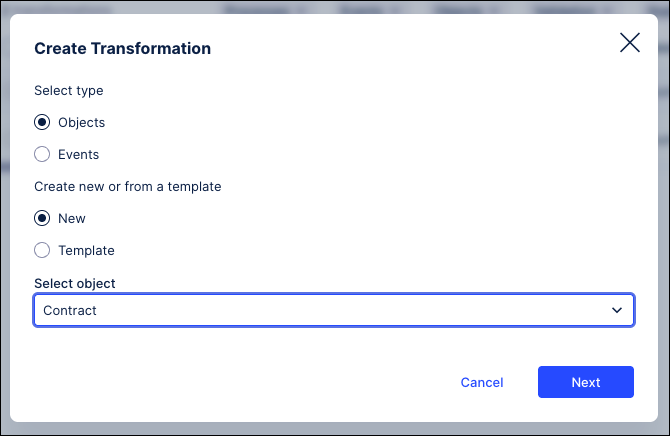
Click Create and select either objects or events.
Select create new or start from a template.
Select the object to create the transformation for and then click Next.
In the SQL editor, select the transformation you want to edit.
Celonis transformations can’t be renamed.
Custom transformations are given an autogenerated name.
Code Assistant for SAP and Oracle data connections
For SAP ECC, S/4 or Oracle EBS/Fusion sources, click Code Assistant to quickly generate an initial transformation script with the AI-powered Transformation Assistant. It uses object, attribute, and source system context to create a custom script you can refine. All transformation types are supported except relationship transformations, and it works with both custom objects/events and Celonis catalog extensions.
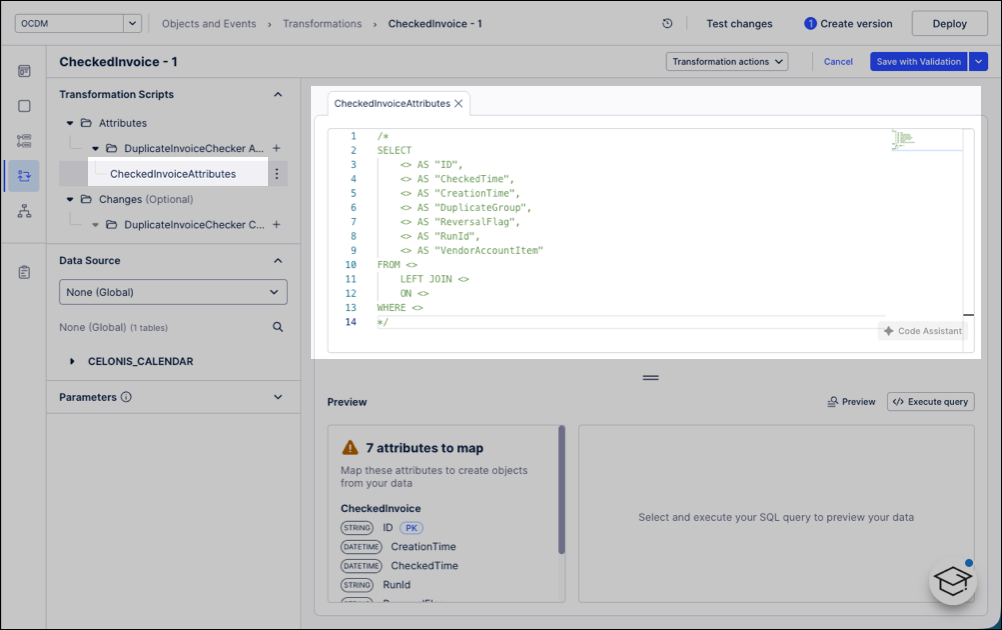
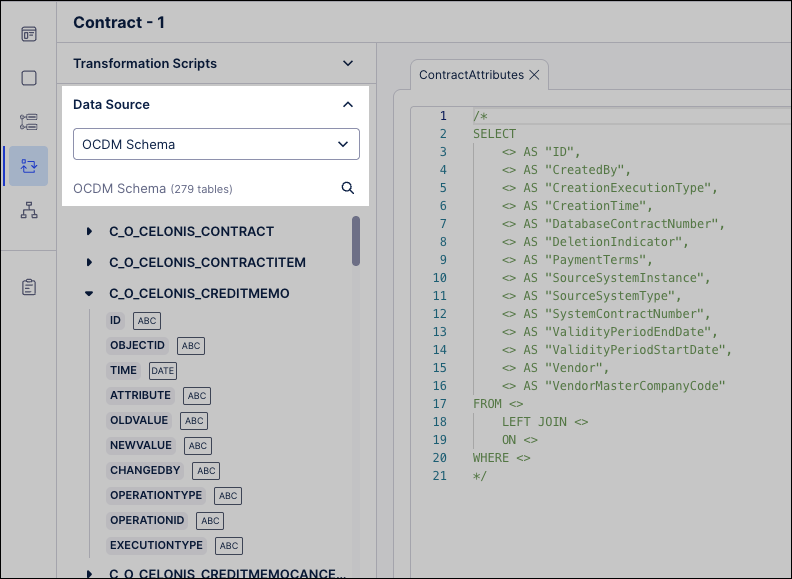
Data source: Select the main data source for the business data in the Data source section. Queries run on this data source unless a data connection parameter is used.
Parameters: If applicable, set values for any local parameters used in the transformation:
Global parameters: belong to the workspace. You supply their values in the transformation editor.
Local parameters: belong to your script. You supply their values in the transformation editor.
Data connections: are specific data connections in the data pool. They override the default data source for the transformation.
Script: If applicable, add a custom script or overwrite script (partial or full).
Only one overwrite per script type is allowed.
Extension scripts must populate all custom attributes or relationships for an object.
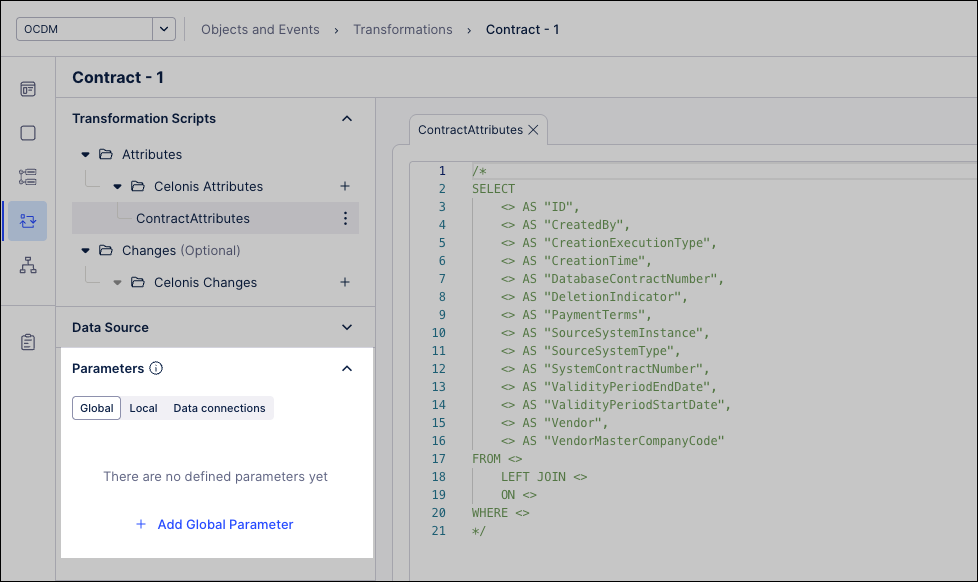
Each script opens with a generated SQL template. Remove comments and build a
SELECTstatement that maps source columns to target attributes.Ensure object and event IDs are unique.
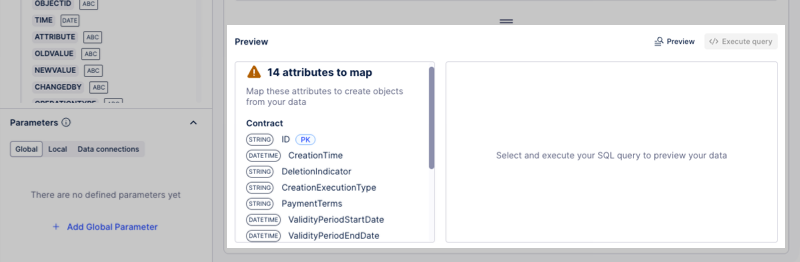
Validate script: Use the Preview pane to see required attributes and key types.
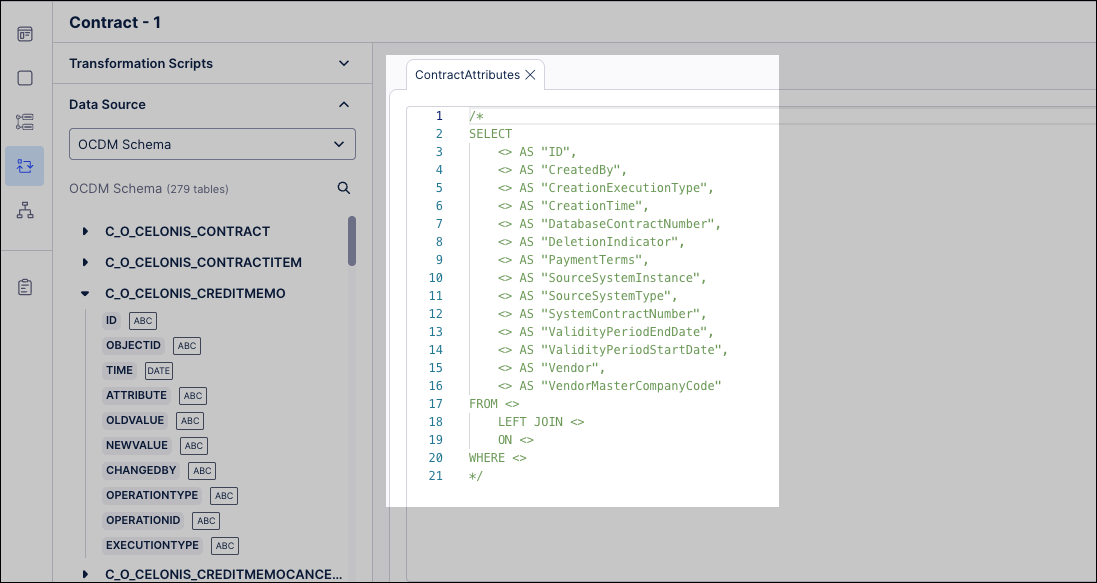
Insert source columns using the Data Source explorer.
Use
NULLfor unmapped attributes and double quotes for source column names if needed.
After reviewing your script, click Save or Save with validation:
Save: Allows you to return to configure the transformation later.
Save with validation: Only validated transformations run as part of data jobs.
After creating a custom validation, you may want to deploy this latest version to development or product. See: Versioning and deploying OCDM.
After deploying custom transformations, you need to run them to create or update objects and events. Running is also required whenever you add new attributes or relationships, ensuring your data stays up to date. See:
Transformation templates let you create a standard blueprint for transforming objects or events, so you can reuse it multiple times without recreating the logic. Each use of a template creates a transformation instance, which mostly inherits the template’s content but can be customized with different data sources, parameter values, or small script overrides. Any changes to the template automatically apply to all instances, though individual customizations stay in effect. This makes it easy to manage similar transformations consistently and efficiently.
To create a transformation template using the Objects and Events dashboard::
Click Transformations.
Select Templates.
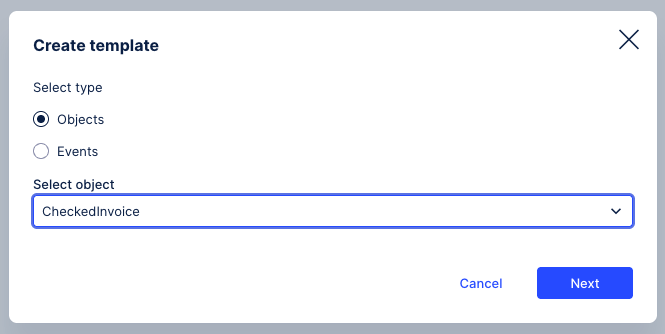
Click Create Template.

Select the object or event to create the transformation template for and then click Next.
In the SQL editor, select the transformation you want to create the template from.
Celonis transformations can’t be renamed.
Custom transformations are given an autogenerated name.
Data source: Select the main data source for the business data in the Data source section. Queries run on this data source unless a data connection parameter is used.
Parameters: If applicable, set values for any local parameters used in the transformation:
Global parameters: belong to the workspace. You supply their values in the transformation editor.
Local parameters: belong to your script. You supply their values in the transformation editor.
Data connections: are specific data connections in the data pool. They override the default data source for the transformation.
Script: If applicable, add a custom script or overwrite script (partial or full).
Only one overwrite per script type is allowed.
Extension scripts must populate all custom attributes or relationships for an object.
Each script opens with a generated SQL template. Remove comments and build a
SELECTstatement that maps source columns to target attributes.Ensure object and event IDs are unique.
Validate script: Use the Preview pane to see required attributes and key types.
Insert source columns using the Data Source explorer.
Use
NULLfor unmapped attributes and double quotes for source column names if needed.
Click Save.
The template can now be used when creating transformations.