Create CSV File from Celonis Output
This Action Flow automates your reporting by converting Celonis output into a custom CSV file. Once configured, the system sends regular data updates to your email as an attachment so you can stay informed without the extra work.
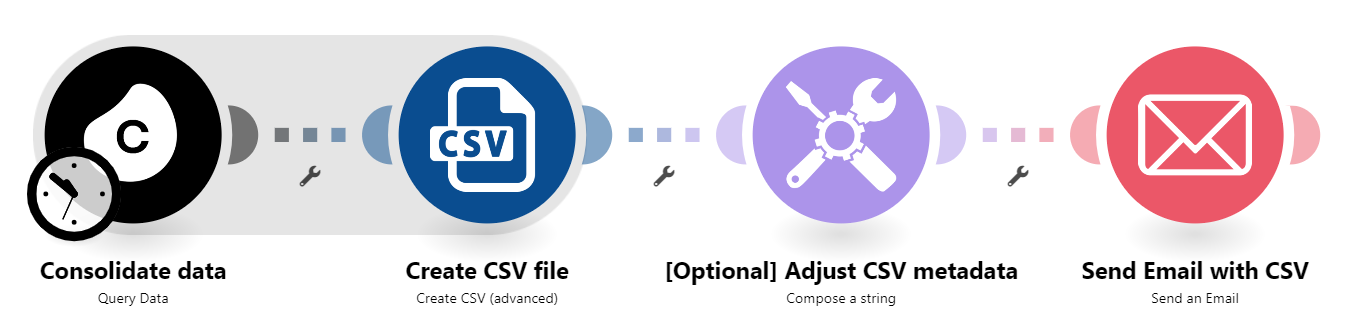
You can see a working example of the Action Flow in the image below. The process is broken down into three main phases:
Extracts data from Celonis: This initial step identifies the required information, though it can be swapped for other data sources if needed.
Generates a CSV file: The system takes the collected data and formats it into a structured CSV.
Distributes the report: An email is sent to designated recipients containing a custom message and the CSV file as an attachment.
 |
Below you will find the step-by-step guide for configuring each module of the above Action Flow.
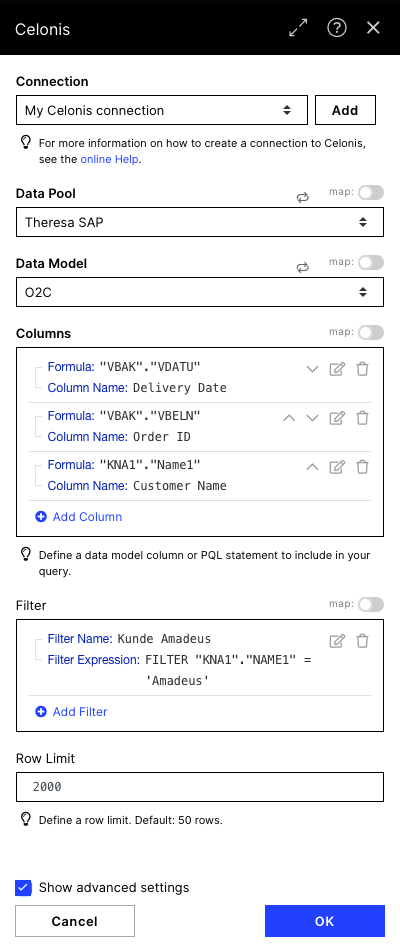
We use the Celonis Query Data Model to consolidate the Data for our CSV to be send. All information on how to do it can be found here. We use some Demo Data here as an example, getting Sales Order Numbers (VBAK.VBELN), requested delivery dates (VBAK.VDATU) and the corresponding customer name (KNA1.NAME1).
In addition we already filter here for the customer with the name Amadeus to keep the amount of orders we find small. So we just want to include the delivery dates of the customer Amadeus in the CSV.
Note
The data can be adjusted (like the formatting of dates) within the next module.
 |
In your use case, you may wish to access data from a different source (i.e. not Celonis) like SAP, email, spreadsheet, etc. and push that information to your Celonis data model. To do so, you would need to replace this Celonis "Query Data" action with the module that corresponds to your chosen data source.
Row Limit
Don't forget to specify the Row Limit - the row limit defines the maximum of rows in the result so make sure it is set to a limit high enough. The default value is 50.
Configuration:
Action Flows Module: Celonis
Action: Query Data
 |
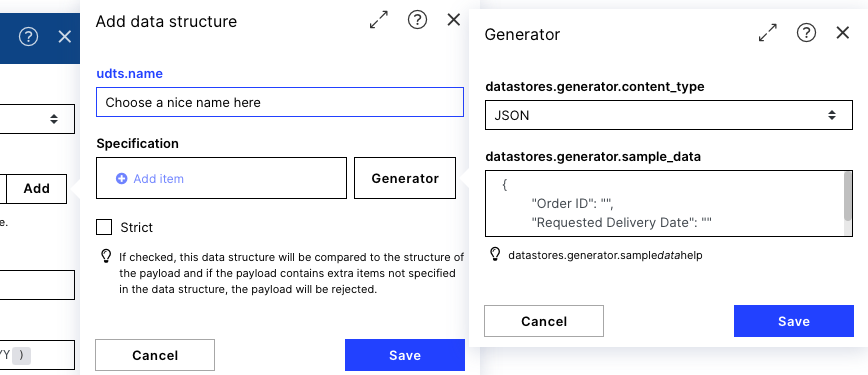
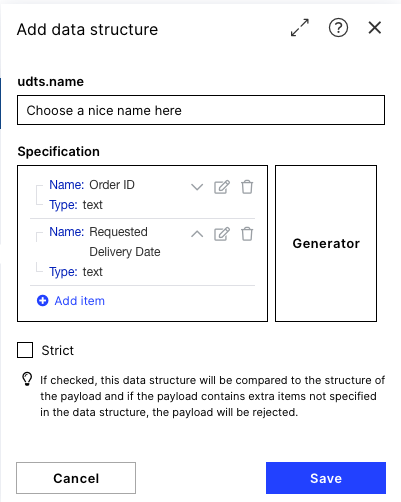
We use the advanced module to create our CSV as we have the possibility here to adjust the data we just queried (e.g. format a date).
We do this by setting up our data structure in the CSV. We use the Generator and paste our JSON format in, this is especially relevant when having more complex data structures:
{
        "Order ID": "",
        "Requested Delivery Date": ""
}
If you have more / other Columns you can adjust the JSON quite easy, the generic format is:
{
        "Column 1 Name": "",
        "Column 2 Name": "",
                "Column 3 Name": "",
                "Last Column Name": ""
}
Fill the new fields with the respective data form the Query Data module and adjust it if needed.
 |
Configuration:
Action Flows Module: CSV
Action: Create CSV (advanced)
 |
 .
. 
Note
This step is particularly useful if you open the CSV attachments with Excel.
In order to open the csv file with Excel locally, a slight modification is neededby adding a "Compose a string" module after the Create CSV module to add additional metadata information.By only adding one line ( sep=,)andnew line before the content from the CSV file, we are able to "adjust" the metadata and this allows Excel to open a CSV file properly considering the columns without needing to "Convert data to columns" in the Excel environment.
 |
Text:
Make sure to have each element in a separate line.
sep=,
{{text}}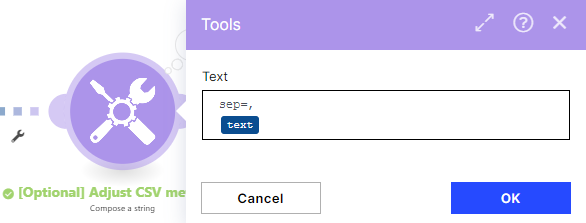 |
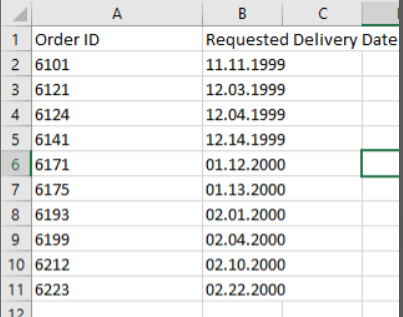
Effect of the Modification
Original result
 |
Result of Modification
 |
4. Send CSV via Mail
 |
Configuration:
Action Flows Module: Email
Action: Send an Email
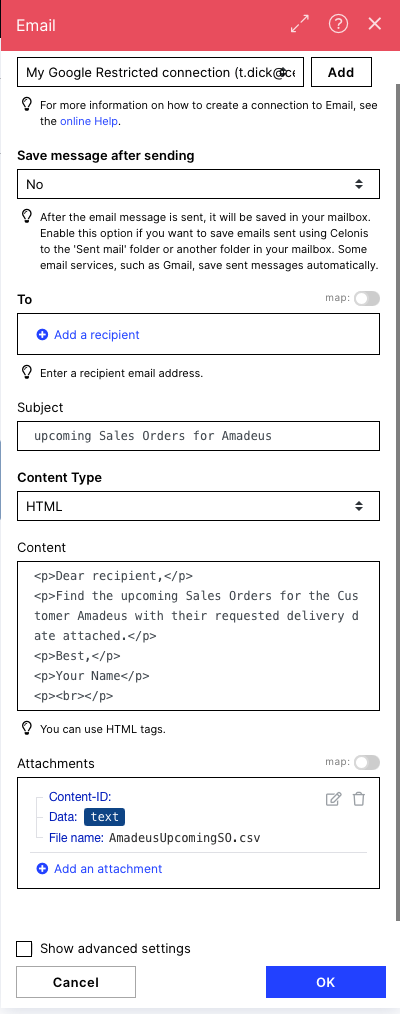
The screenshot on the right show how this module has been configured with our demo data.
To: You can choose a recipient of your choice
Subject: Define the subject of the mail
Content Type: HTML
Content: here we will add the text of the mail. we use the <p> tags to get normal text within the mail which is formatted to fit.
<p>Dear recipient,</p>
<p>Find the upcoming Sales Orders for the Customer Amadeus with their requested delivery date attached.</p>
<p>Best,</p>
<p>Your Name</p>
<p><br></p>
[OPTIONAL] Replace CSV with new Text variable
If you employed the optional step 3, please do not forget to replace the original attachment below with the modified attachment to build up the csv file.
Attachments:
Data: take the text item of the CSV module
File name: Choose the name of the CSV file to be sent
Note
Make sure to add the right suffix to the name your attachments (e.g. somename.csv or picture.jpg) to make sure they are sent in the desired format.
 |