Configuring actions for the case-centric Baseline Date Optimizer app
The Baseline Date Optimizer app comes with skill templates to carry out default actions. Customize these for how you want to use actions and integrate them into your users’ day-to-day activities. You can change or delete the default skills and add your own custom skills.
The Baseline Date Optimizer app comes with two predefined actions:
Copy T-Code lets the user copy the FB03 transaction code for an invoice item to open the invoice directly in SAP.
Send Email to Vendor creates a prepopulated email in the user’s email client for them to send.
At the end of these instructions, we’ve noted the most important things to check and configure if you’re using the supplied skills.
We also supply an Action Flow blueprint that you can download to create an action that lets users update the baseline date in SAP. You can use this blueprint as a template for all kinds of Action Flows related to baseline date updates. Installing the Action Flow blueprint for baseline date updates has the instructions to set this up.
Here’s how to configure the app’s tasks and actions:
In the Celonis navigation menu, select Studio.
Find the Baseline Date Optimizer app in your Studio space navigation.
Expand the package’s structure using the arrow.
Expand the Skills folder.
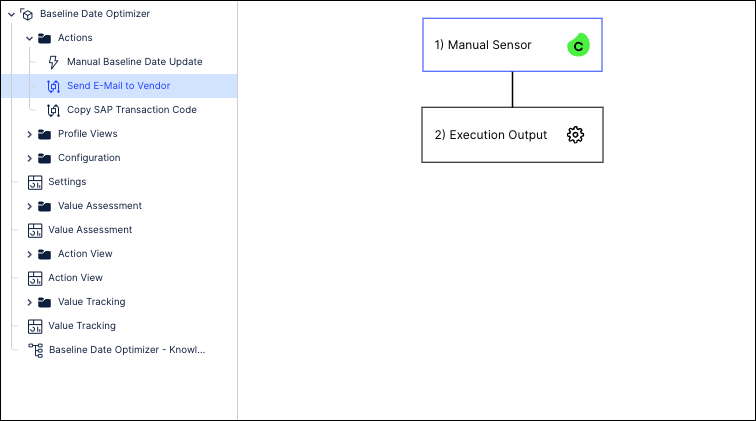
Select any of the listed actions to open it in the visual editor.
Click Edit to work with the skill template.
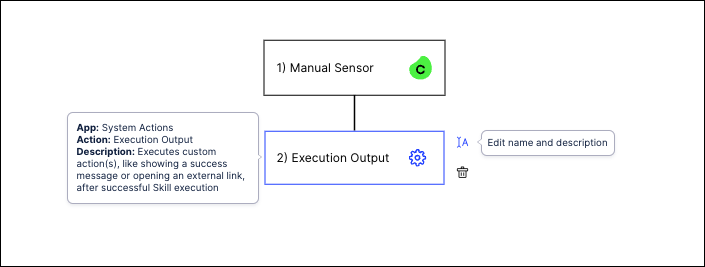
To change the name or description of an action, select the step and click the Edit name and description icon next to it.
To remove a step in the skill template, select the step and click the Delete icon next to it.
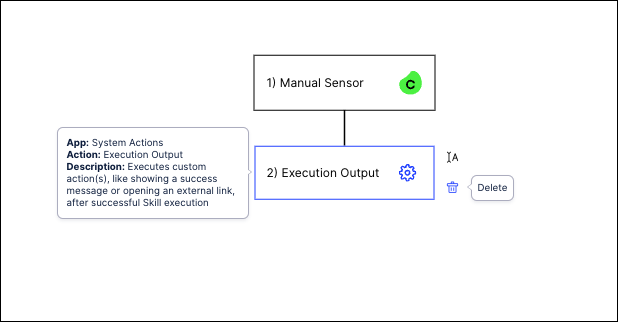
Click on a step to configure the action. Here we’re working with the step “Send E-Mail to Vendor” to change an email template.
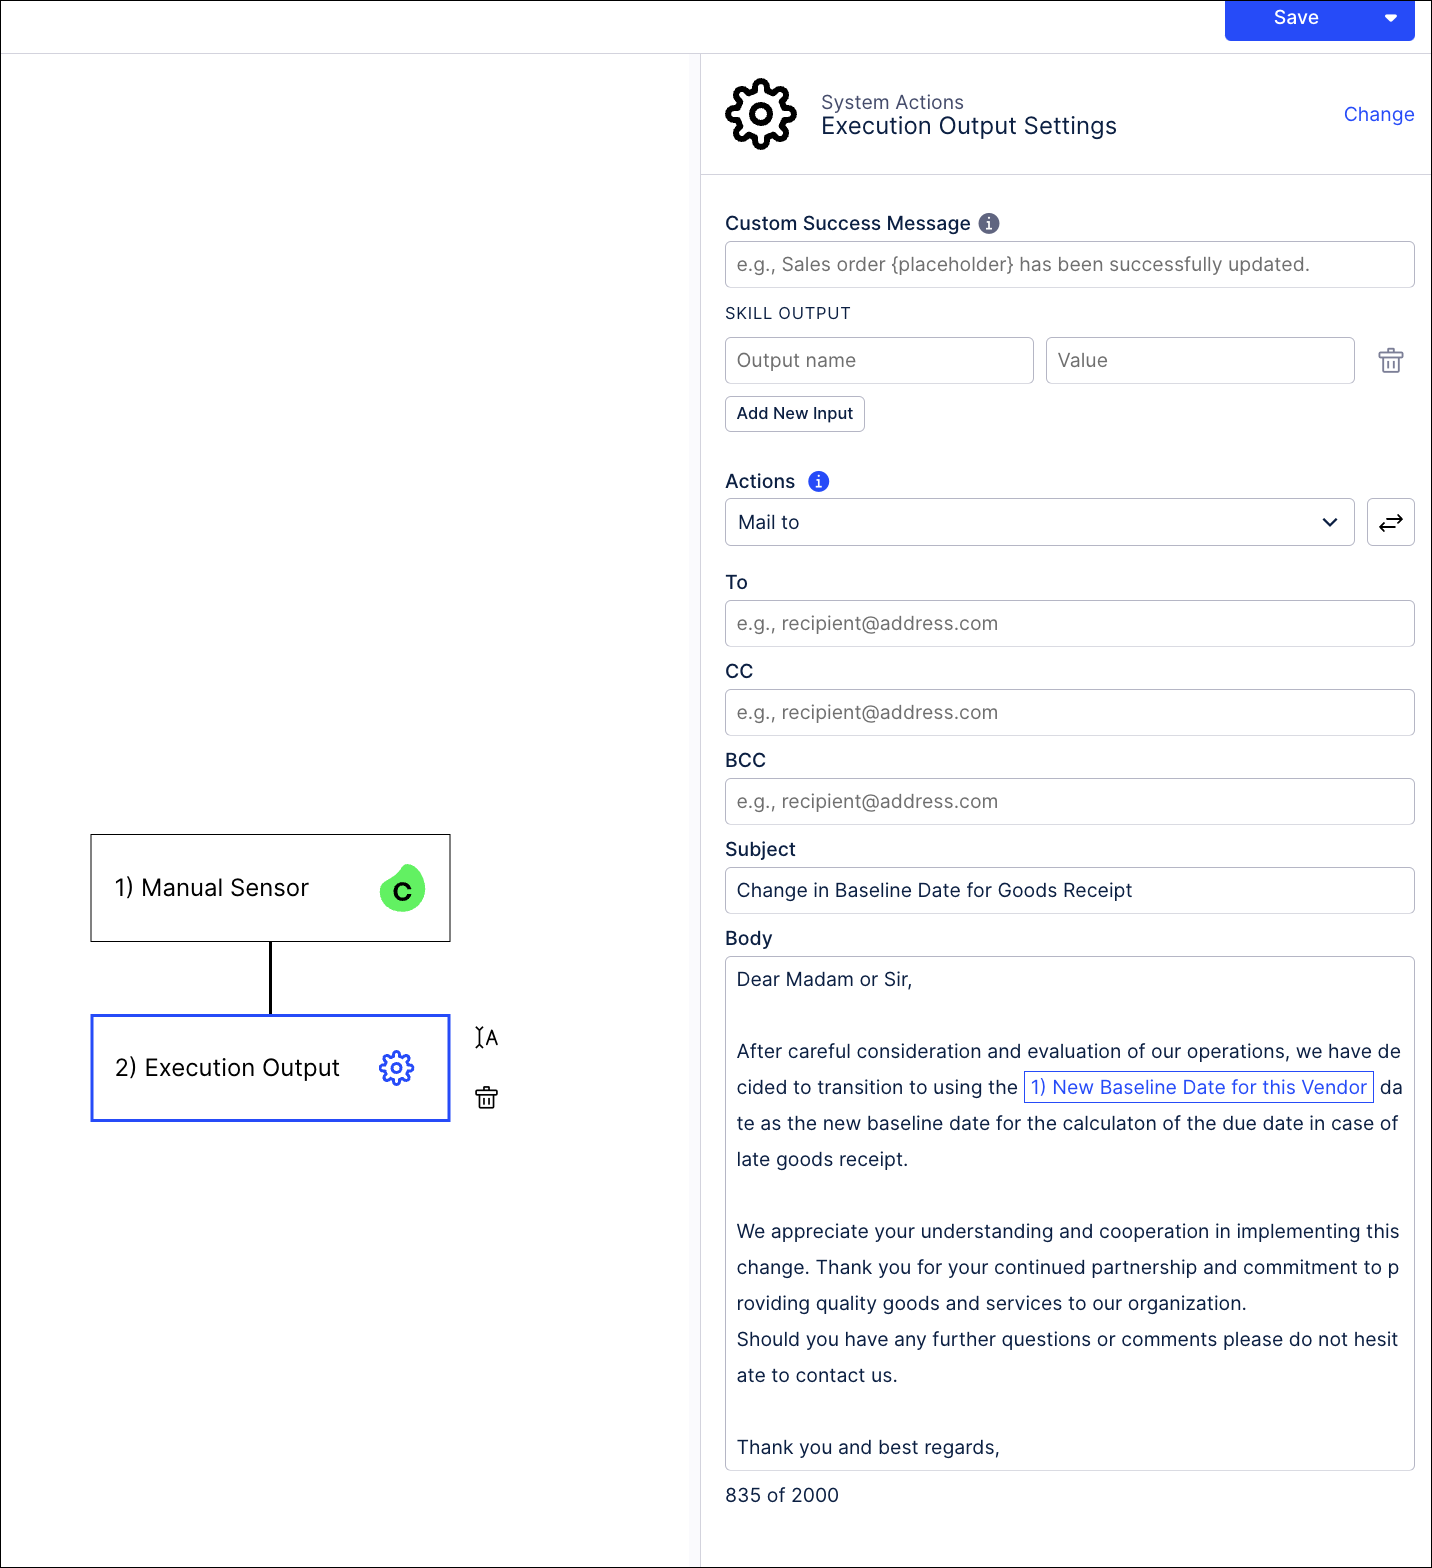
Click Save when you’ve finished configuring a skill.
When you’ve made all the customizations you want to the skills, use the Publish Package button at the top of the screen in your Studio space to publish a new version of the app.
Actions to configure
In the Skills folder, you’ll need to configure actions for these skills if you’re using them. In each case the actions will be visible in the profile views of the affected invoice items.
Copy T-Code copies the FB03 transaction code for this invoice item into the clipboard. This lets the user paste it into the SAP transaction input field to open the invoice directly, skipping the input mask.
Send Email to Vendor opens a prepopulated but editable email in the user’s email client for them to send. You can find the email template in the “Execution Output” step in each skill. Click on the step to see and edit the email template.
You can revise the email templates or create multiple ones for different scenarios. Also evaluate whether it makes sense to replace the no-reply Celonis email action with an SMTP setup (see Permissions).
Installing the Action Flow blueprint for baseline date updates
Download and install our Action Flow blueprint to create an action that lets users update the baseline date in SAP. You can use this blueprint as a template for all kinds of Action Flows related to baseline date updates, for example, background automations using the Celonis Query Data Model module.
Before you install the Action Flow blueprint, you’ll need to complete these prerequisites:
Install the Celonis Agent for Action Flows, if you haven’t already.
Install the appropriate SAP Automation Transport. Raise a support ticket and ask for the function module /CELONIS/FI_GEN_CHANGE. Follow the instructions in SAP Actions.
Identify a set of credentials for a central user that can be used to authenticate to SAP when a user runs the Action Flow. This user must have permission to update a baseline date. By default, the Action Flow will continue using these credentials. If you want users to authenticate dynamically with their own credentials before performing actions, you can ask about our Personal Connections feature, which is in Limited Availability currently.
Here’s how to install the Action Flow blueprint:
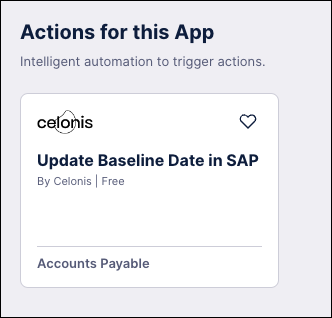
Go to the Celonis Marketplace, and download the ActionFlow blueprint “Update Baseline Date in SAP.” It’s in the section “Actions for this App” for the Baseline Date Optimizer app.
In Studio, create a new Action Flow in the Baseline Date Optimizer app package.
In the new Action Flow, from the top navigation menu, go to Blueprint > Import Blueprint. Select the downloaded blueprint on your local machine.

Create an SAP connection using the user credentials you selected for the Action Flow, and click Save.
Publish the app package - you can just select the Action Flow and publish only that.
Leave edit mode and click on the clock to adjust scheduling for the Action Flow. Select “On demand” and click OK.

Use the slider by the Edit button to set the Action Flow to Active.
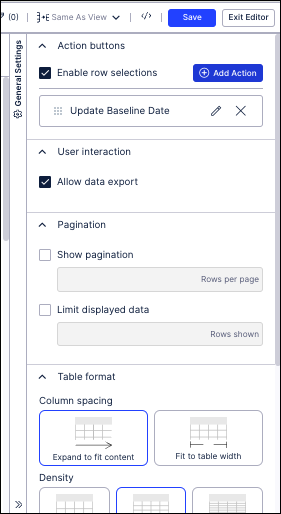
In Studio, in the Baseline Date Optimizer app package, open the view “Action View - Content Block Unfiltered”. Click Edit Mode, then open the visual editor for the invoice table at the bottom of the view, "Invoices with Baseline Date Improvement Potential", by clicking Edit Component.
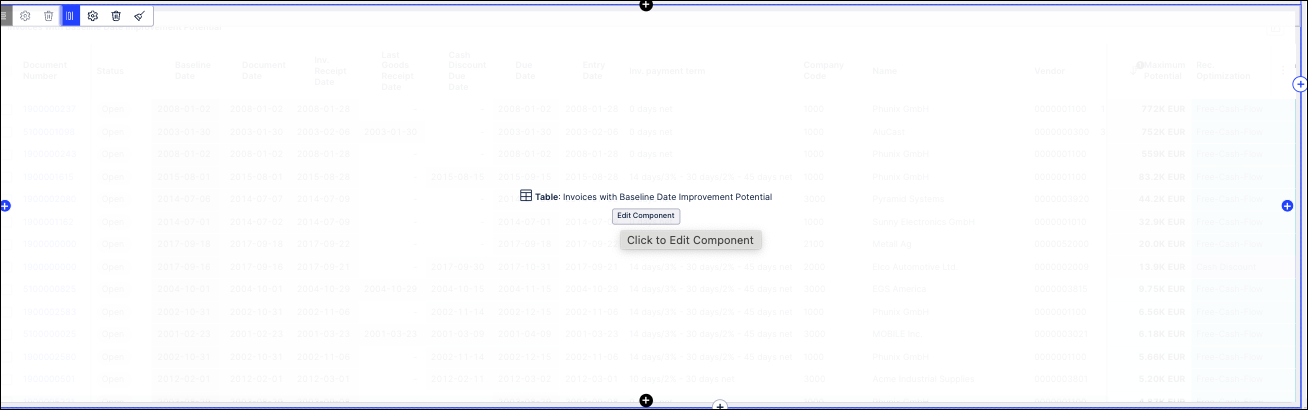
In the top right corner, click Add Action.
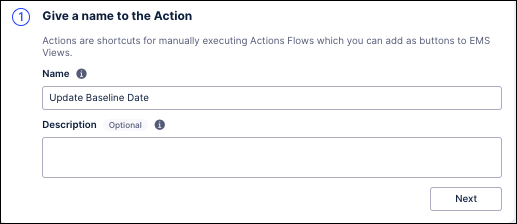
Give a name to the action. This will be the name of the action that business users will see when selecting an invoice. Click Next.
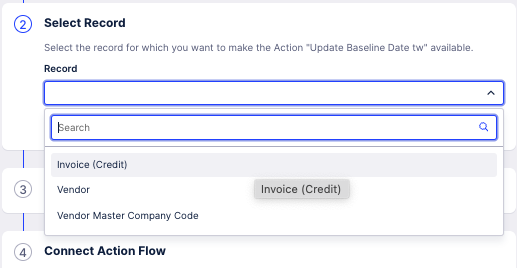
Select the record “Invoice (Credit)”.
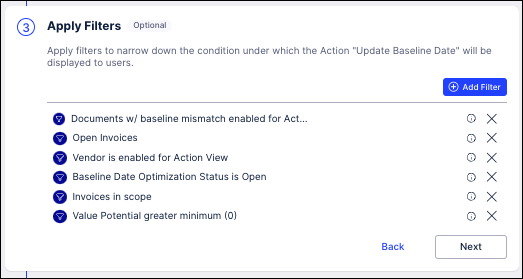
Apply filters to limit when the action should show up. We recommend you apply the same filters as for the Action View, which are:
Documents w/ baseline mismatch enabled for Action View
Open Invoices
Vendor is enabled for Action View
Baseline Date Optimization Status is Open
Invoices in scope
Value Potential greater minimum (0)
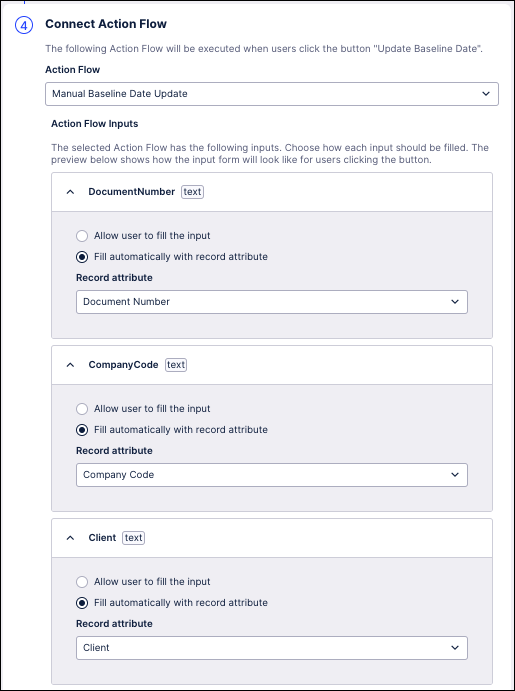
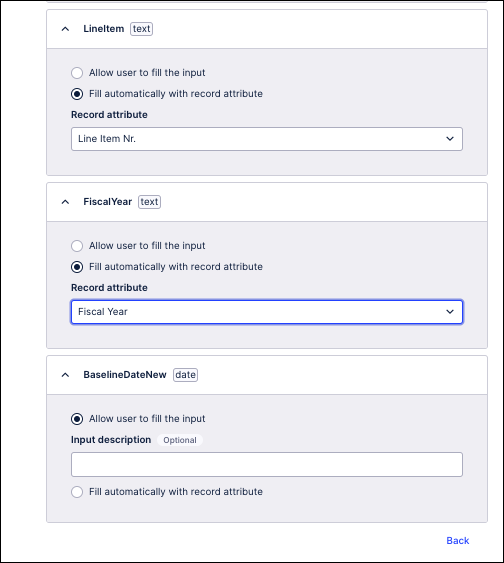
Connect the Action Flow by mapping the Action Flow inputs to your invoice record. The new baseline date can be manually set by the user, or you can map it to a date field from the invoice record.
Click Save, verify that the box for the new action is checked in the Available actions panel, then click Done.
Click Save at the top right, then Exit Edit Mode.
Publish the Action View (or the whole of the app package) to make the new action available for users in Apps.