Assignment Rules
Introducing Assignment Rules
Assignment Rules provide an easy way to find and assign the proper assignee within Celonis Studio. This feature lets you match a specific input with a custom output (either a user, email, or custom text).
Note
Assignment Rules that were created previously using PQL statements within Knowledge Models remain fully functional. However, due to the increased maintainability and ease of use, Assignment Rules' utilization is recommended over such manual solutions.
Exemplary Use Cases
Thanks to the open nature of Assignment Rules, they can be utilized for a broad spectrum of use cases. In a nutshell, most tasks involving the return of a value, based on a custom lookup, can be completed using Assignment Rules. Some examples include:
Assigning a task to a specific user based on certain criteria.
Setting email recipients on a per-case basis.
Expanding the source system through additional information.
Viewing Assignment Rules
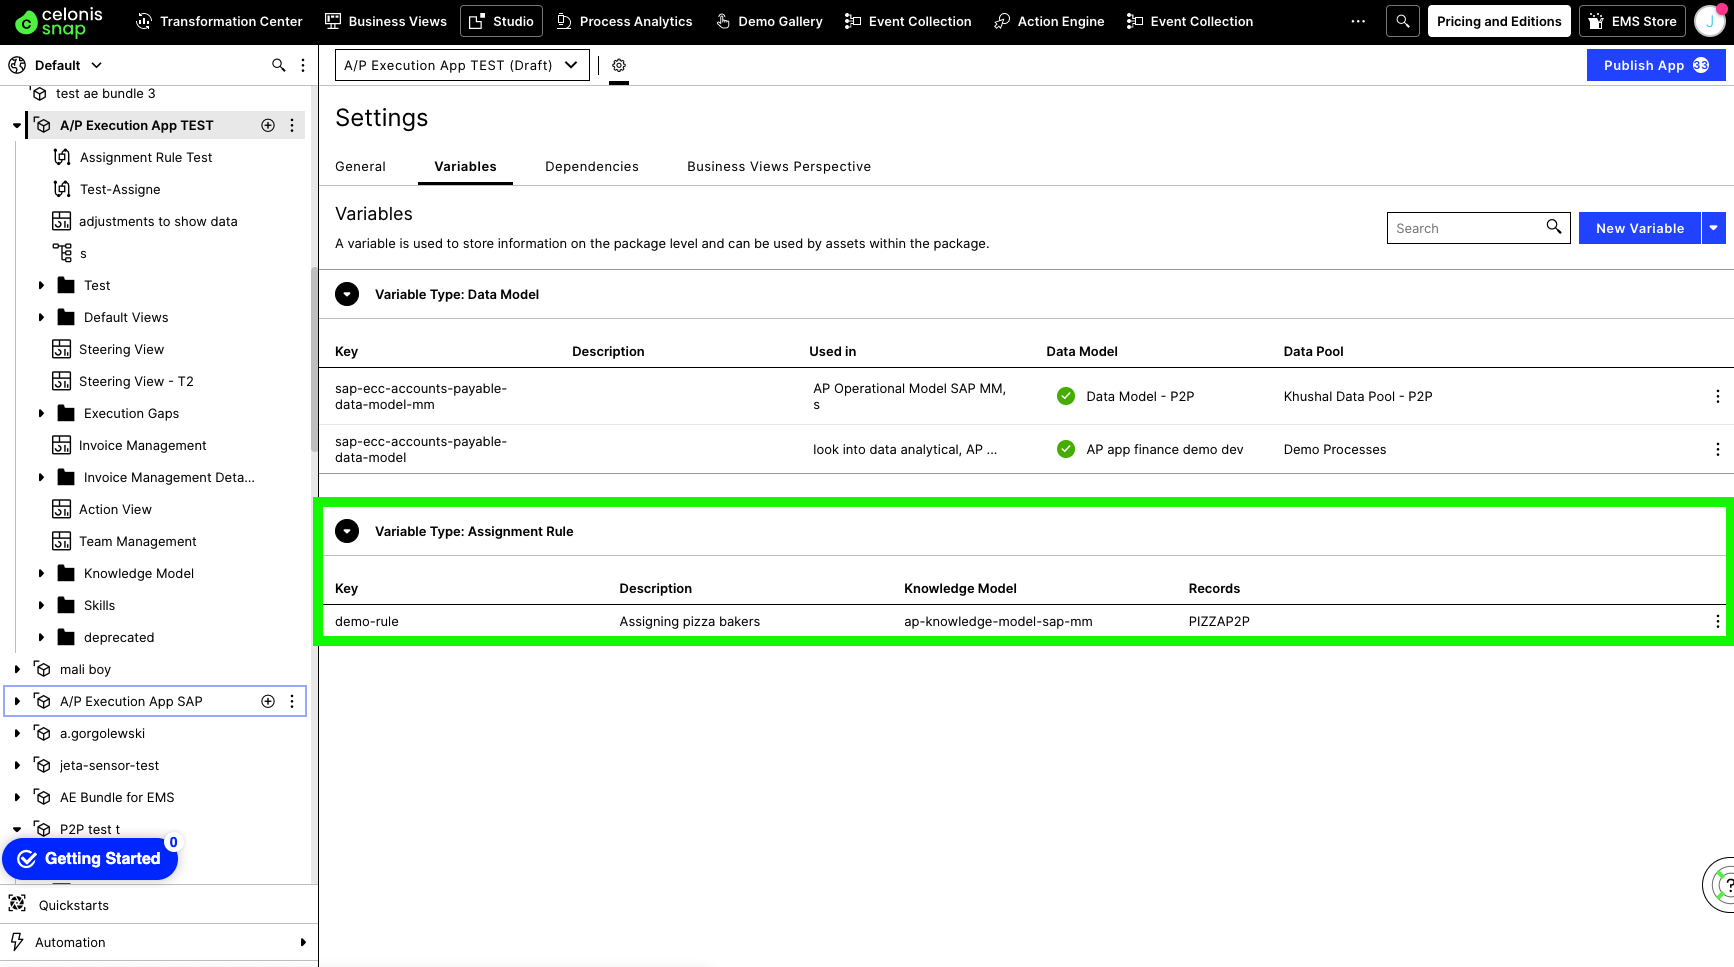
Go to the package settings.
See the Variables tab for:
The Assignment Rule variable type.
An overview of the Assignment Rules for the respective package.
Note
Assignment Rules are by default activated for every team using Knowledge Models. If you cannot see Assignment Rules in your package settings, please contact Celonis support. Remember to mention your team URL.
Step-by- step guide to Assignment Rule creation
Step 1: Creating a new Assignment Rule
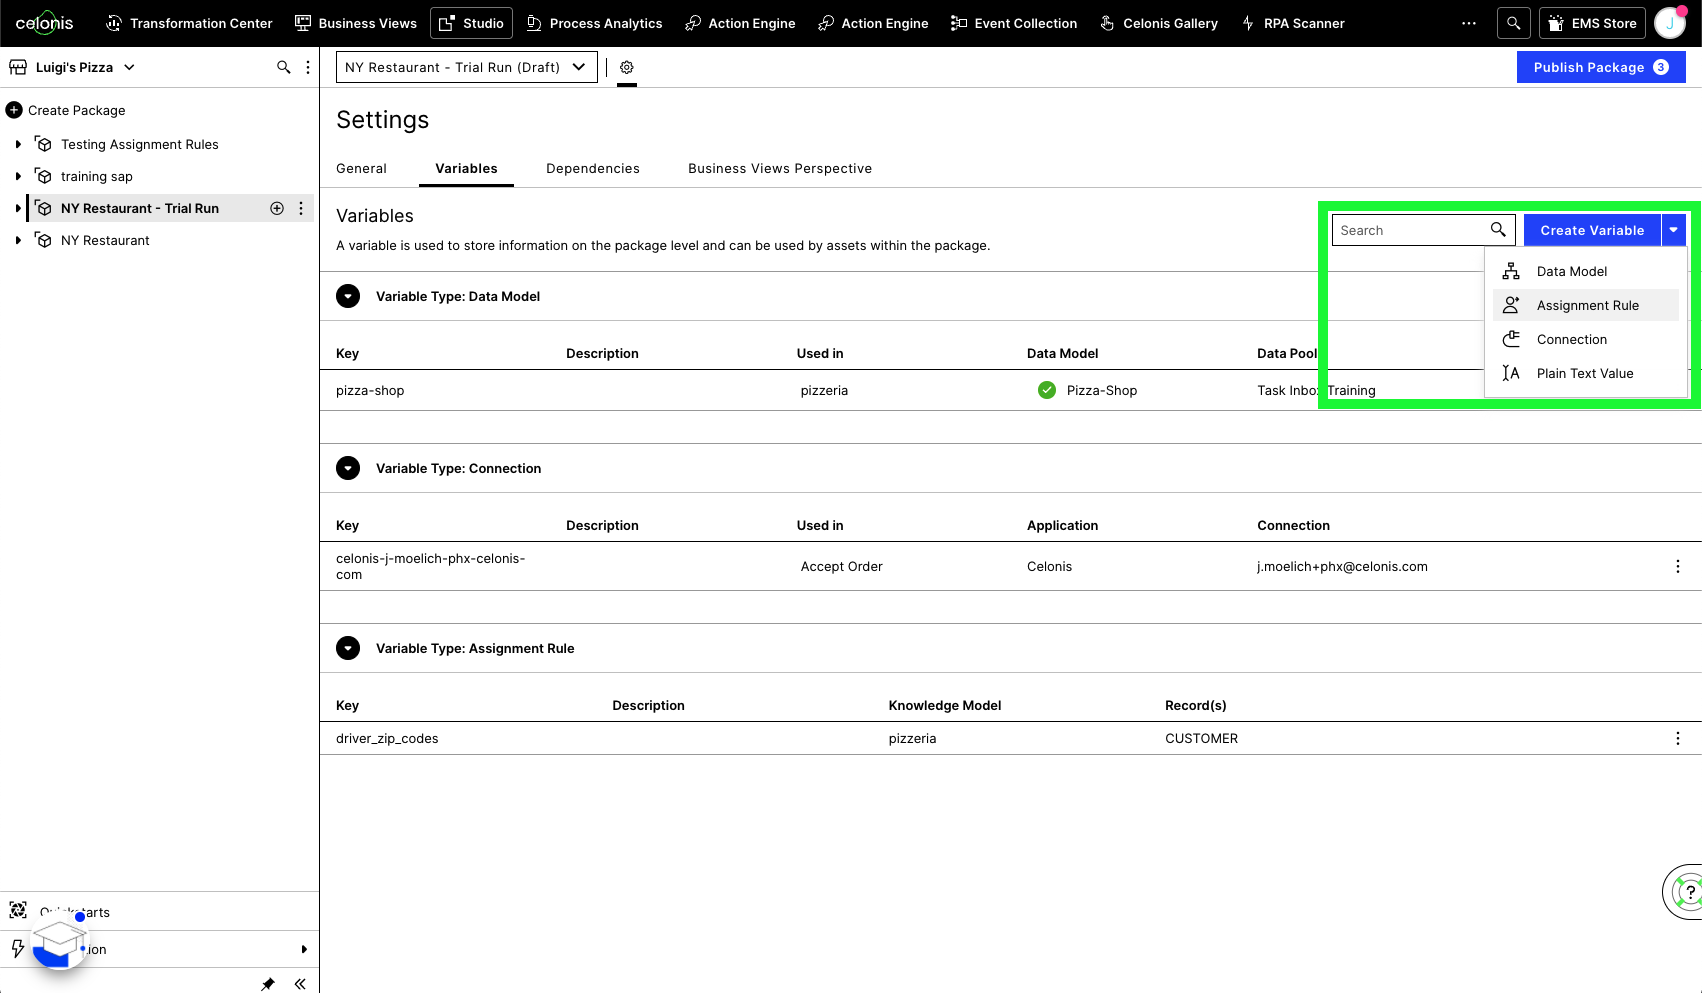
Navigate to Celonis Studio.
Hover over the name of the package you want to enable Assignment Rules for and click the three vertical dots.
Select "Settings" from the dropdown.
Navigate to "Variables" in the settings window.
Click "Create New Variable" and select "Assignment Rule".
 |
Step 2: Providing your Assignment Rule parameters
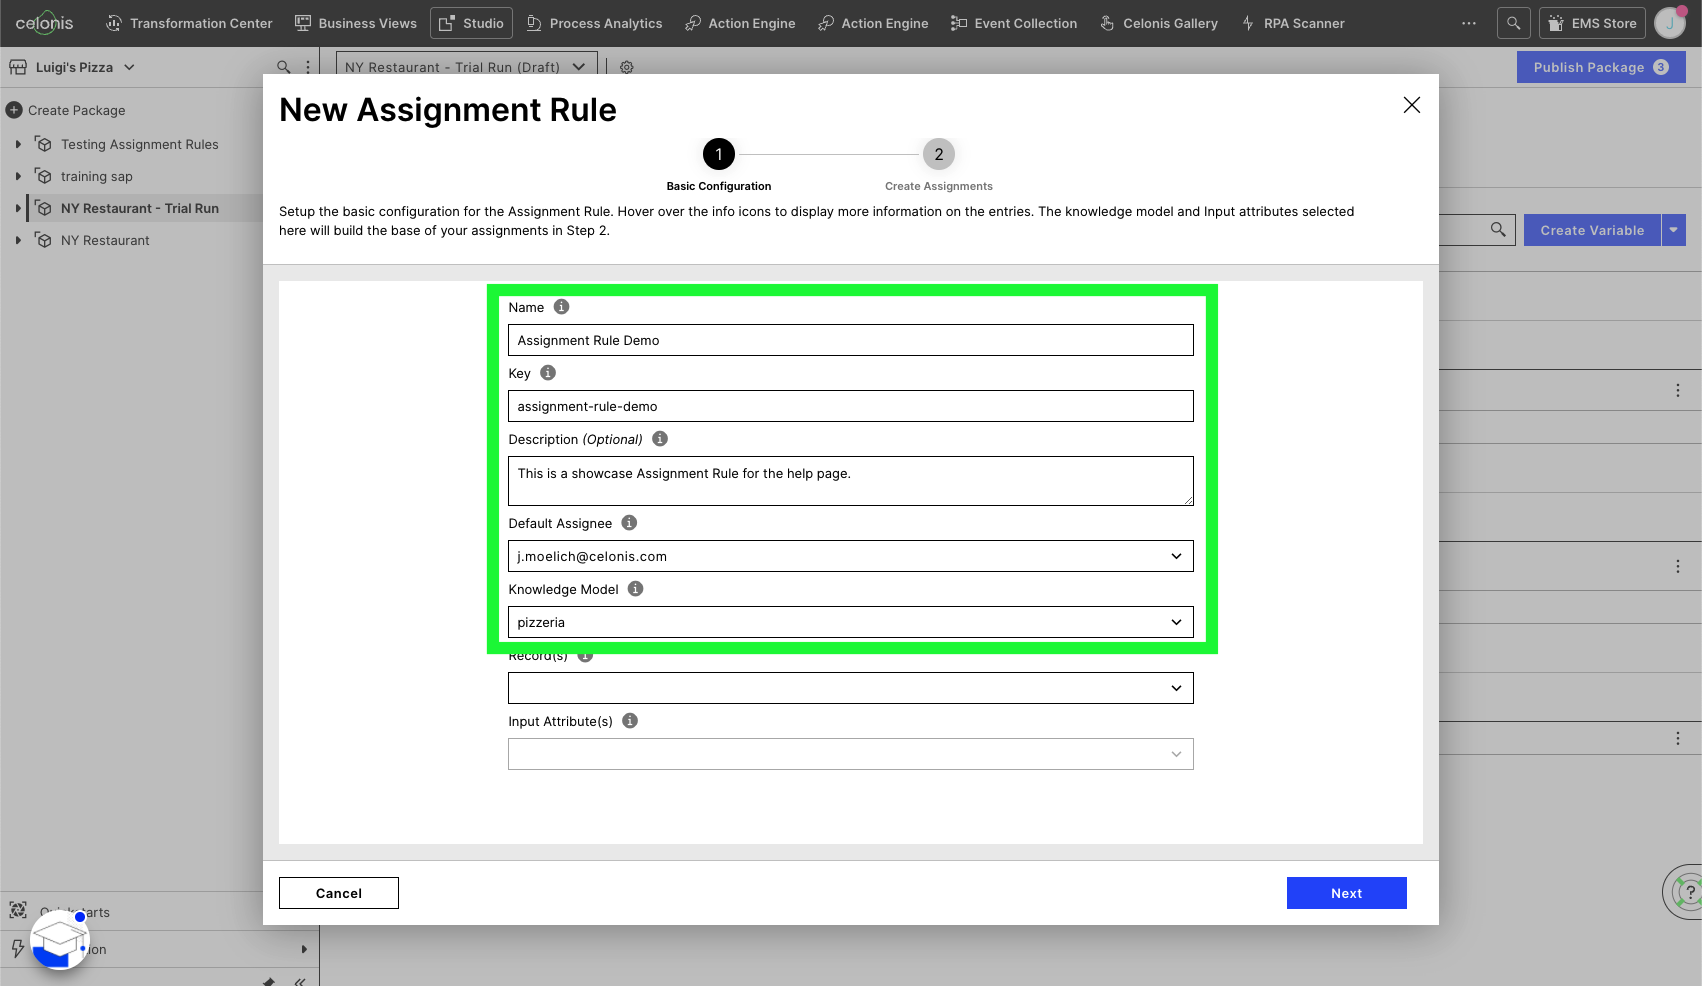
Create a Key for your Assignment Rule
Optionally, add a Description to your Assignment Rule; a description can be helpful when revisiting your rule in the future.
Define a Default Assignee. This assignee can be either a custom output or one of the existing users. The default assignee is used for every combination of input attributes that have not been assigned explicitly to a different output.
Select the Knowledge Model of the input attributes.
Note
Only published Knowledge Models can be selected here. See Version Control for more information on knowledge model publishing.
 |
Step 3: Selecting a Record and defining input attributes
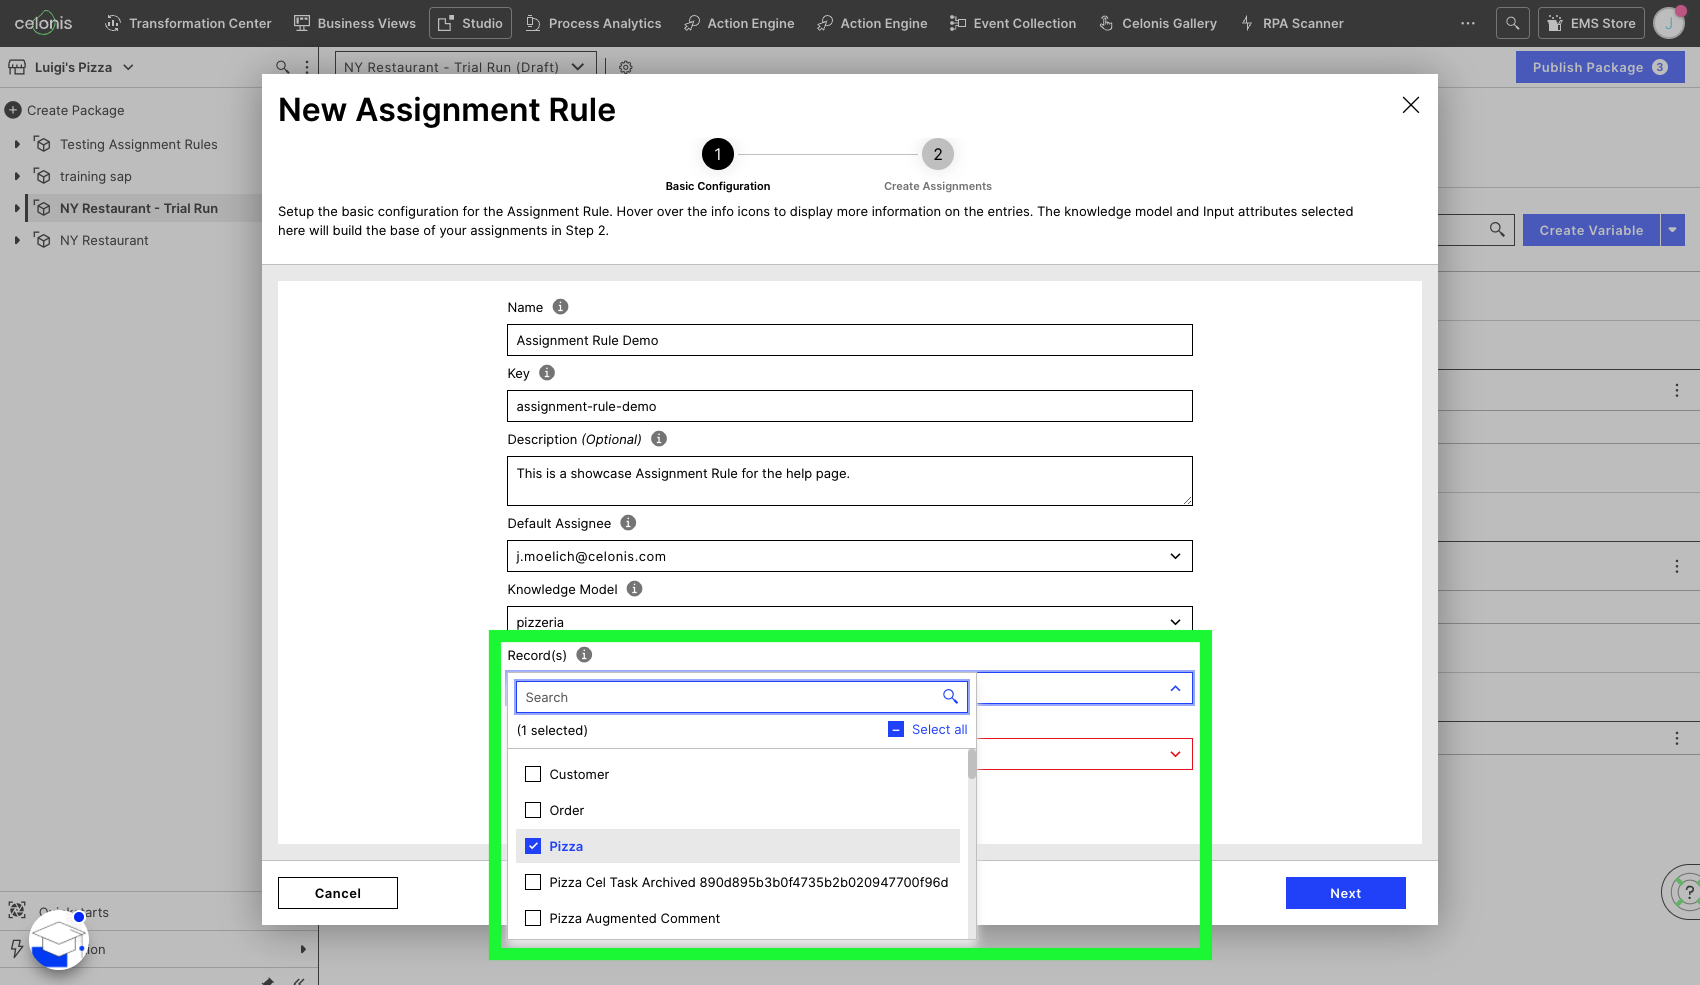
After the previous selection of a knowledge model, the Record field becomes available.
Click the Records dropdown and select one (or more) record you want to use as a basis for your input attributes.
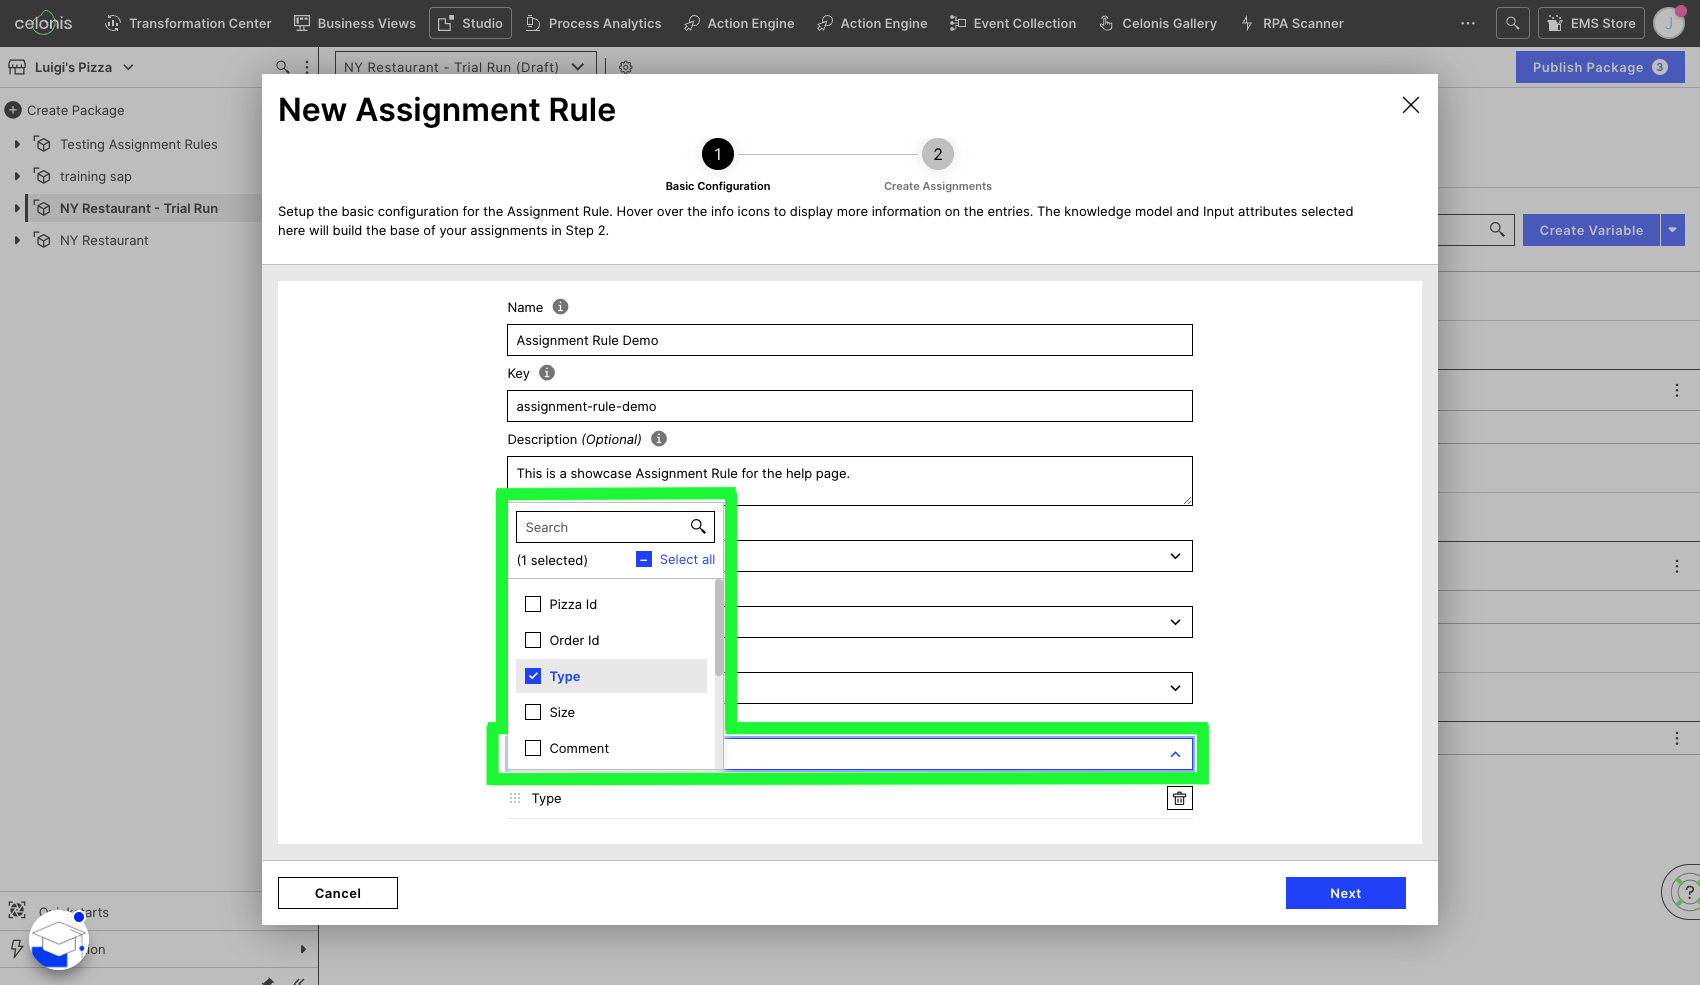
Select one or more Input Attributes you want to use for this Assignment Rule from the dropdown.
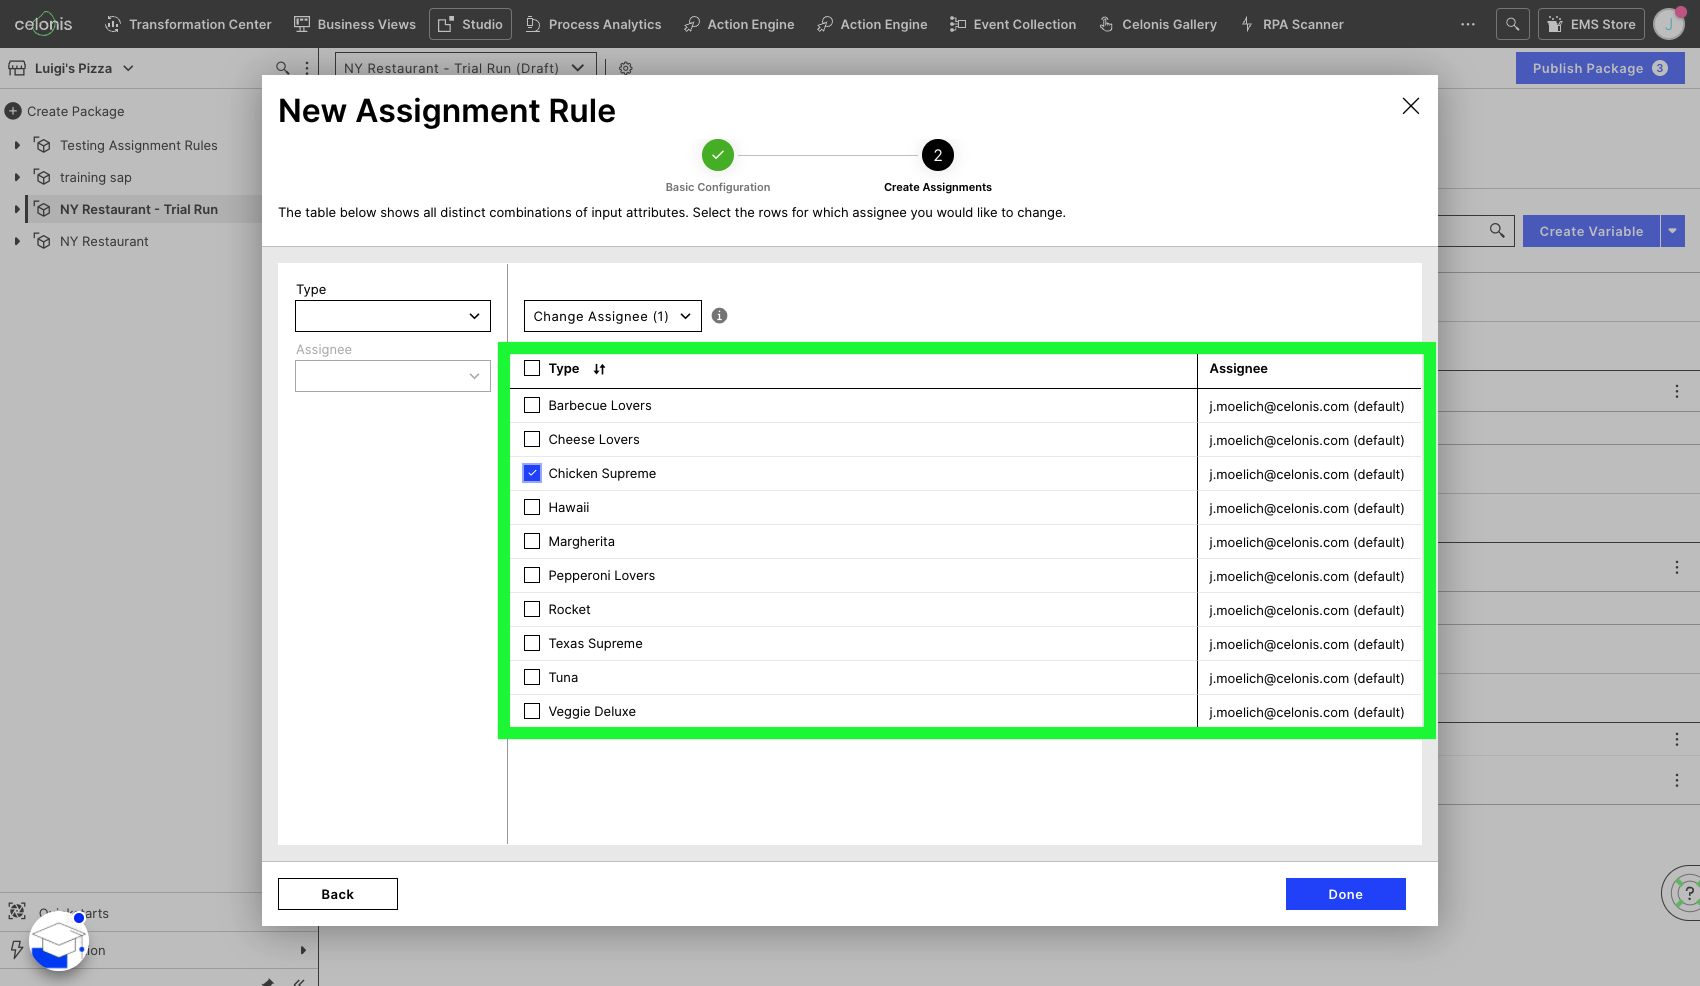
Once an input attribute is selected, the table on the right of the dropdown will appear. It displays all distinct combinations existing in your data for the selected input attributes.
Knowledge Model Records
A Record is the definition of a core item that Celonis tracks in its process mining analysis (e.g. invoice, sales order, purchase order, etc.). For more information on Records see Knowledge Model Records.
Step 5: Creating a new Assignment
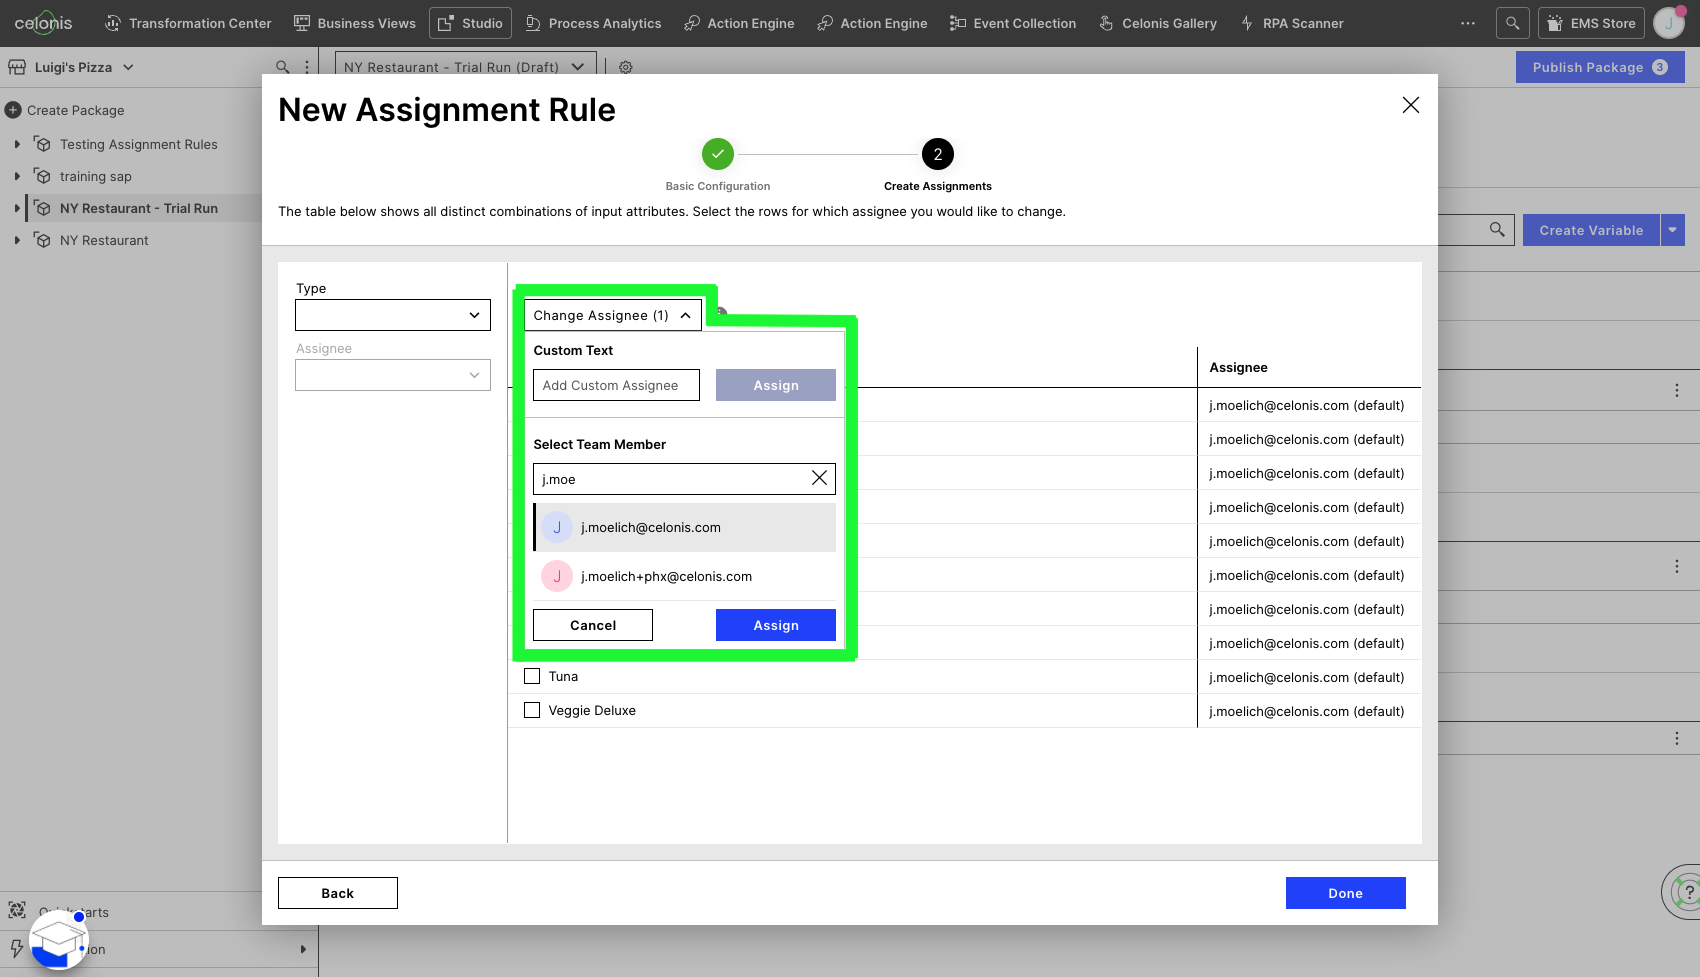
After filtering the input attributes to your desire, you can select one or multiple rows using the checkbox on the very left of each row.
Once one or more rows are selected, the Change Assignee button becomes available.
To create an assignment for the selected instances, click Change Assignee. This will present you with the option to either use a free-text custom assignee (e.g. email) or assign it to an existing user.
Click Save once you are happy with your assignments!
 |
Note
By default, an Assignment Rule will be used on zero Skills. To start using your newly-created Assignment Rule, see Applying Assignment Rules in Skills.
