Filter and Forward Emails
Forwarding specific emails by hand can be annoying. You would have to check the emails regularly and filter them by hand to decide which emails to forward where. That's the reason we provide you with that automation solution that watches your incoming emails, filters them by the subject, and forwards them automatically to the defined recipient. This can ease your life a lot, e.g., when working on a support desk where you have to filter the emails to forward them to the right department.
Follow the step-by-step guide below to implement this solution for your Celonis Action Flows use case.
Sample Action Flow
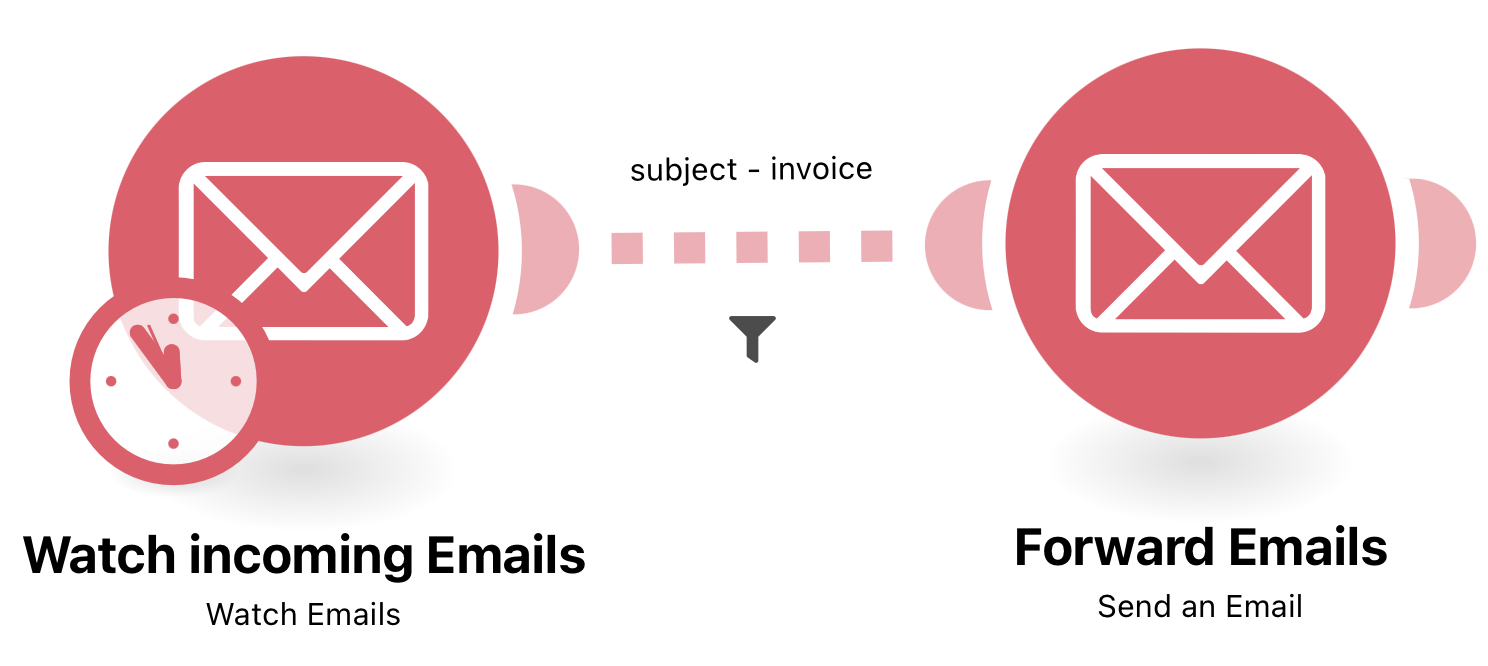
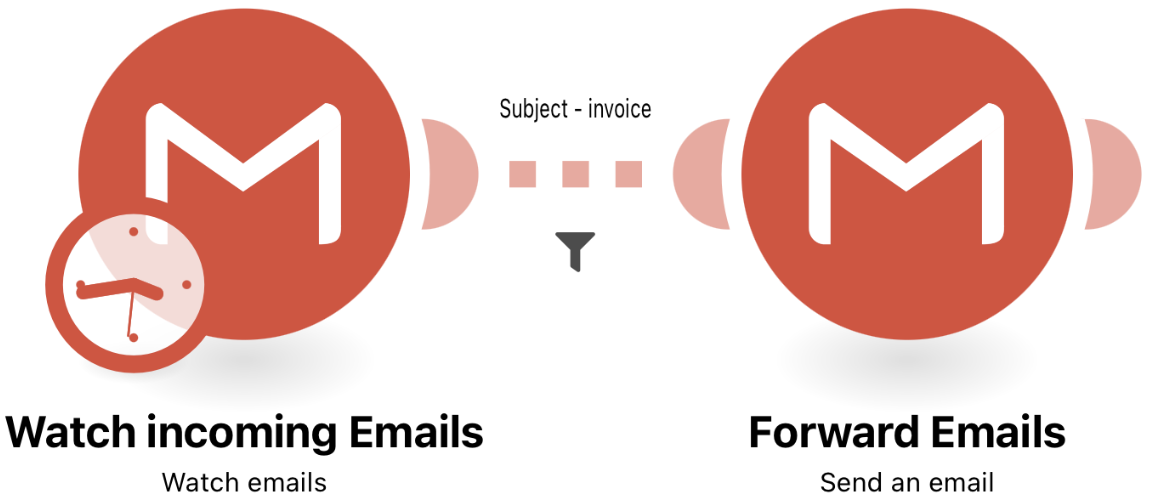
The image below shows a working Action Flow which:
Watches for incoming emails of a specific sender
Filters the emails on a phrase in the subject
Forwards the emails to a defined recipient
 |
Configuring Action Flow
Below you will find the step-by-step guide for configuring each module of the above Action Flow.
1. Watch incoming Emails
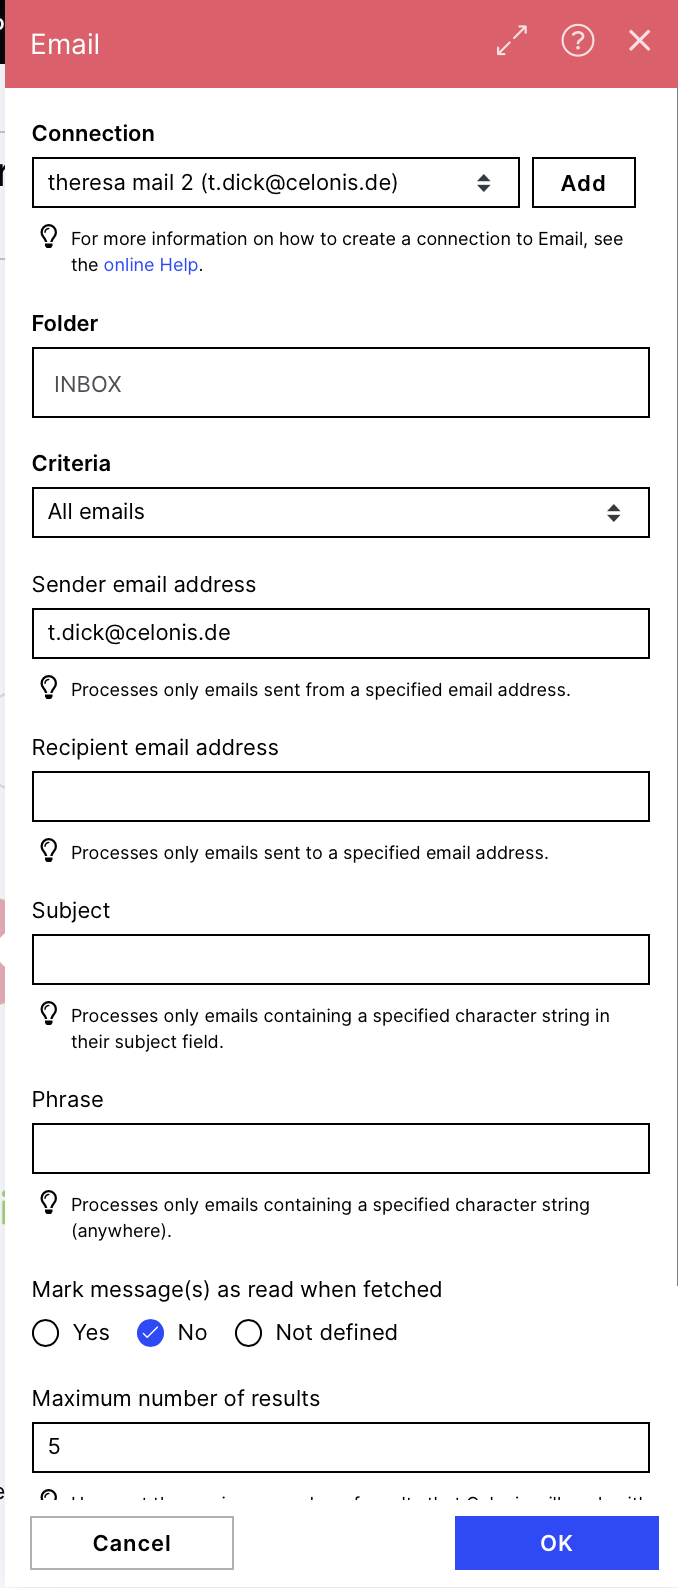
Connection: connect to your mail account and grant Celonis the permission to read and write emails.
Folder: choose the INBOX
Criteria: All emails
Sender email address (optional): only the emails of the sender defined here are selected, if no sender is defined, all emails are chosen
Phrase (optional): one could also filter here for a phrase which the email has to contain. This filter is case sensitive so INVOICE and invoice are different things here. That's why we chose to filter between the modules in this template.
Maximum number of results
Set the maximum number of results that Celonis will work with during one cycle (the number of repetitions per scenario run). If the value is set too high, the connection may be interrupted on the side of the given third-party service (timeout). Celonis has no influence on this. We recommend that you set a lower value and either define a higher value for the maximum number of cycles or run the scenario more frequently.
 |
Configuration:
Action Flows Module: Email
Action: Watch Email
 |
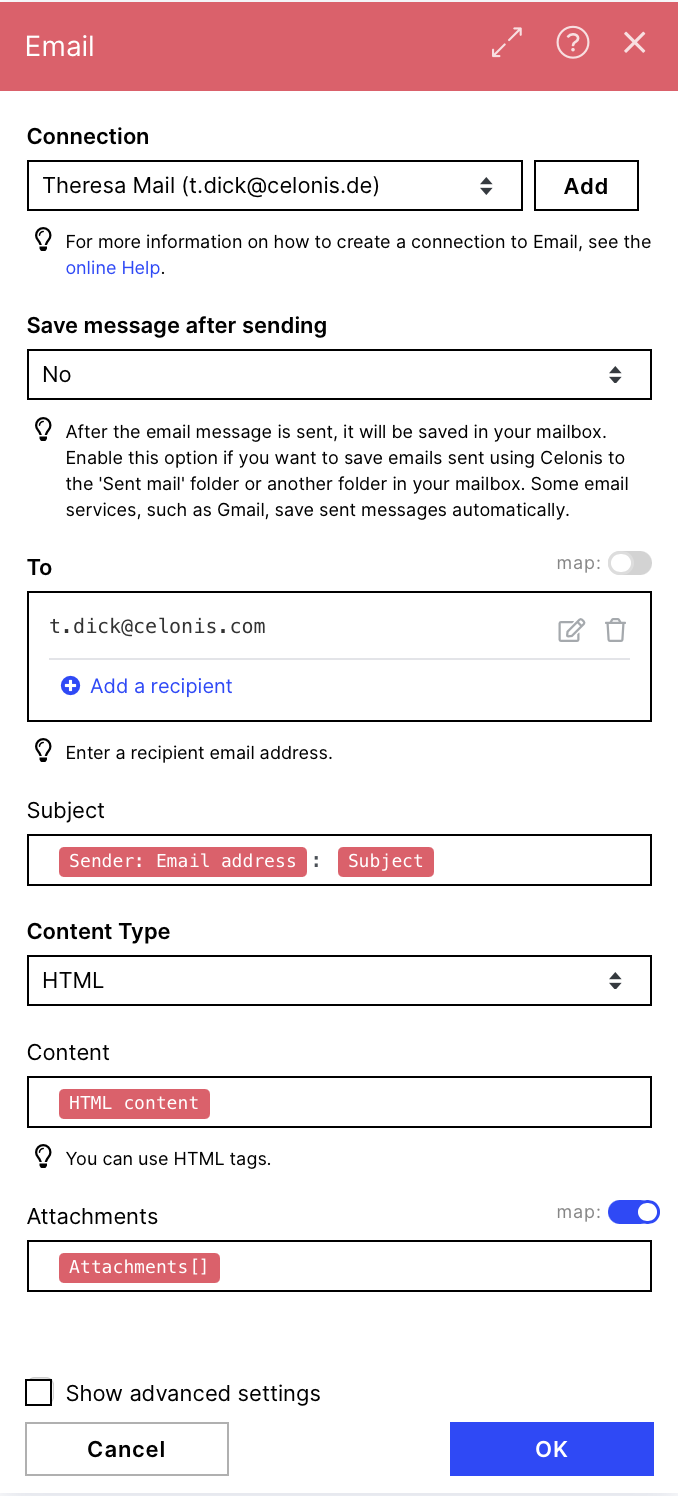
2. Forward Emails without Attachment
Connection: Use the same connection as in the module before
To: define the recipient you want to forward the emails to
Subject: take the subject item from the mail before and add the sender email address to show from whom the original email was
Content Type: HTML (to get the same styling as the original email)
Content: HTML content item from the previous model
Attachments: activate the 'map' toggle and put in the Attachments item to make sure alle attachments are copied in the new email.
 |
Configuration:
Action Flows Module: Email
Action: Send an EMail
 |
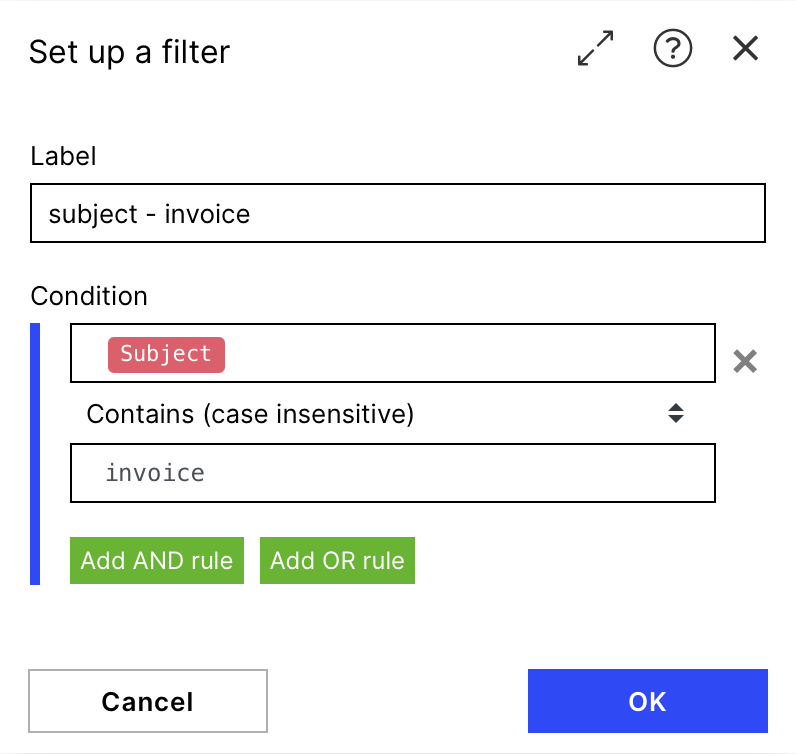
3. Add Filter
To not just take all emails from a specific recipient we filter on a subject, in this example invoices. This searches for the phrase invoice within the subject of the email (case insensitiv, so Invoice with a capital letter would pass the filter as well as invoice). We filter in this additional Filter outside the email module to be able to use 'contains' and the case insensitivity.
 |
Downloading Action Flow blueprints
To download blueprints for Action Flows, go to Marketplace. In the Marketplace page for your Action Flow, click the Download button to get the blueprint.
Blueprints can be imported into your Celonis Platform Team so that you can quickly make the required changes without needing to build the Action Flow from scratch.
Potential Alternatives
You could replace the mail modules with different mail modules of your choice e.g. Gmail
 |
Possible Use Cases
Forwarding Support Mails to the right Department
Keeping another Employee in the loop at a specific topic