Creating Action Flow inputs
Action Flow inputs allow you to pass data with a predefined structure to a Action Flow every time you run it. First, define the expected data structure necessary to start your Action Flow. Then, whenever you run the Action Flow with defined Action Flow inputs,Celonis platform shows a form where you enter the required data. You can use the data from your Action Flow input in all modules in the Action Flow.
You can define Action Flow inputs for your Action Flow before or after adding your modules.
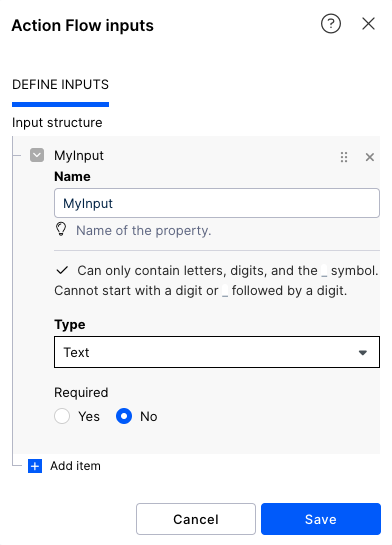
In the Action Flow editor, click the Action Flow input icon.
Click Add item.
Enter the Name. This field is mandatory.
You cannot use spaces or special characters in the name. You can use letters, numbers, and the underscore symbol (_).
You can only start with a letter or underscore.
Select one of the following input data type from the dropdown menu:
Array
Boolean
Collection
Date
Number
Text
In Required, select whether this input is required or not to start your Action Flow.
If you select Yes, your Action Flow cannot run unless you provide the required input.
Important
To use required inputs, your Action Flow scheduling type must be set to On-demand.
If you select No, the Action Flow can run without the specific input.
Optional: If you selected Text, Array, or Collection as your Specification, in Multi-line, select how you want your text to show.
Selecting Yes shows multiple lines of text to show.
Selecting No shows only one line of text.
Repeat the process if you need to add more items.
Click Save.
Click the save icon to save your Action Flow.
Tip
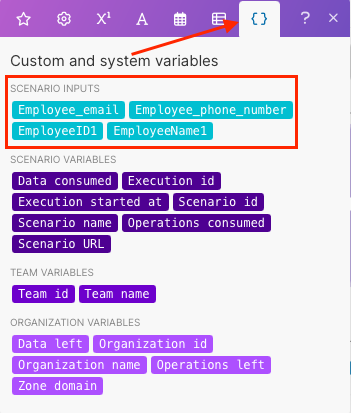
You can use the Action Flow inputs as mappable values in your Action Flows. You can find them under the Variables tab in the mapping dialog.
 |