Task configuration
Involve business users with Tasks explains how to create Tasks on specific data incidents. These Tasks are a call to action (or at least a notification) for a specific business user. They give details about the affected business objects and propose a next best action the user can take. To ensure that your business users can be involved in the best possible and most efficient way, this article provides an overview over all possible Task configurations.
In this section, we will show you how to configure Tasks using Skills. For information on how to set up Tasks with Action Flows, see Tasks.
 |
Note
If you don't see a red dot next to the Activity ID and if all your columns can be filtered, Task Augmentation has already been activated for you. In this case, please check out this tutorial.
Task configuration overview
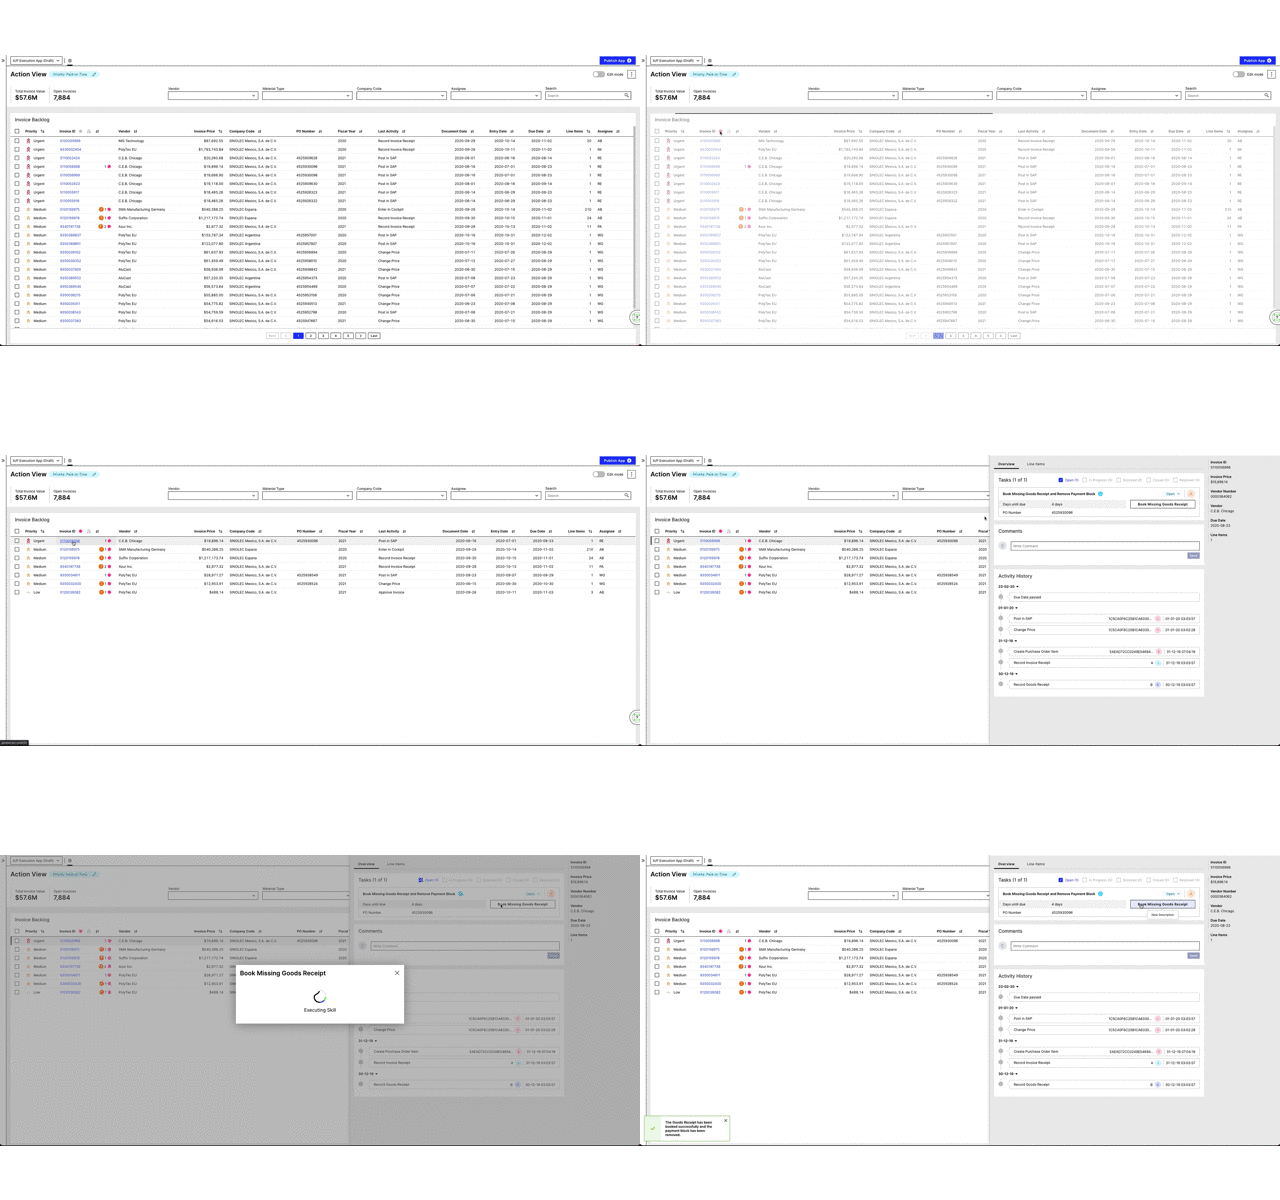
Tasks are created by the "Create Task" Action. These screenshots give you an overview of how the configuration of the action affects the user view:
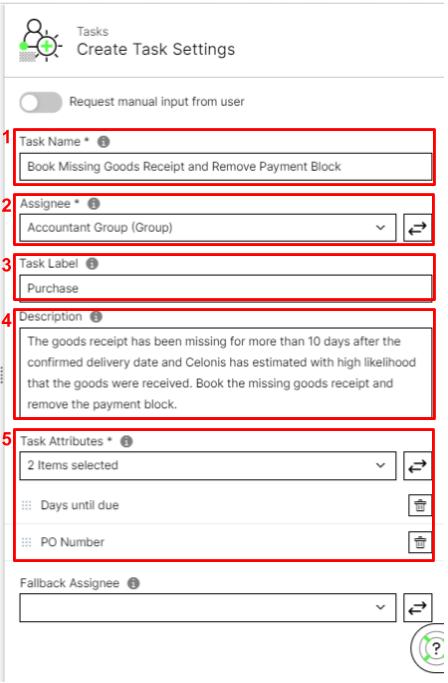
1 - The Task Name is displayed as the title of the specific task in the Task List.
2 - Each Task will be assigned to a user. The Assignee of each Task is shown in the top right corner of the Task in the User View.
3 - Optionally, you can define a Task Label. It allows you to not only show all Tasks on a specific item (record) in the Action Table but to filter on Tasks that are assigned to that specific Label. It, therefore, allows you to group Tasks according to their business meaning.
4 - Optionally, you can give your Task a Description which is displayed in a tooltip when hovering over the info symbol in the Task List.
5 - The Task Attributes are record attributes that characterize the object you are looking at. They are displayed with your Task in the Task List to provide further detail.
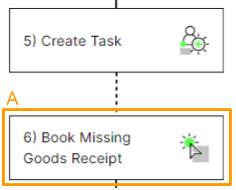
A - You can add one or several Actions in your Skill Configuration that the user can trigger right from the Task List.
Skill Configuration
Create Task Action:
 |
Add an Action:
 |
User View
Task List:

Action Table:
 |
Note
Make sure that your Table is already an Action Table. This means the table indicates the existence of tasks for each record and also displays the number of tasks.
Task Assignee
Choose an Assignee based on Attribute Values
In the basic configuration, you would assign each Task of the same type to the same user. However, you can also assign users dynamically based on specific object attributes.
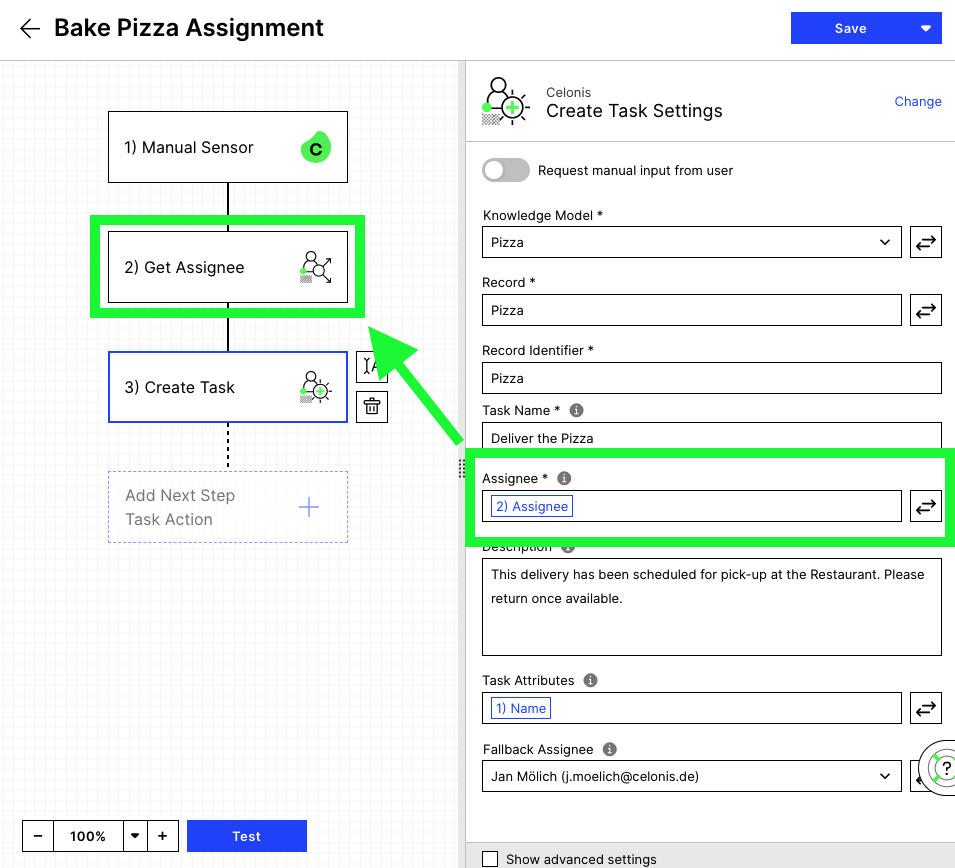
To do this create an Assignment Rule within the package variable settings. Here you can define the conditions under which a specific Assignee is to be returned. Once complete, you can use the Get Assignee action to query this rule and return the appropriate Assignee for your task.
For more information on attribute-based assignments, see Assignment Rules.
 |
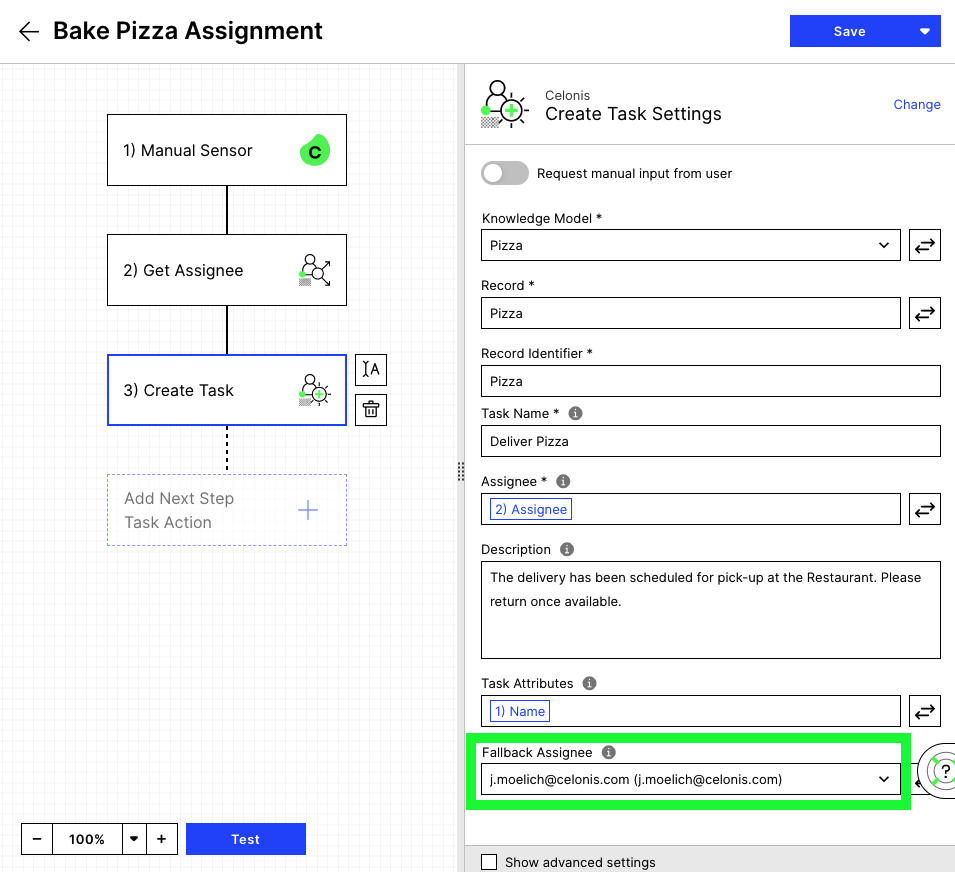
Define a Fallback Assignee
In the configuration of the "Create Task" Action, you have the possibility to define a Fallback Assignee. This Assignee will be used when the actual Assignee cannot be found, for whatever reason.
 |
Change the Assignee in the Task List
By clicking the Assignee's profile picture you can re-assign a specific Task in the Task List.
 |
Change the Assignee via Default Actions
You can re-assign all Tasks on several records (rows of the action table) by triggering a manual action via the Action Table.
Note
Please be aware that all Tasks on the record(s) of your choice will be re-assigned.
 |
 |
 |
 |
How do you configure the Default Action:
For a general guide on how to set up Default Actions, see Provide default actions.
The skill setup for this specific Default Action is displayed on the right side.
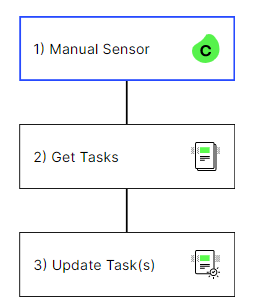 |
Use the Unassigned functionality
It can happen that Tasks become unassigned, e.g., if the user (or the group) to which the task has been previously assigned is deleted from the team. It is important to be aware of that functionality so that the unassigned Tasks can be directly re-assigned to other users.
How to use the Unassigned functionality:
If the Assignee Search is enabled, you can use it to search and filter on unassigned Tasks.
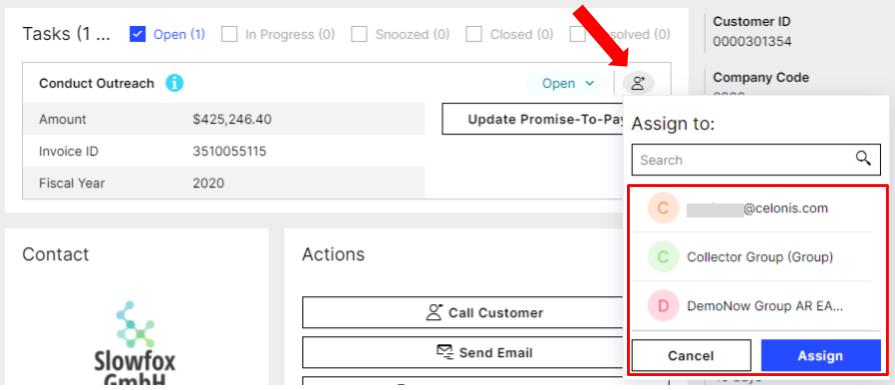
You can assign another user in the Profile View which can be accessed via the link in the Action Table. The Profile View comprises a Task List which shows the Task with the unassigned user. By clicking on the icon, you can search for a new user and assign the task to them.
Note
If the "Unassigned" option is not displayed in the Assignee Filter dropdown menu, this means that all tasks are assigned to a specific business user or a group already.
 |
 |
Task status
Task status overview
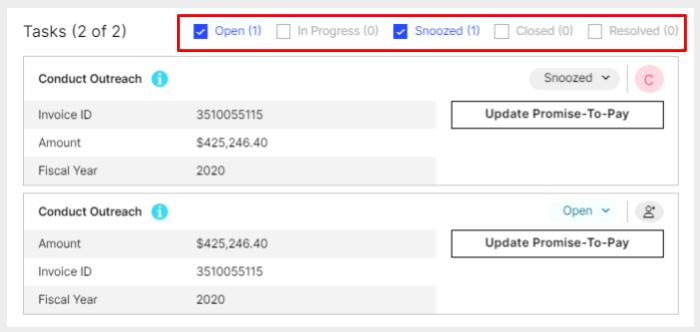
A Task can take on five different statuses: Open, In Progress, Snoozed, Closed, and Resolved. Tasks of all of these five kinds can be shown to the Business User in the Task List of a specific object in case the respective checkboxes are selected (see screenshot).
Whenever a Task is newly created it has the status Open by default. However, the Task status can be changed either manually or automatically when an action is taken or when the incident is modified.
Note
In the Action Table, only Tasks of the status "Open" or "In Progress" are highlighted and counted as these are the Tasks on which action needs to be taken by the Business User.
 |
See the following matrix for all options for a Task status change:
from → ↓ to | Open | In Progress | Snoozed | Closed | Resolved |
|---|---|---|---|---|---|
Open | (1) manually / (2) status change as Skill action | (1) manually / (2) status change as Skill action / (4) happens automatically after a fixed date | (1) manually / (2) status change as Skill action | not possible | |
In Progress | (1) manually / (2) status change as Skill action | (1) manually / (2) status change as Skill action | (1) manually / (2) status change as Skill action | not possible | |
Snoozed | (1) manually | (1) manually | (1) manually | not possible | |
Closed | (1) manually / (2) status change as Skill action | (1) manually / (2) status change as Skill action | (1) manually / (2) status change as Skill action | not possible | |
Resolved | (3) happens automatically for the modified incident | (3) happens automatically for the modified incident | (3) happens automatically for the modified incident | (3) happens automatically for the modified incident |
(1) Manual change of Task status
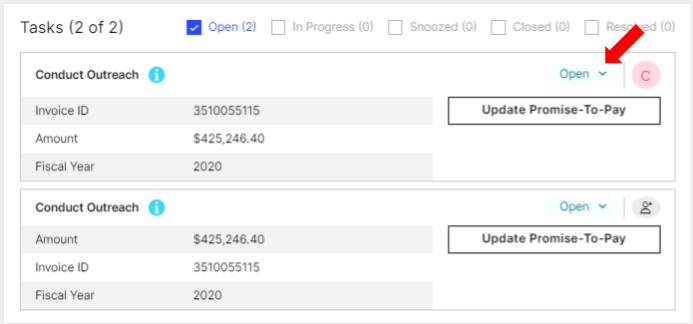
You can change the status for a specific Task in the Task List manually. After this update, it will appear in the respective category and is displayed when the checkbox for the new status is selected.
 |
 |
(2) Status change as a Skill action
You can change the status of all Tasks on several records by triggering a manual action from the Action Table.
The status will change for all Tasks on the record(s) of your choice.
The Action Table only displays open Tasks.
How to configure the Default Action:
For a general guide on how to set up Default Actions, see Provide default actions.
The Skill setup for this specific Default Action is displayed on the right side.
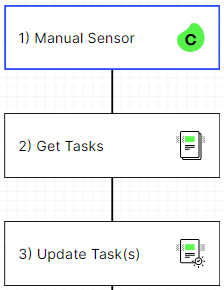
Moreover, you also have the possibility to automatically update the status of the Task that the user took action on.


How to configure the automatic status update:
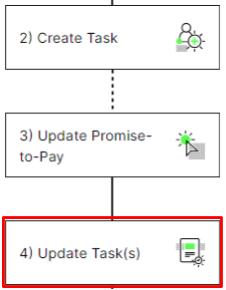
You can add the "Update Task" action block to your Skill which includes the Task creation. There could be several other actions in the same branch in addition to the "Update Task" action.
See Involve business users with Tasks for more information on setting up Tasks and Task Actions.
(3) Resolved Task for the modified incident
The Business User cannot resolve a Task manually. Task resolving only occurs if the Data Model is reloaded or the filter statement for the Smart Sensor in the Knowledge Model is edited. These two possibilities are explained in the following:
A Data Model reload can update the attributes of an object (record) that previously met the filter conditions of a Knowledge Model sensor. Then, the specific object might no longer be detected by the Sensor. Respective Tasks don't have to be considered any longer. These Tasks are called resolved to emphasize that their original trigger condition truly is no longer met in the source system (which could have happened due to an Action previously taken by the Business User).
In case the PQL query of a Sensor filter is edited, objects (records) that previously met the filter conditions might not meet them anymore. Then, initially existing Tasks on these objects will be resolved. Once the filter condition is reset to the initial state, new Tasks will be created on the objects but the resolved Tasks won't be recovered. This feature can be used to reset your Tasks.
(4) Automatic re-opening of a snoozed Task
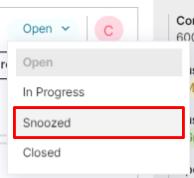
If you set a Task to snooze, you have the possibility to specify a date at which the Task will be re-opened. By default, the proposed re-opening date will be one week from now. If the Task hasn't been resolved automatically until the specified date, it will re-open and disappear again as highlighted Task in the Action Table.
The comment (reason to put a Task into the status "Snoozed") can be seen in the Activity History of the respective record.
 |
 |
Task Label
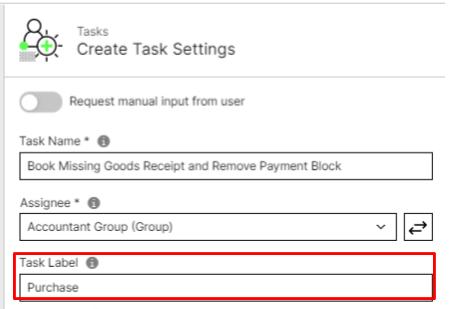
As described in the Overview, you can optionally define a Task Label in the "Create Task" Action. It allows you to filter the existing Tasks in the Action Table. Besides (or instead of) displaying all Tasks, you can add columns in which only Tasks of a specific Label get displayed.
 |
How to add a column to your Action Table which displays only Tasks of a specific Label:
Assign the Label of your choice to all Tasks which fit the business meaning in the "Create Task" action.
Add a column to your Table with the id "<your_record>_TASK_<your_label>_COUNT_GEN".
data:
  columns:
  - id: "INVOICE.INVOICE_BELNR"
  - id: "INVOICE_TASK_Purchase_COUNT_GEN"