Scheduling machine learning notebooks
Machine learning notebooks can be executed on a recurring schedule within the Celonis Platform, allowing you to control when they execute, how long the timeout is, and setting the maximum number of retries.
Once notebooks are scheduled and running, you have a number of management options.
Important
For your notebook to be successfully scheduled, your workbench must contain a valid execution file.
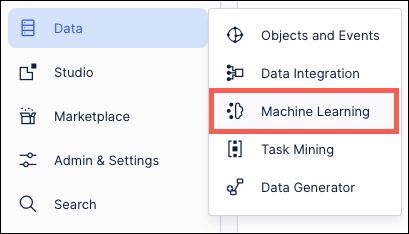
Go to Data > Machine Learning.
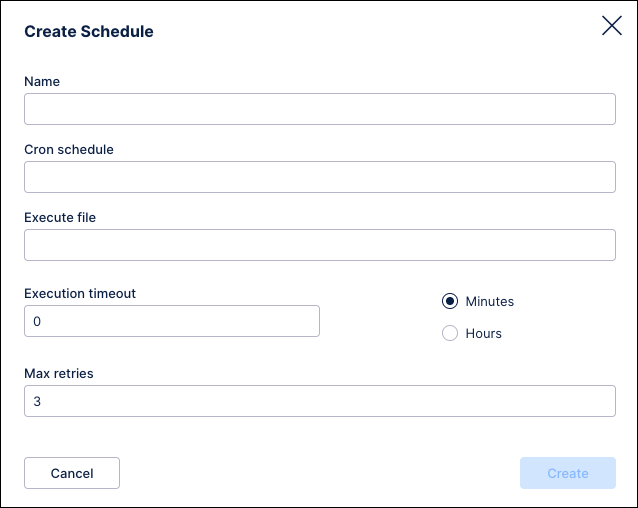
Click Scheduling and then click the Create Schedule button in the upper right.

Configure your schedule, including the name, selecting which workbench and execution file to use, and setting your frequency options.
Time
Hourly (Full hour, quarter past, half past, quarter to)
Every few hours (with customizable number of hours, plus the hourly options above)
Daily (with customizable time)
Weekly (select one or more days and the time the notebook should run)
Monthly (select a calendar day and the time the notebook should run)
Custom cron (freely define a scheduling plan by using space-separated values, with 1 minute being the minimum period between runs)
Configuration / Frequency options
Execution timeout (select from minutes or hours)
Maximum retries (select the number of retires before the notebook stops running)
Receive emails for failed executions (with an email summary sent to the email address you are accessing your Celonis Platform team with)
Click Create.
Your schedule is configured and set to disabled, meaning that it will not currently run on your configured frequency. To enable this, click the Options button and select Enable.
Once scheduled, you can manage your machine learning notebook schedules by clicking the options (three dots) button:
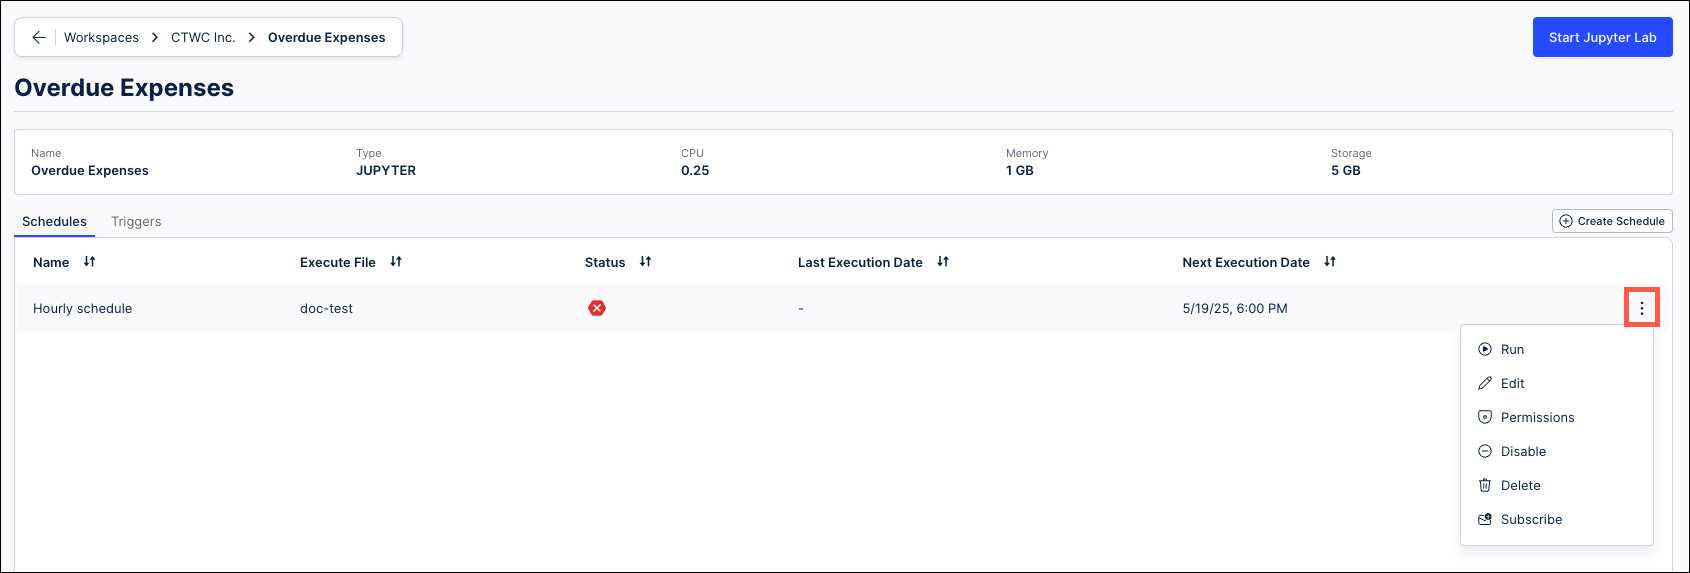
Your options include:
Run: Manually run or execute you notebook once, regardless of your configured frequency and whether your schedule has been enabled.
Edit: Update all the details of your schedule and save any changes you made.
Delete: Disable and delete this schedule from your list, with no reversal or restoration possible.
Permissions: Configure notebook level permissions only.
Enable / Disable: Once enabled, your schedule will run on your configured frequency.
Subscribe / Unsubscribe: Receive email notifications whenever your schedule runs.