Involve business users with Tasks
Important
Tasks can only be created for Records which have a unique Record Identifier. This is configured in the Knowledge Model for the respective Record.
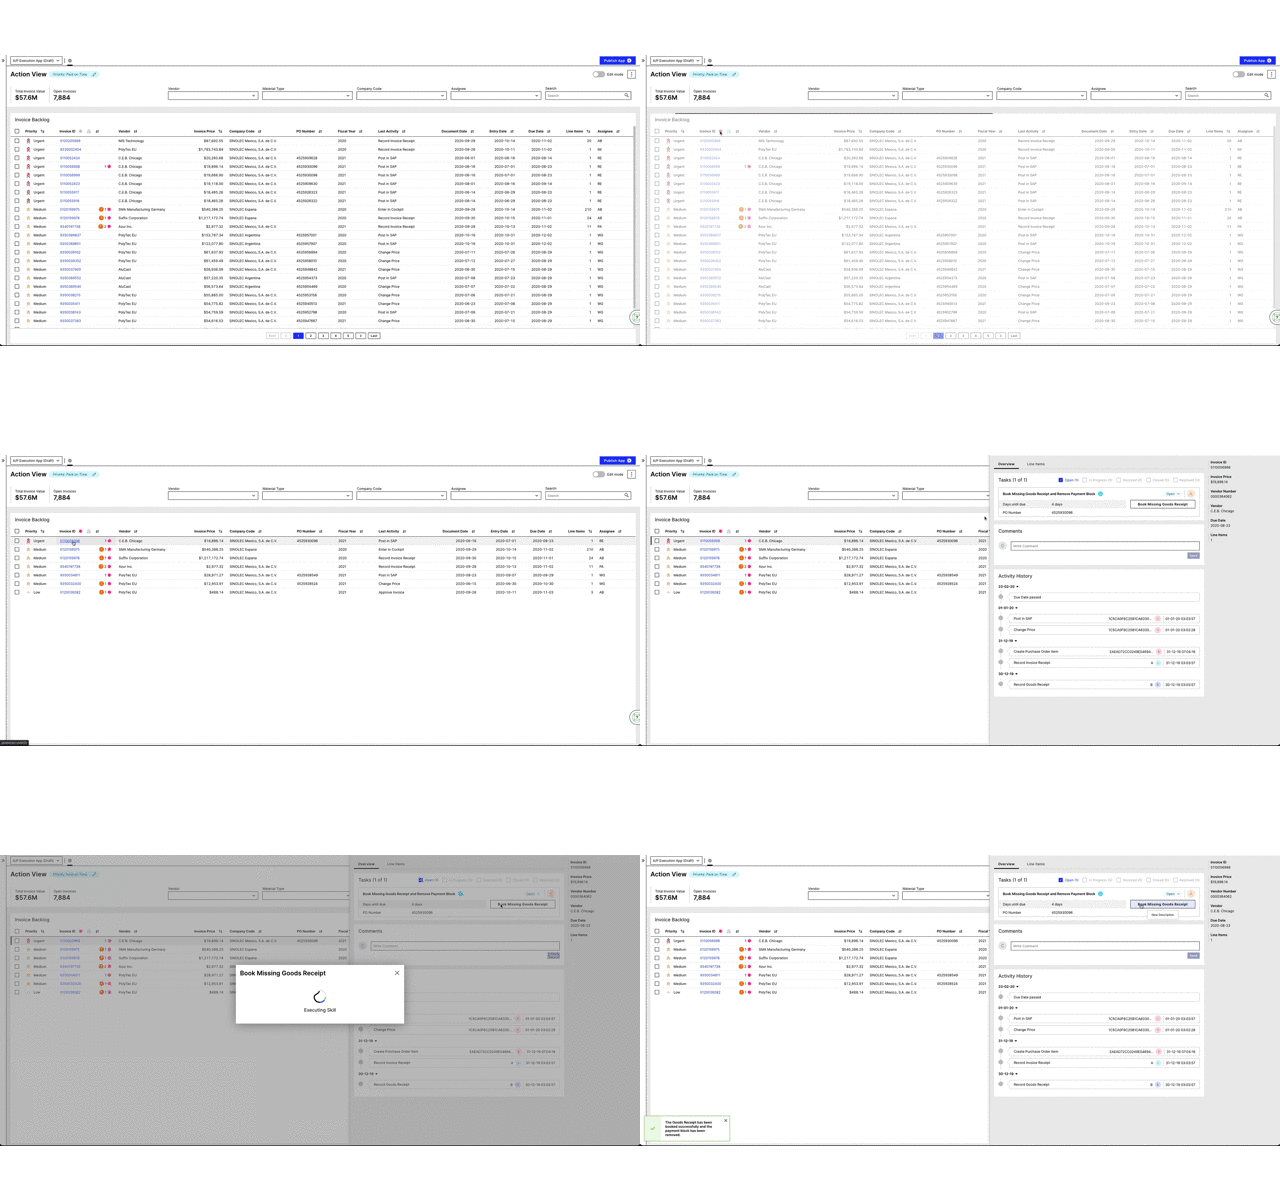 |
Step by step guide
Step 1: Create a new Skill in your package
Define a Skill name.
The Skill key will be automatically created. The Skill key is unique and can be used to refer to a specific Skill throughout the Celonis Platform.
Optional: Add a Skill description.
Click Create.
Step 2: Set up the Smart Sensor as trigger of the Skill
The purpose of a Smart Sensor is to react automatically upon a specified data incident, also called Signal, which can be defined in the filter statement(s).
In the Skill that you created in Step 1, click Add a Sensor.
Select "Smart Sensor" which you can find in the "Celonis" category.
Select the inputs for your Smart Sensor (for a detailed description of the configuration, see Celonis Smart Sensor:
Knowledge Model in which you defined the filter.
Record to which the Smart Sensor is related.
Add one or more filter(s)
Choose the State of the Smart Sensor to be "Active" if it constantly runs in the background.
Click Save.
Click Add Next Step.
Note
Alternatively, a Manual Sensor can be used instead of the Smart Sensor. For more details and the differences between those two options, see the Manual Task creation section below.
Step 3: Add a Task
Select "Create Task" which you can find in the "Tasks" group.
Configure the Task by:
Entering a Task name (required): The name will later be displayed in the Task List.
Selecting an Assignee (required): Select an email address or a group name from the drop-down menu.
Choosing a Task Label (optional)
Adding a Description (optional): This information will be displayed when hovering over the info button in the Task List.
Choosing the Task Attributes (required): Select the attributes you want to display with the Task in the Task List.
Click Save.
Click Add Next Step.
Step 4: Create Task Actions
Give a name to the Action that the Business User can trigger and add a description optionally. The description will be displayed to the Business User as a tooltip when hovering over the Task Action button in the Task List.
You can optionally add more Task Actions if the Business User should be able to choose between several Actions for this Task.
Step 5: Add Actions to your Skill
You can add more than one Action to your Skill. Users can trigger any of these Actions directly from their task list. For instructions to configure extra Actions for a Skill, see Task configuration.
Note
In order to connect to a third-party system or to a Celonis internal application, make sure that you set up all needed connections and assign them to connection variables correctly.
Step 6: Testing and publishing your Skill
When you have defined all required inputs, click Test to monitor the Test Execution Logs. This will only be possible if all the required inputs are defined.
Edit the Skill where appropriate and click Publish to execute the Skill for all existing incidents.
Note
Note 1: The Skill creation is only completed when the Skill is published. Saving is not enough if you want the Skill to be active.
Note 2: Once a Skill is published the Smart Sensor checks for new incidents constantly and executes the Skill automatically if applicable. New incidents can occur due to a data model reload or due to updated filter conditions in the Knowledge Model (see Step 2). Saving the modified Knowledge Model counts as an update since you don't necessarily have to publish it.
Step 7: Monitor and Edit your Skill
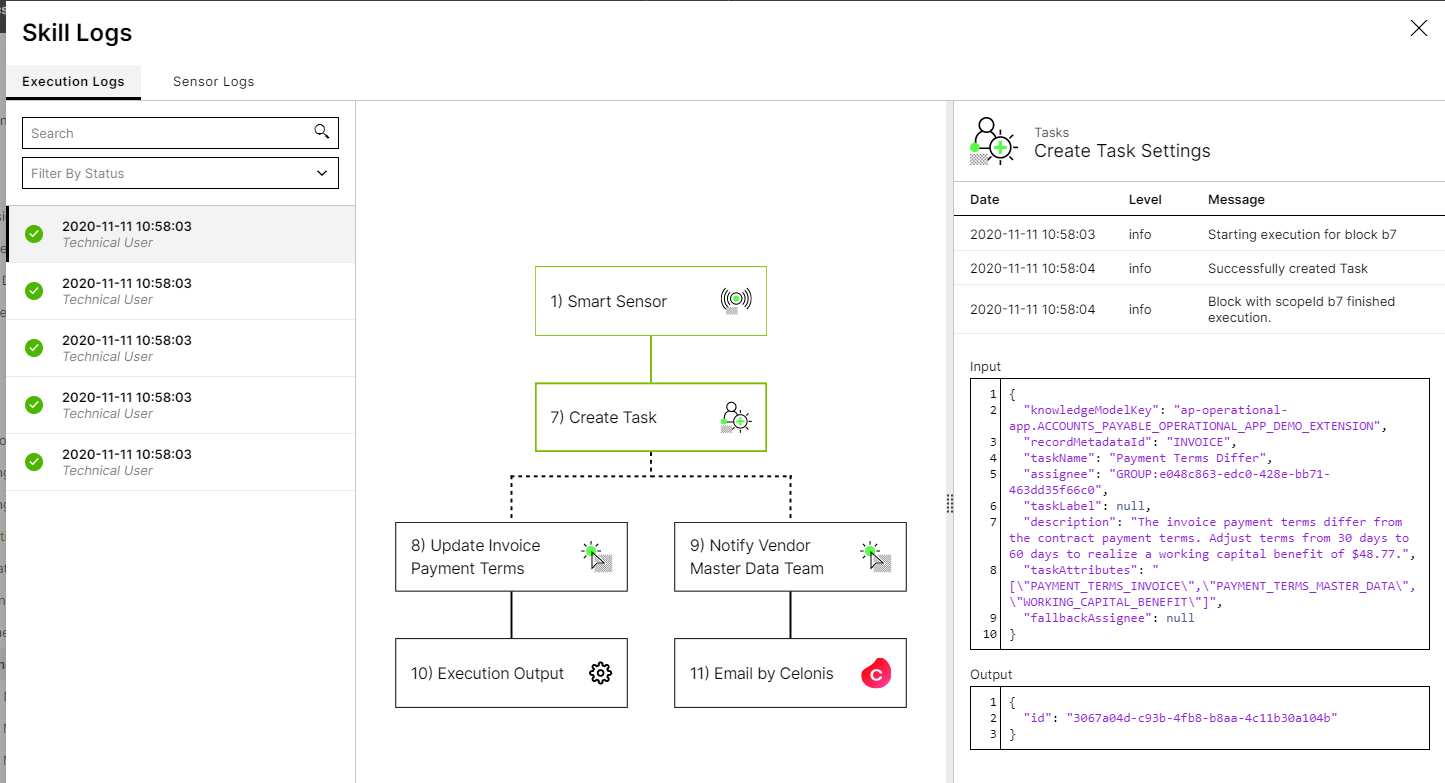
Monitor the Execution and the Sensor Logs of your Skill by clicking Logs:
The Execution Logs show how often and when the Skill was executed and which path was taken (fields in green).
The Sensor Logs show how many new incidents were detected by the Smart Sensor, when they were detected and if they were resolved.
Edit your Skill by clicking Edit and Publish again once all changes are made.
Note
Note 1: When you publish the edited Skill the changes will directly apply to all existing Tasks as well as to the ones created in the following executions. But you have to make sure to publish your package - saving is not enough.
Note 2: A resolved Task will not be opened again when publishing the edited Skill. New open Tasks will only be triggered for new incidents but in this case, the incident stays the same.
Execution Logs:
 |
Sensor Logs:
 |
Step 8: Visualizing Tasks
To visualize the created Tasks, we recommend creating a Table from which a Profile View can be opened via a link. The Table contains all attributes of interest and will be called Action Table as it shows if and how many open Tasks exist on the respective objects. The Profile View can comprise a Task List among others which give more details about the Tasks on the object you are looking at.
Create an Action Table
Create a new Action View or edit an existing one.
Create a new Table in this View or edit an existing one.
Columns or KPIs based on Task information can be added to the table.
Create a Task List on a Profile View and link it to the Action Table
Create a new Profile View.
Add a Task List to the Profile View as a component.
Add other possible Components to the Profile View.
Create the link from the Action Table to the Profile View by editing the Table.
Manual Task creation
The step-by-step guide above describes how a Smart Sensor can be used as the trigger to create a Task. In addition, it is also possible to create Tasks using the Manual Sensor. The following table describes the main differences between those two options.
Task created by | |
Smart Sensor | Manual Sensor |
|---|---|
|
|
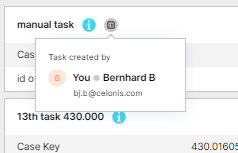
To distinguish those Task types in the Task list, an icon highlights those Tasks which have been created by a user.
When hovering above the icon, the name and contact of the Task creator are shown.
 |
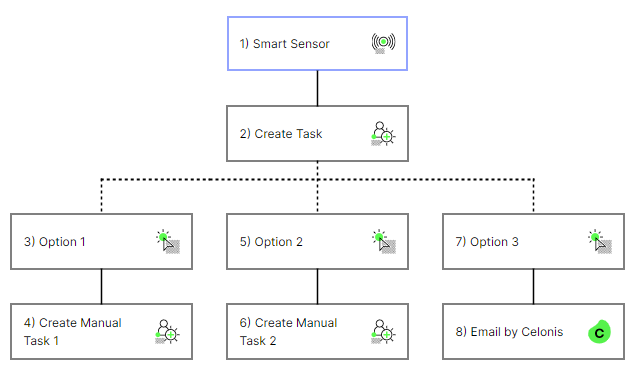
Combination of Smart Sensor Task 2) and Manual Tasks 4), 6)
 |
Use Cases for Manual Tasks
Manual Tasks can be created via default actions (e.g., a User selects one or several items in a table via the checkbox, then creates manual Tasks and assigns them to one of their team members)
The creation of a Manual Tasks can also be one of the Task actions of another Task that was created by a Smart Sensor (see screenshot with a combination of Smart Sensor Task and Manual Tasks). In this case, the Smart Sensor will only resolve the first Task while the others have to be resolved by a User.
Setting up manual Task creation
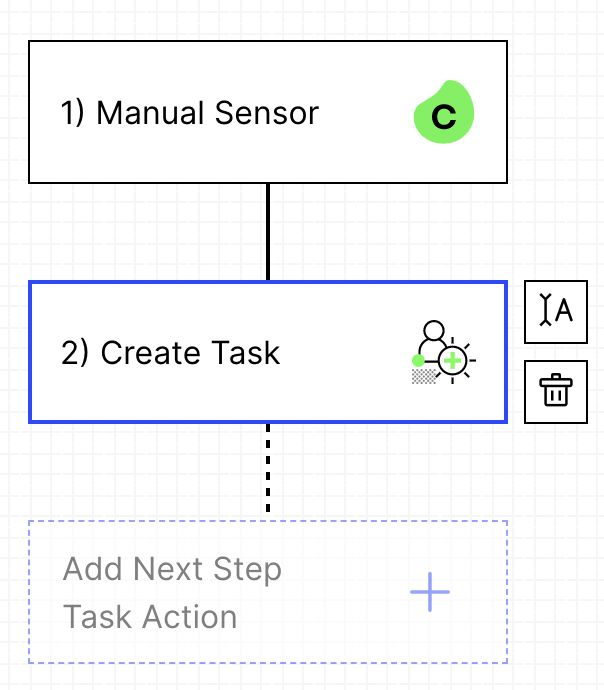
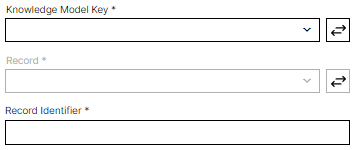
You can follow the step-by-step guide above. The only difference is that the first three entries in the "Create Task" action (shown in the screenshot below) have to be filled by the user. If a Smart Sensor is used, those fields are filled automatically by the Smart Sensor in the background and are not displayed to the user.
Additional inputs when creating a manual Task
 |