Creating an Annotation Builder from a table
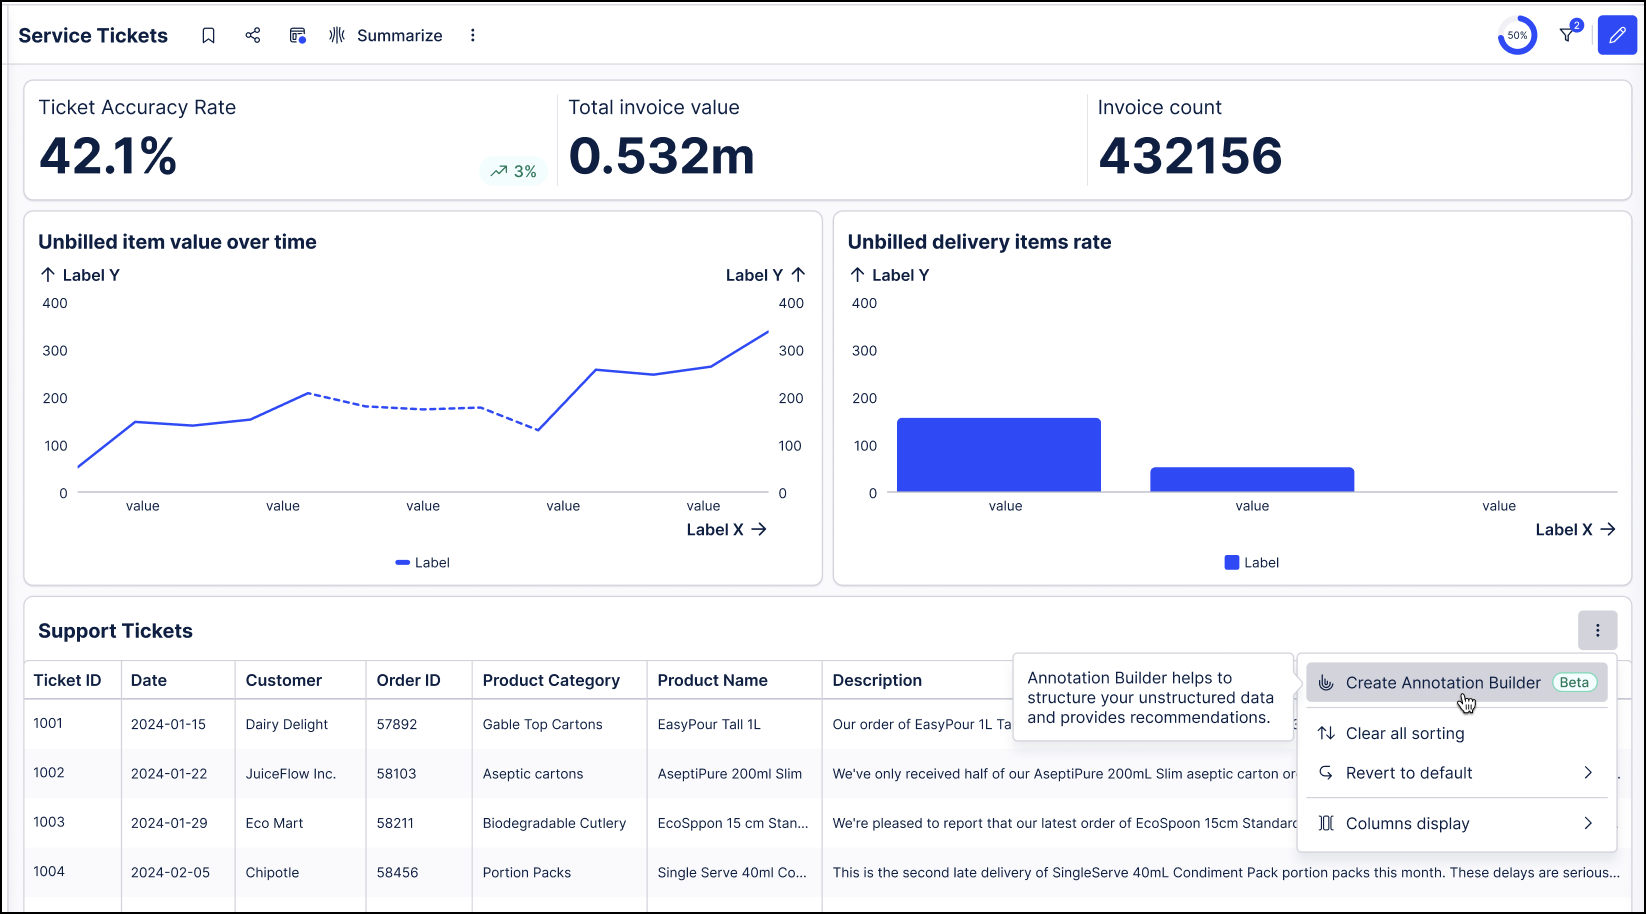
Annotation Builders can be created directly from a View table in Studio by clicking the options menu (three dots) above the table and selecting the "Create Annotation Builder" option. This will create an Annotation Builder that is specific to the data in that table with the inputs automatically mapped to the tables columns.
 |
Selecting this option launches the Create Annotation Builder window that is used to create an initial configuration for this new Annotation Builder that can be modified as needed. The Input Data section of the configuration is completed by mapping the existing table columns as inputs. These connections will be completed automatically but can be modified as needed. The description of the use case entered on the Create Annotation Builder screen will be analyzed by AI to create the initial system prompts for how this Annotation Builder will function and set the expected outputs created by the analysis.
Use the following procedure to create a new Annotation Builder from an existing Studio View:
In Studio, open the View containing the table you want to use to create the Annotation Builder.
On the table, click the options menu (three dots) in the header and select “Create Annotation Builder”.

In the Create Annotation Builder window, the name of the new Annotation Builder defaults based on the name of the table, but can be modified.
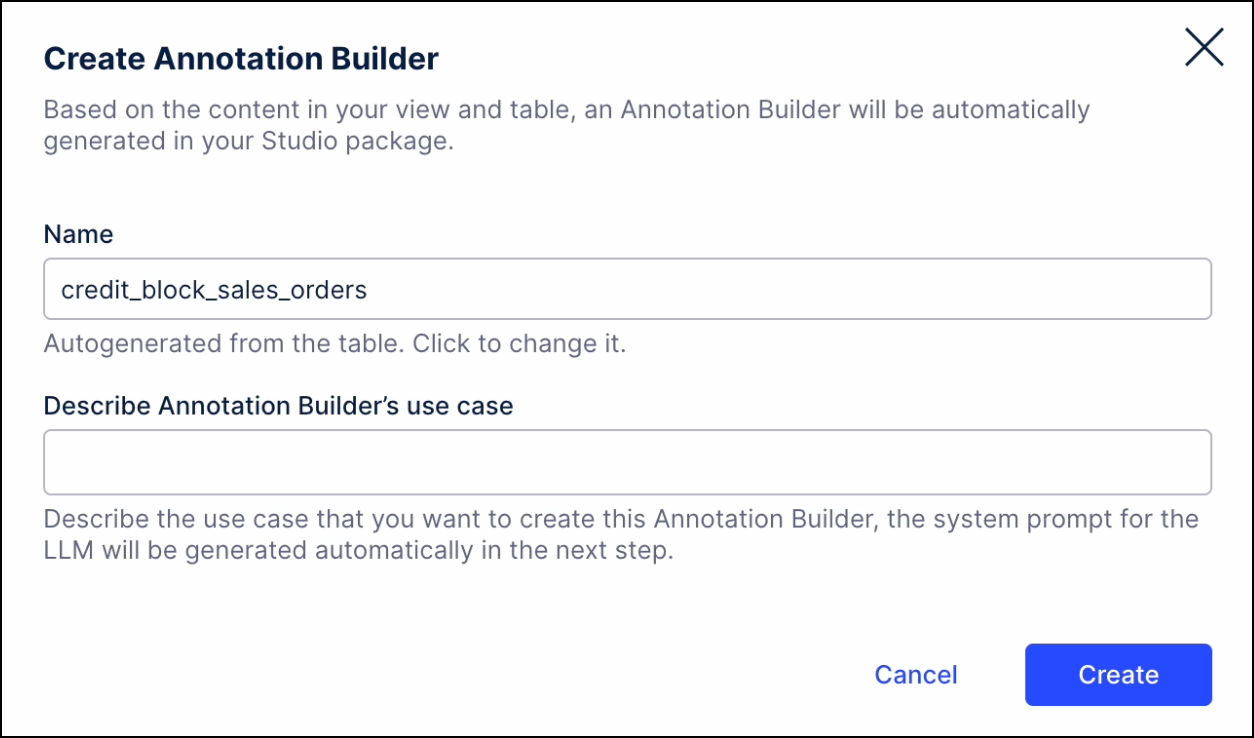
In the Describe Annotation Builder’s use case field, enter a description of the use case for this new Annotation Builder, how you want it to complete its function, and any additional instructions. This description will be used by AI to generate the initial System Prompt for this Annotation Builder.
Click Create. The Annotation Builder is generated and the configuration screen is shown with all sections completed.
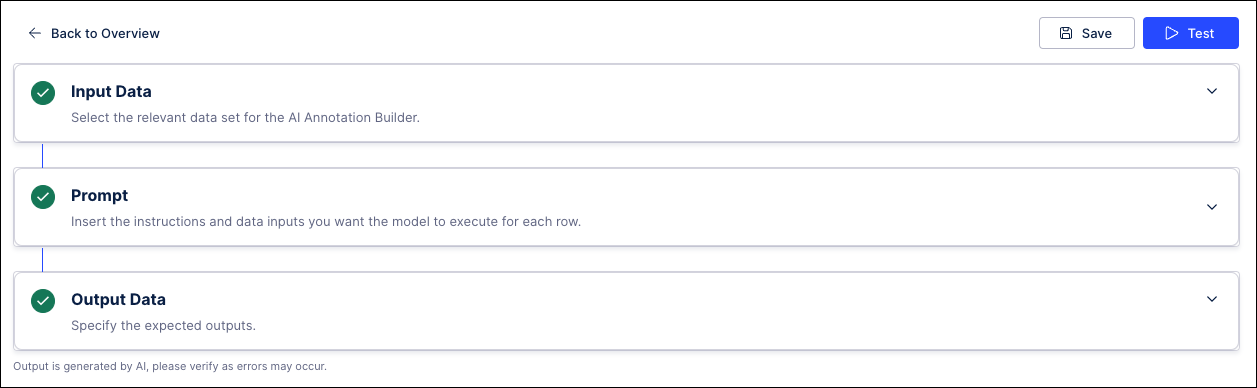
Check each section to verify that the configuration is accurate and make changes as needed.
In the Input Data section, make sure the inputs are mapped to the columns from the View table correctly and assign any additional inputs needed.
Click Save & Continue.
In the System Prompt section, the initial prompt is created using AI-technology and should be verified for accuracy and completeness. Think of the prompts as how you want this Annotation Builder to analyze the data from the table and add any additional instructions for how you want this Annotation Builder to perform its task.
In the Expected Outputs section, configure the columns for the data generated by this Annotation Builder, including the name and description for each column. Add any additional columns required and enable the Add Reasoning column toggle if needed.
Click Save & Continue when finished. You are now ready to test this Annotation Builder configuration to preview the outputs that can be generated using the data from this table.