Creating and managing enhanced View variables
Enhanced View variables allow you to centrally create and manage information that is referenced and reused across components within the same View. You can use enhanced View variables in buttons, KPI lists, tables, and input dropdowns.
For an example of using enhanced view variables, see: Enhanced variable use case example using an input box.
And for an overview of variable types, see: Enhanced variables.
To create enhanced View variables when editing your View:
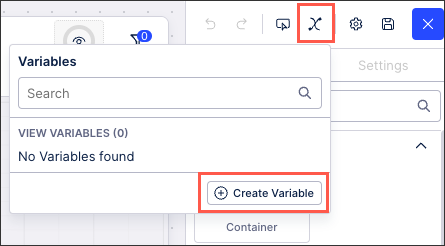
Click Variables - Create Variable:
Enter a variable name, select a variable type, and optionally enter a description.
Key: This should be a unique ID, allowing for the variable to be referenced across components. Avoid using special characters here.
Your variable key can then be referenced in your View as:
${KEY}Type: Choose between string (text), number (#), boolean (true /false), and object.
For object variables, see: Object variables
Default Value (optional): This is the value that will be referenced unless otherwise stated.
Optional: Enable Advanced Options and enter a variable description and choose the variable and user scope.
Description: Provide further information here, giving your team added context where needed.
Variable Scope: Choose whether this variable is saved at a View level only, within the knowledge model (which can be referenced by all Views created using that model), or for all assets within the existing package.
User Scope: Choose whether this variable is specific to your account or is available for all users within your team.
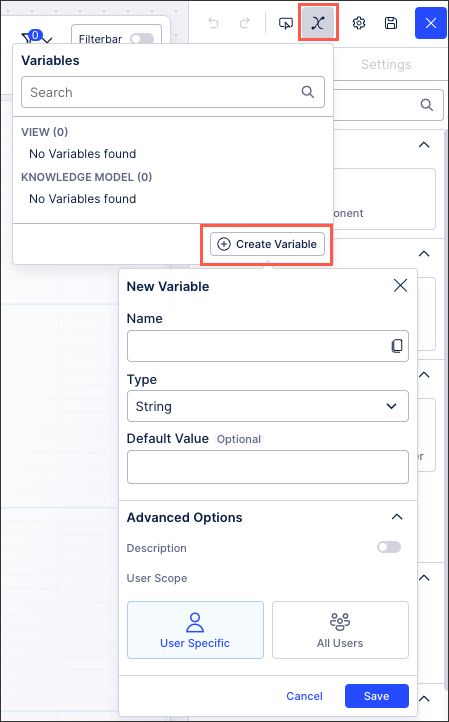
Click Save.
Once saved, your enhanced View variables are then displayed in the variables menu within that View only.
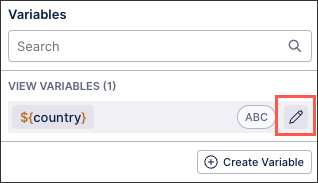
To edit or delete an existing variable, click Edit:
 |
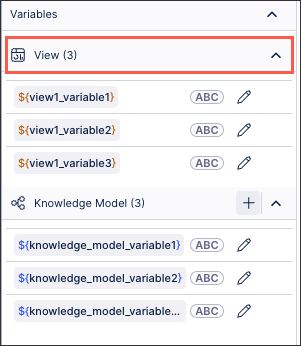
Enhanced view variables can also be seen in the PQL editor, accessed when editing View components that use data:
 |
An input box saves a value that is entered manually by a user, with that value then used throughout your View. You can save the input value as either a View variable or a Knowledge Model variable. This variable can then be used in other components to adjust the View, based on the manual value entered by the user.
In this example, the input box allows users to enter the minimum net value:
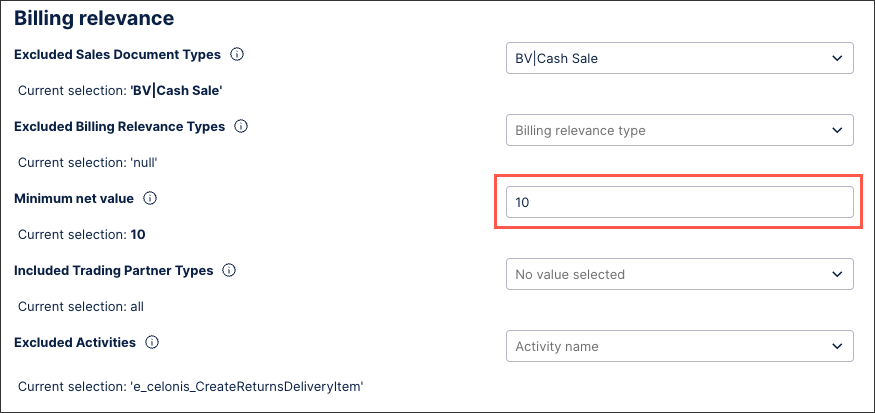 |
This input box example is configured by saving the user input as a Knowledge Model variable. In this case, the variable is a number type:
${minimum_value_threshold_unbilledcurrency)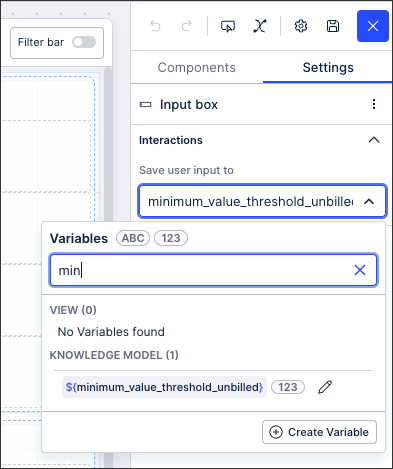
This variable can then be used in other components, such as a text box:
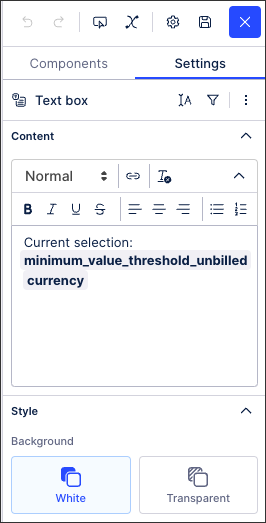
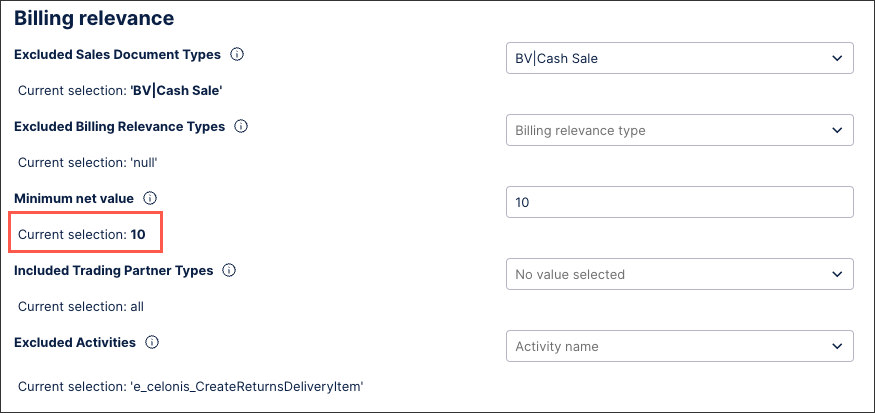
The published version of the app displays the value entered (10):
 |
Follow these guidelines to ensure data and string type variables are correctly interpreted and function as intended in PQL.
Date type variables: When comparing data type variables, the variable formatting should be:
{t ${date_variable_name_here}}String type variables: When using string type variables, the variable formatting should be:
('${string_variable_name_here}')Note
If you don't use quotation marks, the variable will be treated as if it is a PQL expression. For example, a string variable value of 2025-02-01 without quotation marks will result in a literal calculation of 2025-2-1 = 2022.
Date string variables: Data string inputs can be referenced in PQL using {d } or integer inputs with a count of milliseconds since 01.01.1970 using {t }. Two formats are supported as date string inputs:
yyyy-MM-dd HH:mm:ss
yyyy-MM-dd