Route Data to Employee
Searching for and manually retrieving data for the correct employee contact can be tedious and difficult to maintain. This automation solution uses the Get Assignee module to automatically identify the right person for you. By replacing manual forwarding with an Action Flow and a one-time Assignment Rule, you can efficiently manage and scale the distribution of large volumes of data, such as routing Sales Orders to their respective Sales Organizations.
The following Action Flow automates the end-to-end process of identifying the correct stakeholders and delivering data to them:
Data retrieval: Pulls specific data points (e.g., Sales Orders) required to identify the correct assignee.
Aggregation: Consolidates and formats the retrieved data into a clean, readable summary.
Routing and delivery: Automatically identifies the assigned employee via the Get Assignee module and pushes the consolidated report directly to their Slack.
 |
Below you will find the step-by-step guide for configuring each module of the above Action Flow.
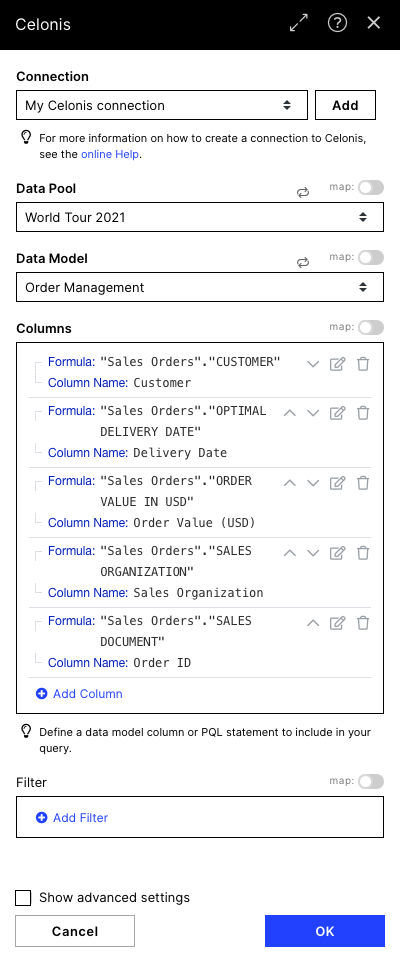
To get the data you want to send to an assignee as well as to find the right assignee you have to set up the Celonis Query Data module. All information on how to do it can be found here. We use some demo data here as an example, getting Customer Names, Delivery Dates, Order Value, Sales Organization, and the Order ID.
 |
Configuration:
Action Flows Module: Celonis
Action: Query Data
 |
In this module we focus on two important steps:
1. Preparing the data to be sent
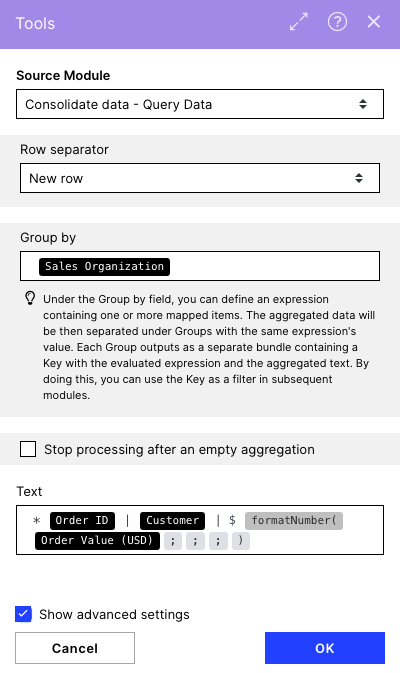
Text: {{1.`Order ID`}} | {{1.Customer}} | $ {{formatNumber(1.`Order Value (USD)`; ; ; )}}
Note
This format helps you to build some kind of table for Slack. If you use another messaging tool you could also build a HTML table. Find more information on potential alternatives here.
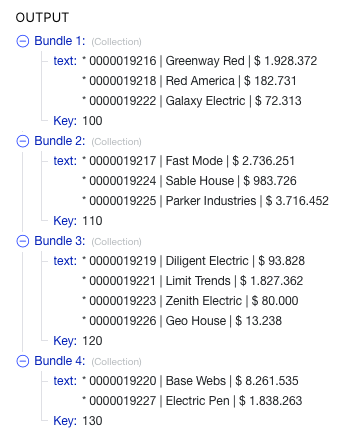
2. The grouping by a specific Sales Organization
Group by: Sales Organization Item of the Celonis Query Data module
This ensures we get an output where we have the prepared data grouped by the respective Sales Organizations leading to an output like the following:
 |
Note
In order to get the group by possibility you have to enable the advanced settings
 |
Configuration:
Action Flows Module: Tools
Action: Text Aggregator
 |
After we got the data for the specific Sales Organizations we want to investigate the right person to send this data to.
We use the Get Assignee module which is explained in detail here.
You have to create an Assignment Rule if not already happened following the guide you can find here.
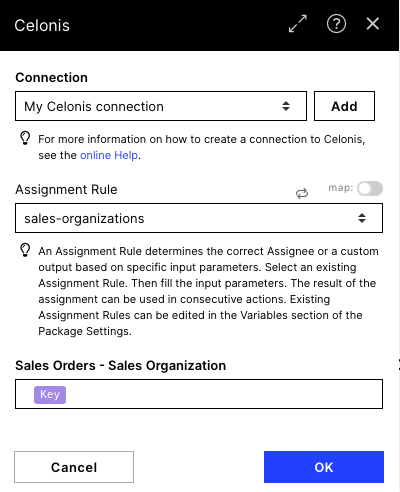
If setting up the Assignment Rule in the package settings you will find it in the dropdown menu within the Get Assignee module and the defined input field(s) used for the assignment will pop up when selecting the rule. In our example case we have to input the Sales Organization of the specific Sales Orders which we used for the group by in the module before.
Sales Orders - Sales Organization: Key Item of the Text Aggregator module (→ Sales Organizations)
 |
Configuration:
Action Flows Module: Celonis
Action: Get Assignee
 |
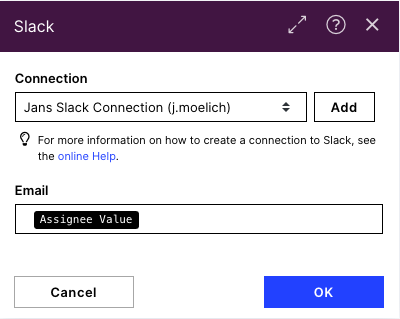
Within our Assignment Rule we defined to get the email addresses of the people in charge of the Sales Organizations back which we now use to write a message on slack. We first have to find the right chat by using the mail address.
Email: Assignee Value Item of the Get Assignee module
 |
Configuration:
Action Flows Module: Slack
Action: Search for User
 |
Having the right channels to send the message to as well as the right recipients we now can use our initially created content within the slack message to send an update.
Enter a channel ID or name: Enter manually
Channel ID or name: User ID Item from the Slack module before
Text: Hey {{6.profile.first_name}},
Please find all orders for *Sales Org. {{3.`__IMTKEY__`}}* below:
Order ID | Customer | Net Value
{{3.text}}
 |
Configuration:
Action Flows Module: Slack
Action: Create a message
 |