Sending audit logs to Splunk
By creating an OAuth client and granting that client API permissions, you can configure a RESTful HTTP GET request for your Celonis Platform audit logs. This GET request can then be configured as a data input in your Splunk account, enabling Splunk to frequently pull your audit logs from your team.
Before using your Splunk account, you need to complete the following steps in the Celonis Platform:
After completing these steps, you can then add the data input in your Splunk account. As this is an external platform, we recommend viewing their website for the latest step-by-step guides and user interfaces: Splunk.com - Getting data from your REST APIs in Splunk.
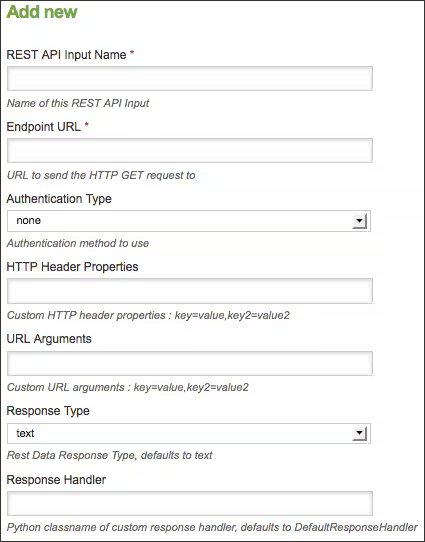
For illustration purposes only, the following is an example of adding a new data input in Splunk:
Tip
Alternatively, you can create an application key and assign the following permissions: Audit Log API, Login History API, and Studio Adoption APIs.
For more information, see: Application keys.
To start, you need to create an OAuth client in your team and then grant this client API permissions.
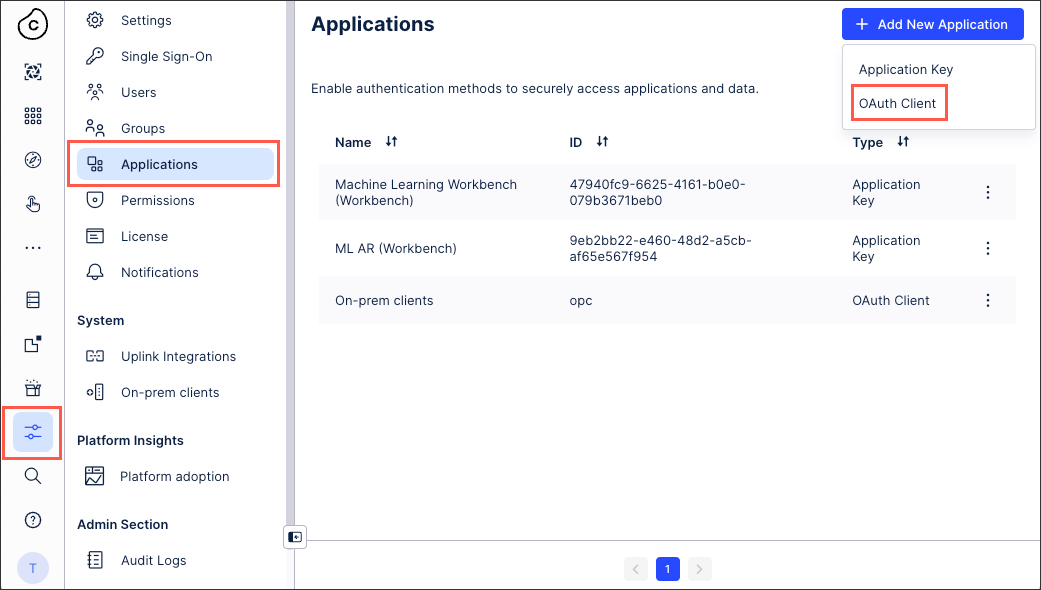
Click Admin & Settings and select Applications.
Click Add New Application - OAuth client and create your OAuth client.
When creating your OAuth client, use the following configurations:
Authentication method: Client secret post
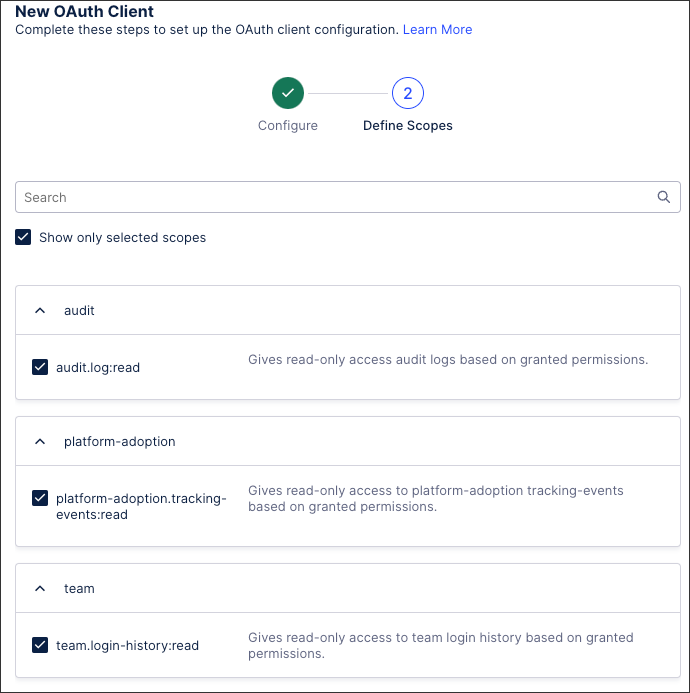
Scopes to select:
audit.log:read (for the Audit Log API)
platform-adoption.tracking-events:read (for the Studio Adoption API)
team.login-history:read (for the Login History API)
team.user-group-info:read (for Team Members info API)
Click Create and then copy the client ID and client secret to your clipboard for later use.
Click Permissions and edit Team permissions.
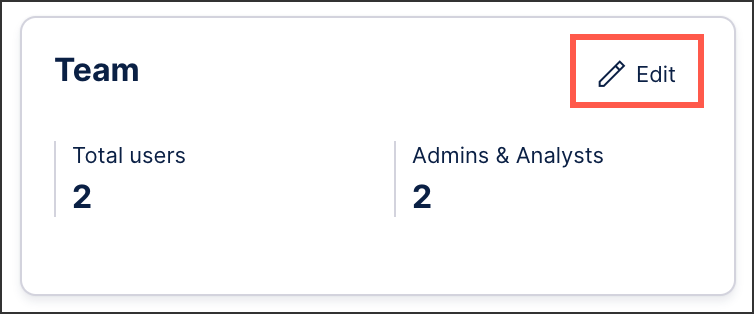
Assign Audit Log API, Login History API, and Studio Adoption APIs permissions to your newly created application as required.

Click Save.
The OAuth client now has the relevant API permissions. You now need to request an OAuth access token.
After registering your OAuth client and assigning it the necessary permissions in your Celonis Platform team, you can now use a REST API client such as Postman to make a POST request for your access token.
To do this, you need your token URL:
https://<team>.<cluster>.celonis.cloud/oauth2/token
And in Postman:
 |
You then need to append at least two query parameters to your token URL:
Grant type: This must be "client_credentials" as this is currently the supported grant type for OAuth clients.
Scope: This should be the Celonis Platform services that you have granted permissions to (based on the service string). In our example, we've included Studio:
https://<team>.<cluster>.celonis.cloud/oauth2/token?grant_type=client_credentials&scope=studio
And in Postman:
 |
You can then configure the Authorization. In this example, we're using a basic authentication using a username (the client ID) and password (the client secret):
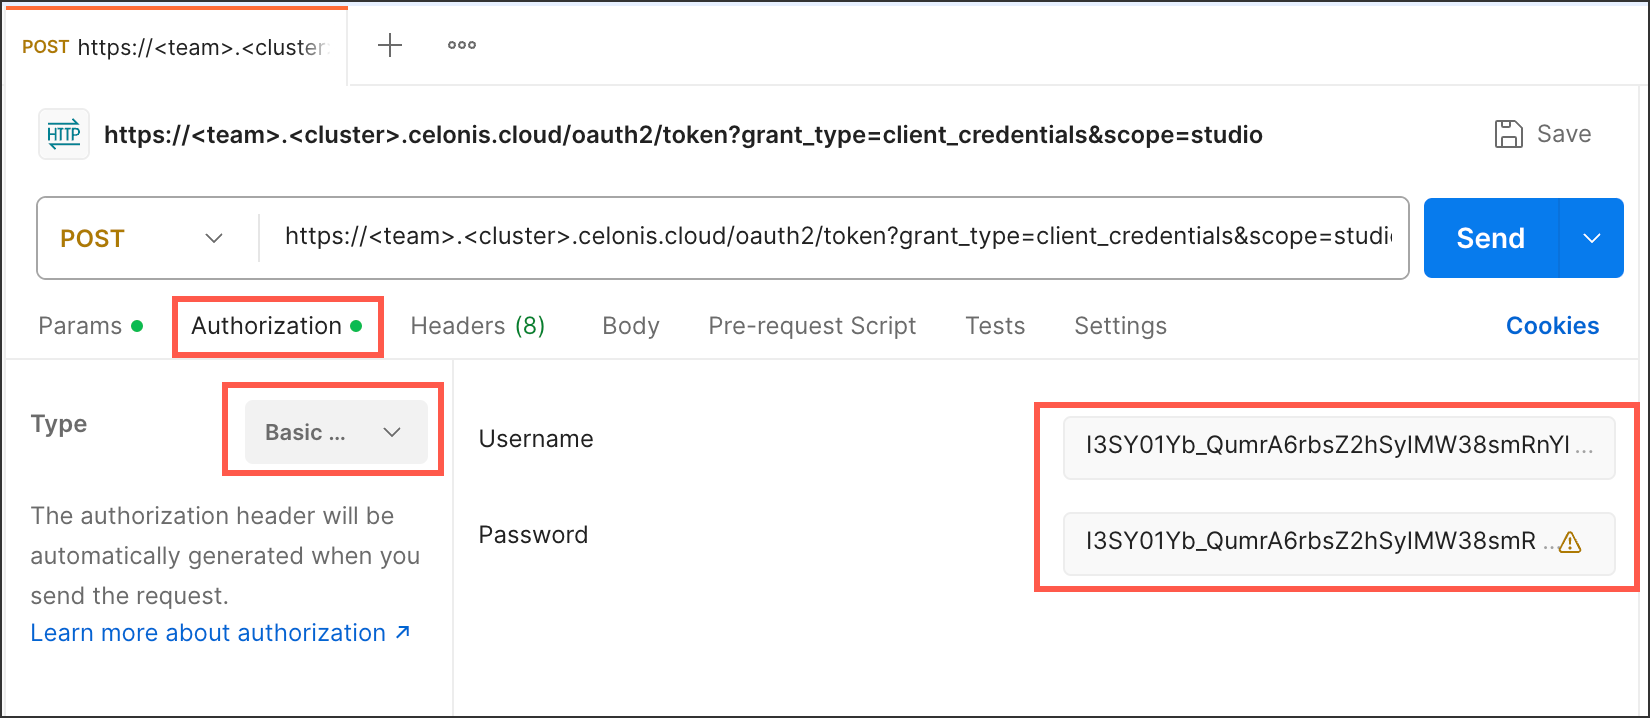 |
This configuration gives you an OAuth request such as:
curl --request POST \
  --url https://<team>.<cluster>.celonis.cloud/oauth2/token \
  --header 'content-type: multipart/form-data' \
  --form client_id=<client id> \
  --form client_secret=<client secret> \
  --form grant_type=client_credentials \
  --form scope=<scope1 scope2 scopeN>
And running the request returns a response that includes your access token:
{
	"access_token": "randomizedAcessToken",
	"scope": "scope1 scope2 scopeN",
	"token_type": "Bearer",
	"expires_in": 899
}
This access token can then be used with a bearer token authentication method to request access to and information from the Celonis Platform services you need:
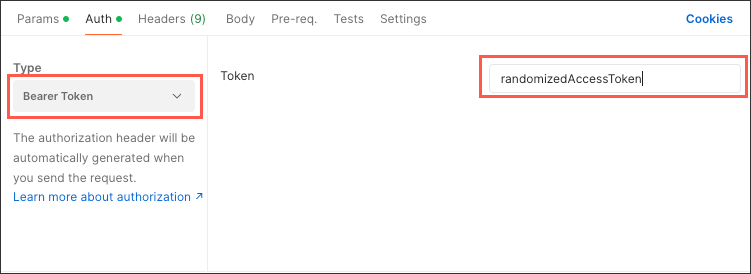 |
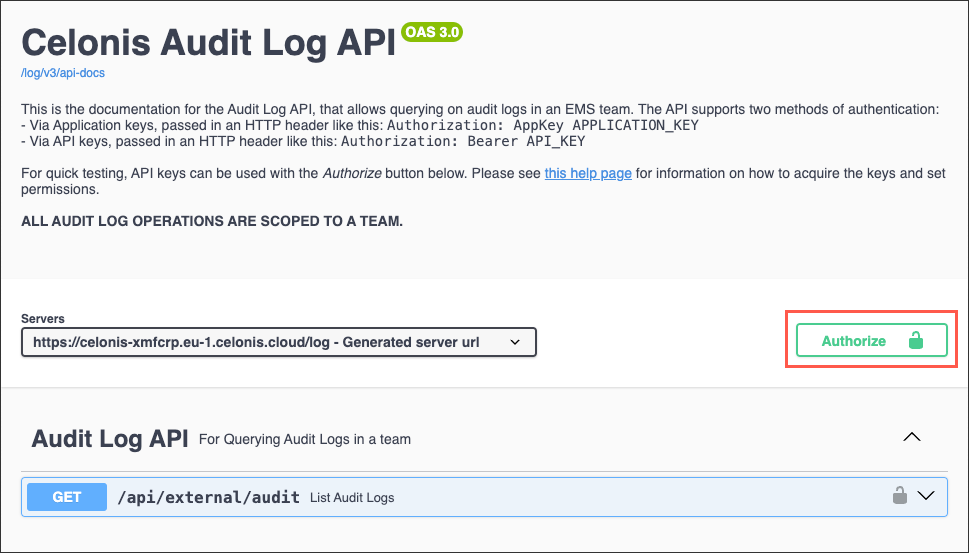
You can now test your APIs with Swagger UI using your team name and environment cluster to access Swagger using this URL:
https://[teamname].[realm].celonis.cloud/swagger-ui/index.html?configUrl=/log/v3/api-docs/swagger-config
Once on the Swagger UI, follow these steps to test your API:
Click Authorize.
Using an OAuth client: Enter "Bearer", followed by a space and then copy the client ID you obtained for the client. For example:
Bearer XxxxxxAxxxxBxxxxCxxxXBBBBX
Using an application key: Enter "AppKey", followed by a space and then copy your application key from the earlier procedure. For example:
AppKey XxxxxxAxxxxBxxxxCxxxXBBBB
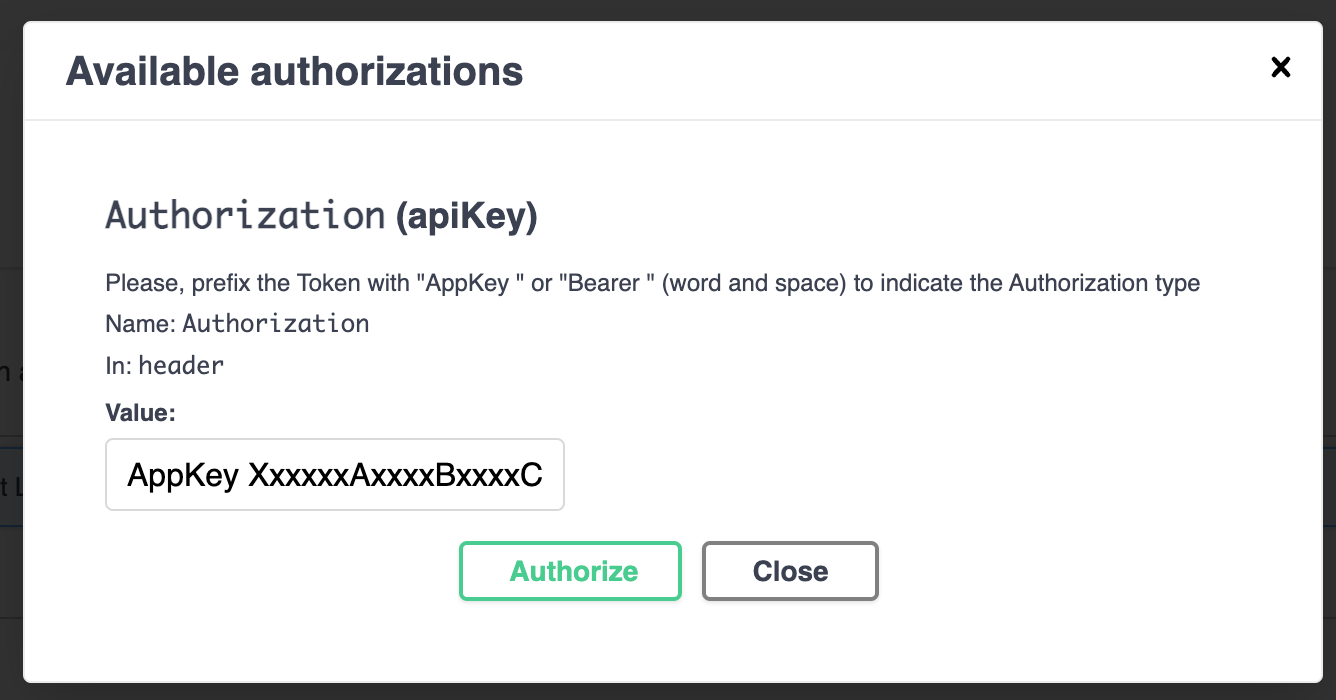
Click Authorize. Once authorization is successful, click Close.
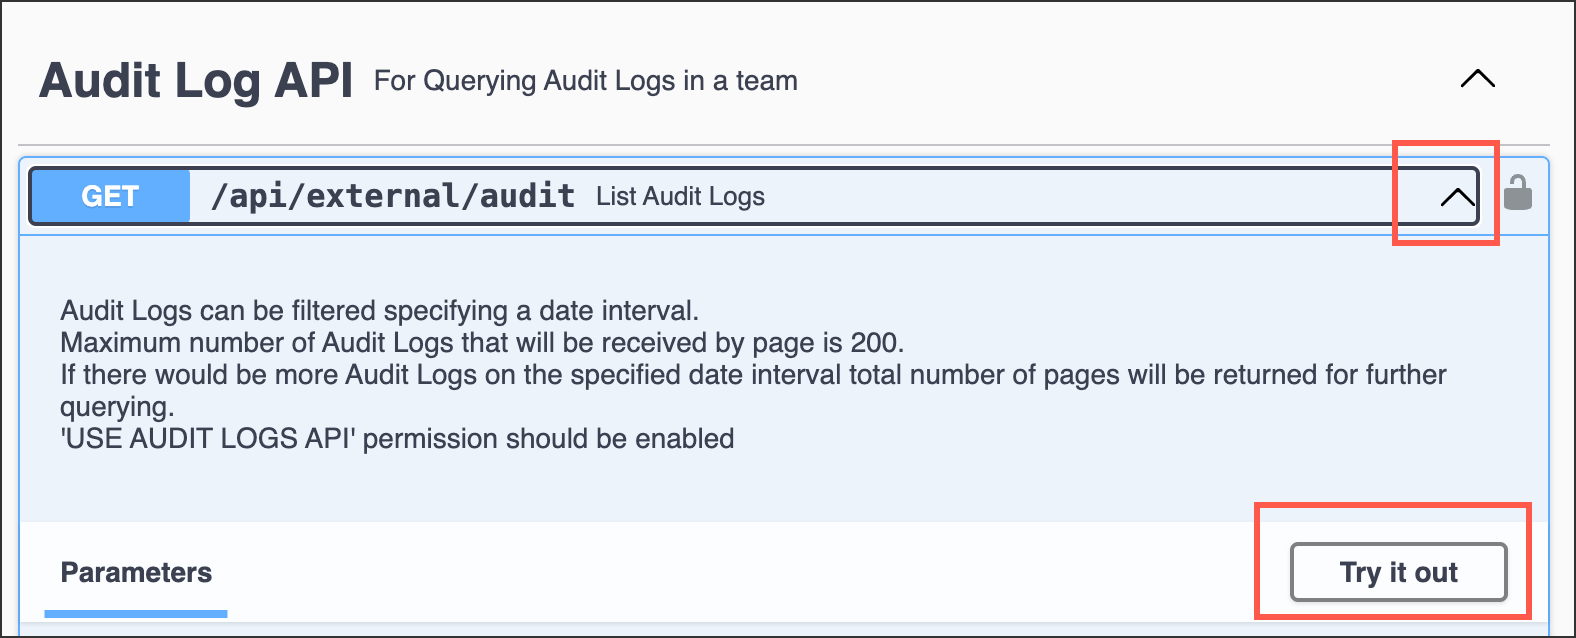
Expand the GET call for the API you want to test and click Try it out.
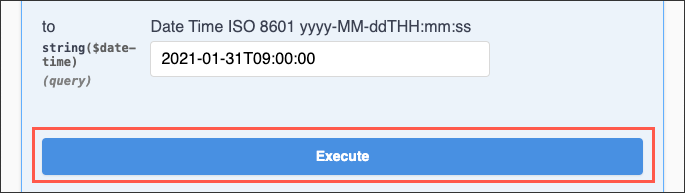
Click Execute.
You will now see the response from the API, including the header that shows the AppKey Token and the URL.