Event Processing Rules - Visual Editor
Tip
Instead of manually writing the event processing rules, you can also use the visual editor provided by the configuration editor. You will find it on the Event Processing Rules tab
Note
The visual editor does not currently cover the full expressiveness of the Event Processing Rule language. However, it should be capable of the most common use cases.
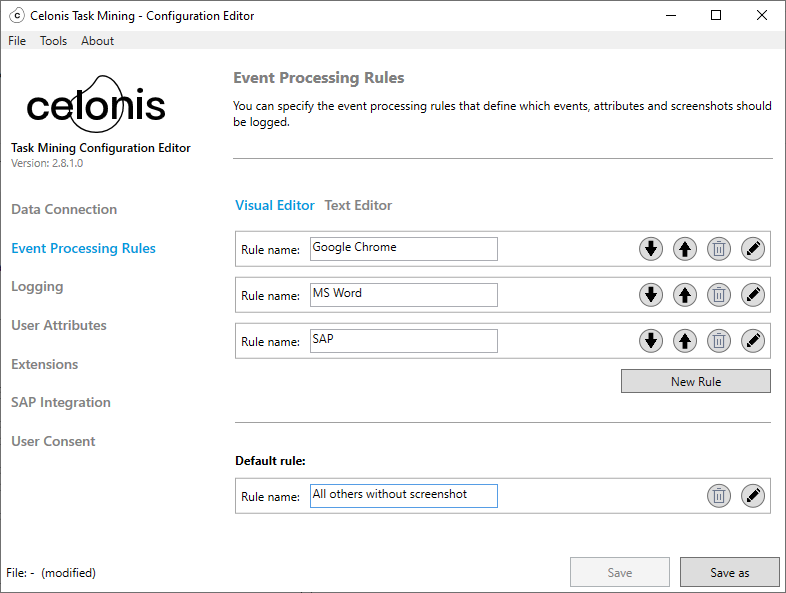
The screenshot above shows the Event Processing Rules tab with three rules and an additional default rule. The default rule is always shown on the bottom of the list. The rules provide the following controls:
 - Removes the rule.
 - Moves the rule one position down.
 - Moves the rule one position up.
 - Opens a new window to edit the rule.
When clicking the edit button of a rule, it is opened in a new editor window which allows you to edit the different parts of the rule. The following sections explain this in more detail:
Description
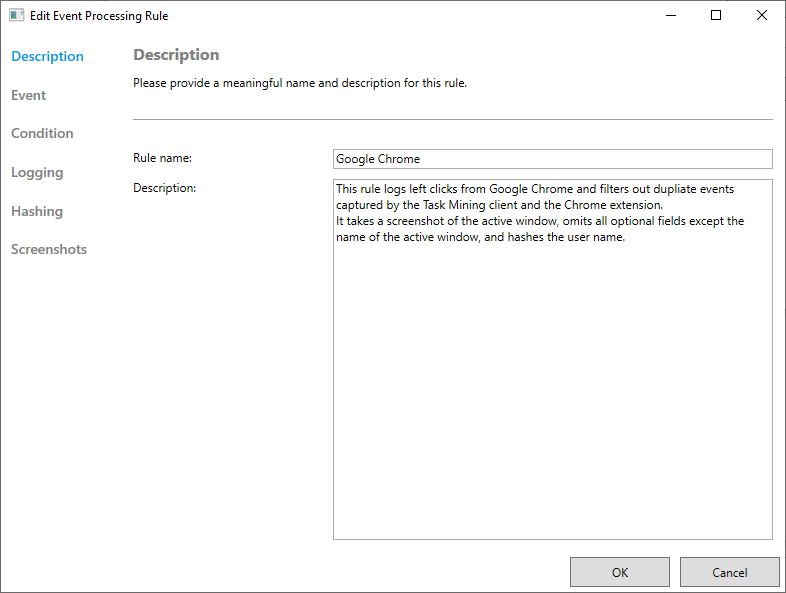
On this tab, you specify the name of the rule and describe the intention of the rule in more detail.
Event
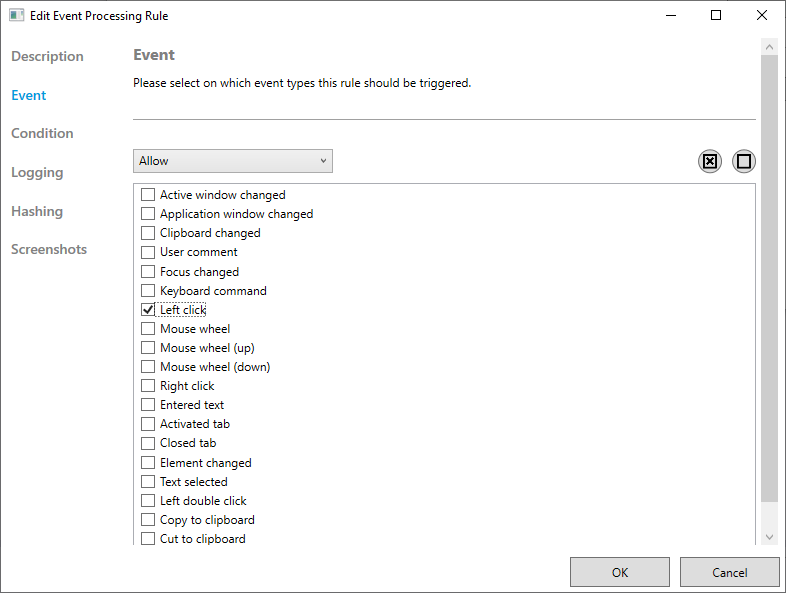
In this tab, you can select which event types should trigger the rule. It provides three different modes:
All: All event types will trigger this rule. Any selections in the list of event types below are ignored.
Allow: This rule will trigger only for the event types selected in the list below. All other event types are ignored.
Deny: The rule will trigger for all event types except the event types selected in the list below.
The list of event types can only be changed if Allow or Deny mode is selected. The  button selects all items in the event type list, the
  button deselects all items.
Condition
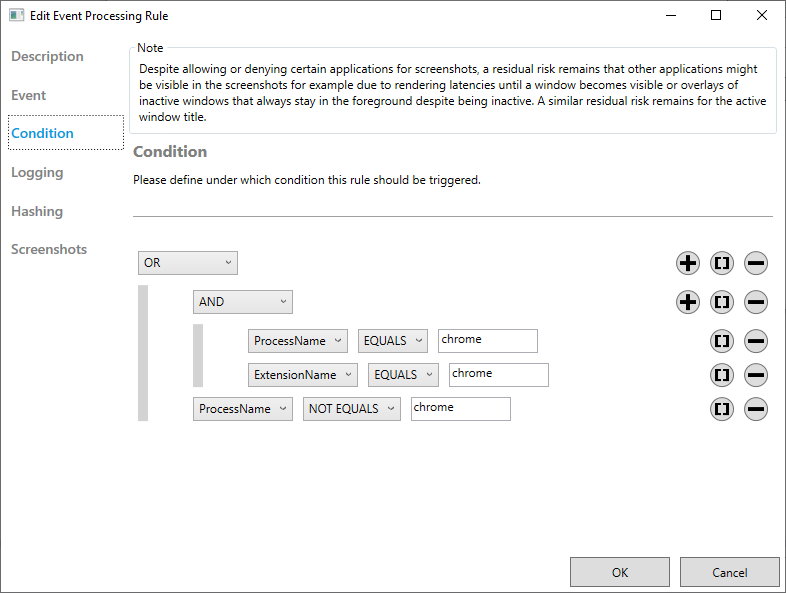
In this tab, you can create a condition that must be fulfilled for applying this rule. As it is shown in the screenshot, the condition consists of a tree of different components, which can be combined to express complex conditions Each subtree is a condition itself. Currently, the following components are supported:
Comparison: A comparison relates the value of an attribute to a constant value. Comparisons are atomic, i.e., they cannot have any child components. Each comparison consists of two drop-down menus and a textfield. From the first drop-down menu, you can be select the attribute you want to evaluate in the comparison. From the second drop-down menu, you can select the operation you want to use for comparison (e.g. equals, greater than). In the text box, you can enter the constant value, you want to compare to the value of the attribute.
"LIKE" and "URL LIKE" operator:
For LIKE and URL LIKE operations, this value may contain wildcards as described for the event processing rules language. The constant value must always match the type of the selected attribute. Also, the operation needs to be compatible with the types of the attribute and the constant value. E.g., greater than operations are currently only supported for numerical values and attributes.
Difference between LIKE and URL LIKE: URL LIKE operator is applying the "LIKE" operator only to the domain part of the URL. URL LIKE operator is more helpful if you try to capture data from all URLs for a specific domain.
Operator
Event Processing Rules - Text Editor Equivalent
Example event on URL 'https://www.google.de/search?q=celonis.de'
LIKE
URL LIKE <some_string>
URL LIKE '%celonis.de% will match the example URL 'https://www.google.de/search?q=celonis.de' and capture the event
URL LIKE
DOMAIN(URL) LIKE <some_string>
DOMAIN(URL) LIKE '%celonis.de%' will not match the example URL 'https://www.google.de/search?q=celonis.de' and not capture the event, as first the domain part of the URL extracted (which is 'www.google.de') and only then the like comparison is executed, which does not match '%celonis.de%'
Group (AND/OR): A group is a container for multiple subtrees which are combined either by a logical AND operation or by a logical OR operation. A group must have at least one child. You can switch between AND and OR operations by selecting the respective entry from the drop-down menu.
Negation: A negation inverts the condition represented by its child. Each negation must have exactly one child.
With the  button, you can add a new child component of any component type. With the
  button, you can wrap a component within a group or a negation. The
 button removes the respective component from the condition. Depending on the type of component, you can choose if you want to keep the child components or remove them as well.
Tip
Restricting an event processing rule to a certain application is a typical use case for defining a condition. You can do this by comparing the ProcessName attribute to the respective process name of the application. This article shows you how to retrieve the process name of an application.
Rules are Case-Sensitive
Be aware that all rules are case-sensitive. For example, if you want to deny list Slack and not capture any data.
Correct: This denylists Slack so no events from Slack are captured (slack is lowercase):
ON ALL EVENTS
IF ProcessName NOT IN ('slack') THEN
LOG ALL
TAKE SCREENSHOT ACTIVE_WINDOW
DEFAULT SKIPWrong: This would fail and still capture data from Slack, as the actual process name is lowercase and not uppercase:
ON ALL EVENTS
IF ProcessName NOT IN ('Slack') THEN
LOG ALL
TAKE SCREENSHOT ACTIVE_WINDOW
DEFAULT SKIP
Logging
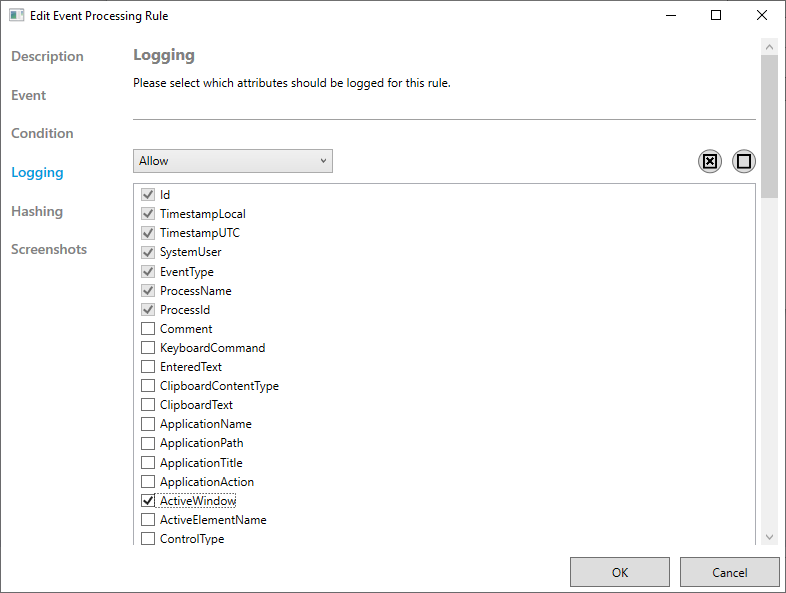
On this tab, you can select which attributes should be stored for the rule. It provides three different modes:
All: All attributes will be stored in the Celonis Platform.
Allow: This rule will only store the attributes selected in the list below. All other attributes are set to their respective default value.
Deny: This rule will only store all attributes except for the attributes selected in the list below.
The list of attributes can only be changed if Allow or Deny mode is selected. The  button selects all items in the attribute list, the
  button deselects all items. Some attributes (e.g. Id, TimestampLocal, ProcessName) are mandatory for technical reasons. Therefore, these items are disabled in the attribute list.
Hashing
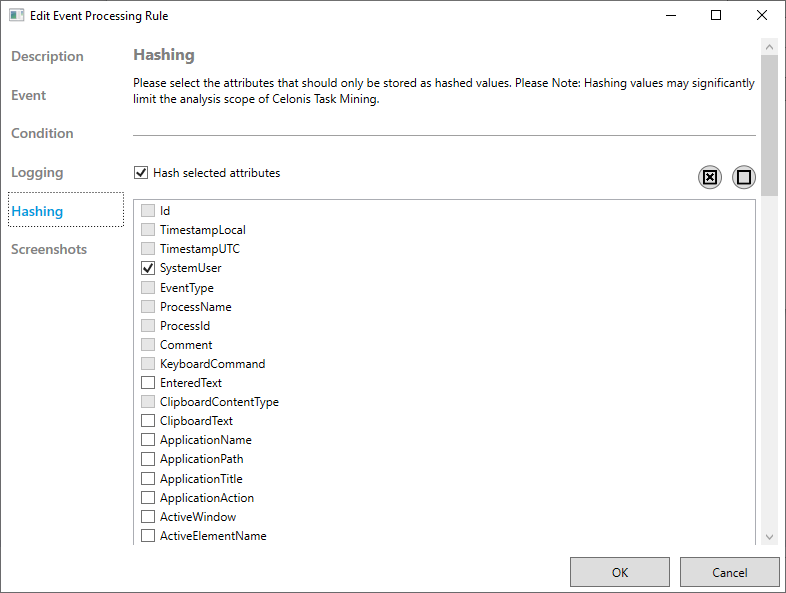
On this tab, you can select which attributes should only be stored as hashed values. To activate hashing, you need to set the checkmark for "Hash selected attributes". If hashing is enabled, you can select the attributes you want to store as hashed values. The  button selects all items in the attribute list, the
  button deselects all items. Some attributes cannot be hashed due to technical reasons and are disabled in the attribute list.
Screenshots
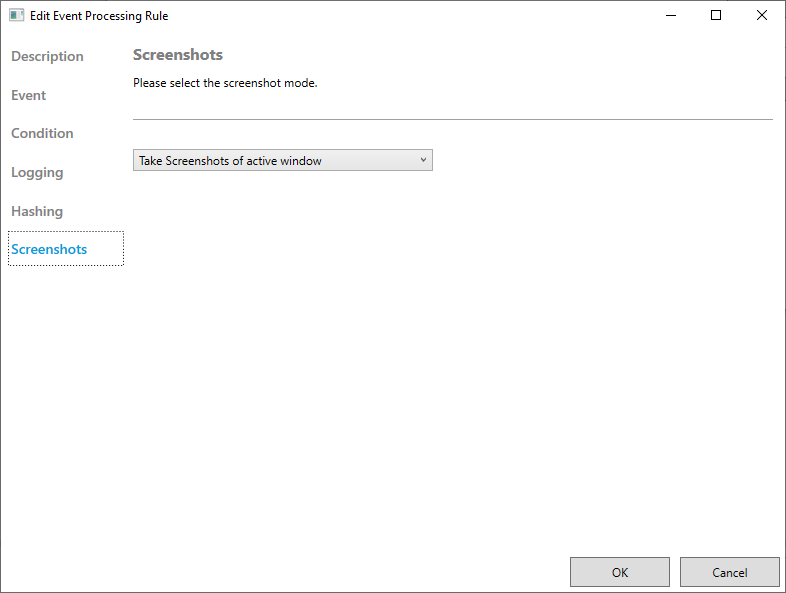
On this tab, you can select if and what kind of screenshots should be taken for this rule. It provides four different options:
Do not take screenshots: Screenshots will be disabled for this rule.
Take screenshots of the active window: This rule will only capture a screenshot of the currently active window.
Take screenshots of the active desktop: This rule will capture a screenshot of the full desktop which shows the currently active window.
Take screenshots of all desktops: This rule will capture all desktops.