Update Augmented Attribute using Action Flows
This module allows you to update enhanced Augmented Attributes, which are defined in Data Model Tables.
If you use record-based Augmented Attributes, see Update legacy Augmented Attributes.
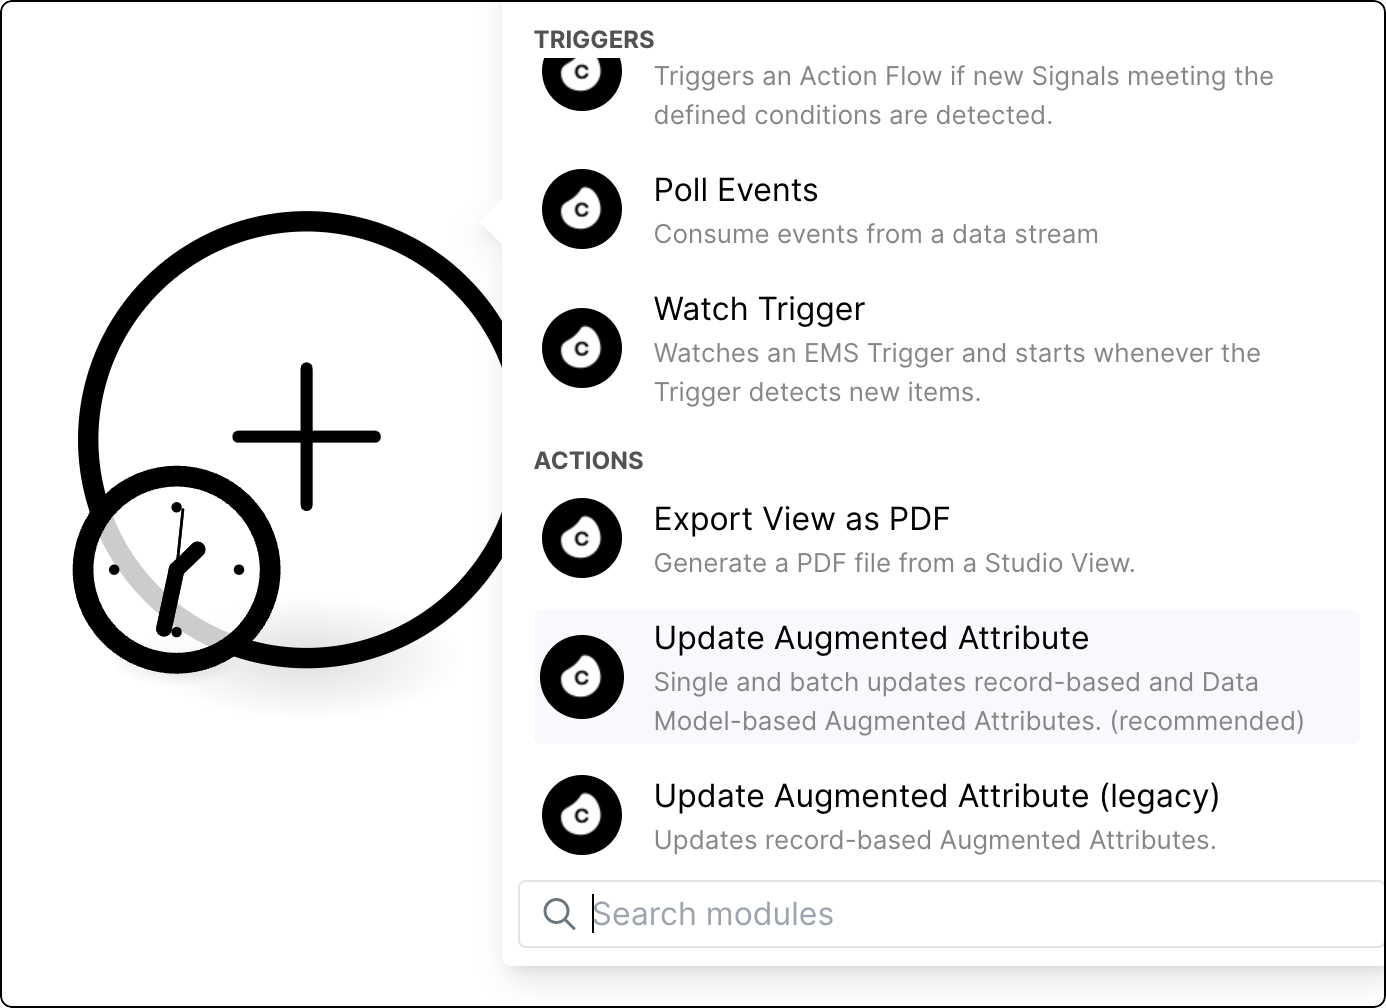
In Studio, go to your package and click New asset > Action Flow.
Click Add module and from the list select Celonis > Update Augmented Attribute.
Add a connection to the module using one of the following methods:
Note
For creating and testing an Action Flow, the "Celonis User Connection" might be the fastest and easiest choice to get started.
For unattended full automation use cases we recommend to switch to the "Celonis App Key Connection". This ensures that the automation runs stable even if a specific user is removed from the team.
Note
You must have Data integration service permission to use this connection method. See Data Integration permissions.
Give your connection a name.
Click Save.
Celonis Application Key
The Celonis App Key connection will reflect the data permissions granted to the selected Application Key and allow you to query data to which you may not otherwise have access.
Give your connection a name.
In a separate window, create an application key and copy it. See Application keys.
Paste the application key and click Save.
Celonis user
The Celonis User connection will reflect your existing data permissions and allow you to query data to which you already have access.
Select the Knowledge Model which contains Augmented Attributes you want to update.
Select the Augmented Attribute you want to update.
For execution type, select Single update.
Select the new value for the Augmented Attribute.
If you have defined possible values in the Knowledge Model definition, you can choose a value from the dropdown. Alternatively, use the Map toggle to put another input either directly or using a placeholder.
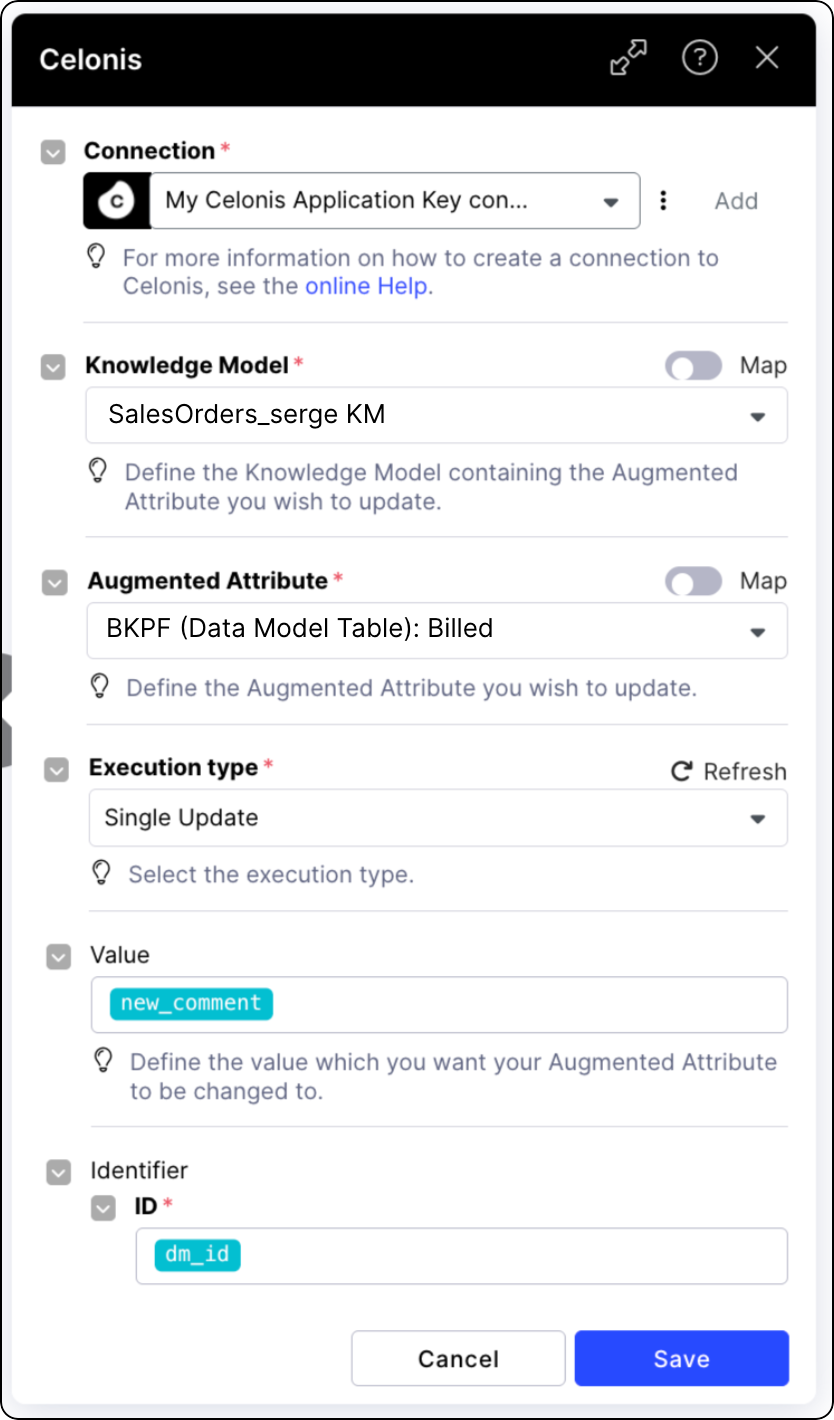
Click Save.
You can now add another module of your choice to which your configured Update Augmented Attribute module will pass on updated data. To make your module functional, you must version and deploy the package it is in. See Versioning and deploying packages.
In Studio, go to your package and click New asset > Action Flow.
Click Add module and from the list select Celonis > Update Augmented Attribute.
Add a connection to the module using one of the following methods:
Note
For creating and testing an Action Flow, the "Celonis User Connection" might be the fastest and easiest choice to get started.
For unattended full automation use cases we recommend to switch to the "Celonis App Key Connection". This ensures that the automation runs stable even if a specific user is removed from the team.
Note
You must have Data integration service permission to use this connection method. See Data Integration permissions.
Give your connection a name.
Click Save.
Celonis Application Key
The Celonis App Key connection will reflect the data permissions granted to the selected Application Key and allow you to query data to which you may not otherwise have access.
Give your connection a name.
In a separate window, create an application key and copy it. See Application keys.
Paste the application key and click Save.
Celonis user
The Celonis User connection will reflect your existing data permissions and allow you to query data to which you already have access.
Select the Knowledge Model which contains Augmented Attributes you want to update.
Select the Augmented Attribute you want to update.
For execution type, select Batch update.
Select the new value for the Augmented Attribute.
If you have defined possible values in the Knowledge Model definition, you can choose a value from the dropdown. If that is not the case use the "map toggle" to put another input either directly or via a placeholder.
Decide if you want to update new values for different identifiers dynamically.
Select Yes, to update multiple Augmented Attributes with different values using the mapping defined in the next steps.
Select No to update all attributes with the same value.
Define the values of the primary key columns of the selected Data Model table.
Click OK.
For the batch update to work, add additional modules to your Action Flow setup:
Array aggregator which allows you to merge several bundles into one single bundle.
Celonis module, like Get Rows, which will allow you to batch update your Augmented Attribute.
Click Save.
You can now add another module of your choice to which your configured Update Augmented Attribute module will pass on updated data. To make your module functional, you must version and deploy the package it is in. See Versioning and deploying packages.