Registering your OAuth client
Registering an OAuth client establishes secure, token-based programmatic authentication for external applications connecting to the Celonis Platform. This workflow replaces static API keys with dynamic client credentials to safeguard automated pipelines, such as continuous data ingestion logs within your Accounts Payable or Order-to-Cash processes.
For an overview of the differences between OAuth 2.0 and using Application or API Keys, see: Using OAuth 2.0.
Verify that your user account has Admin permissions within your Celonis Platform team.
Confirm that your external application supports standard OAuth 2.0 client credentials or authorization code flows.
To register your OAuth clients:
Go to Admin & Settings > Applications.
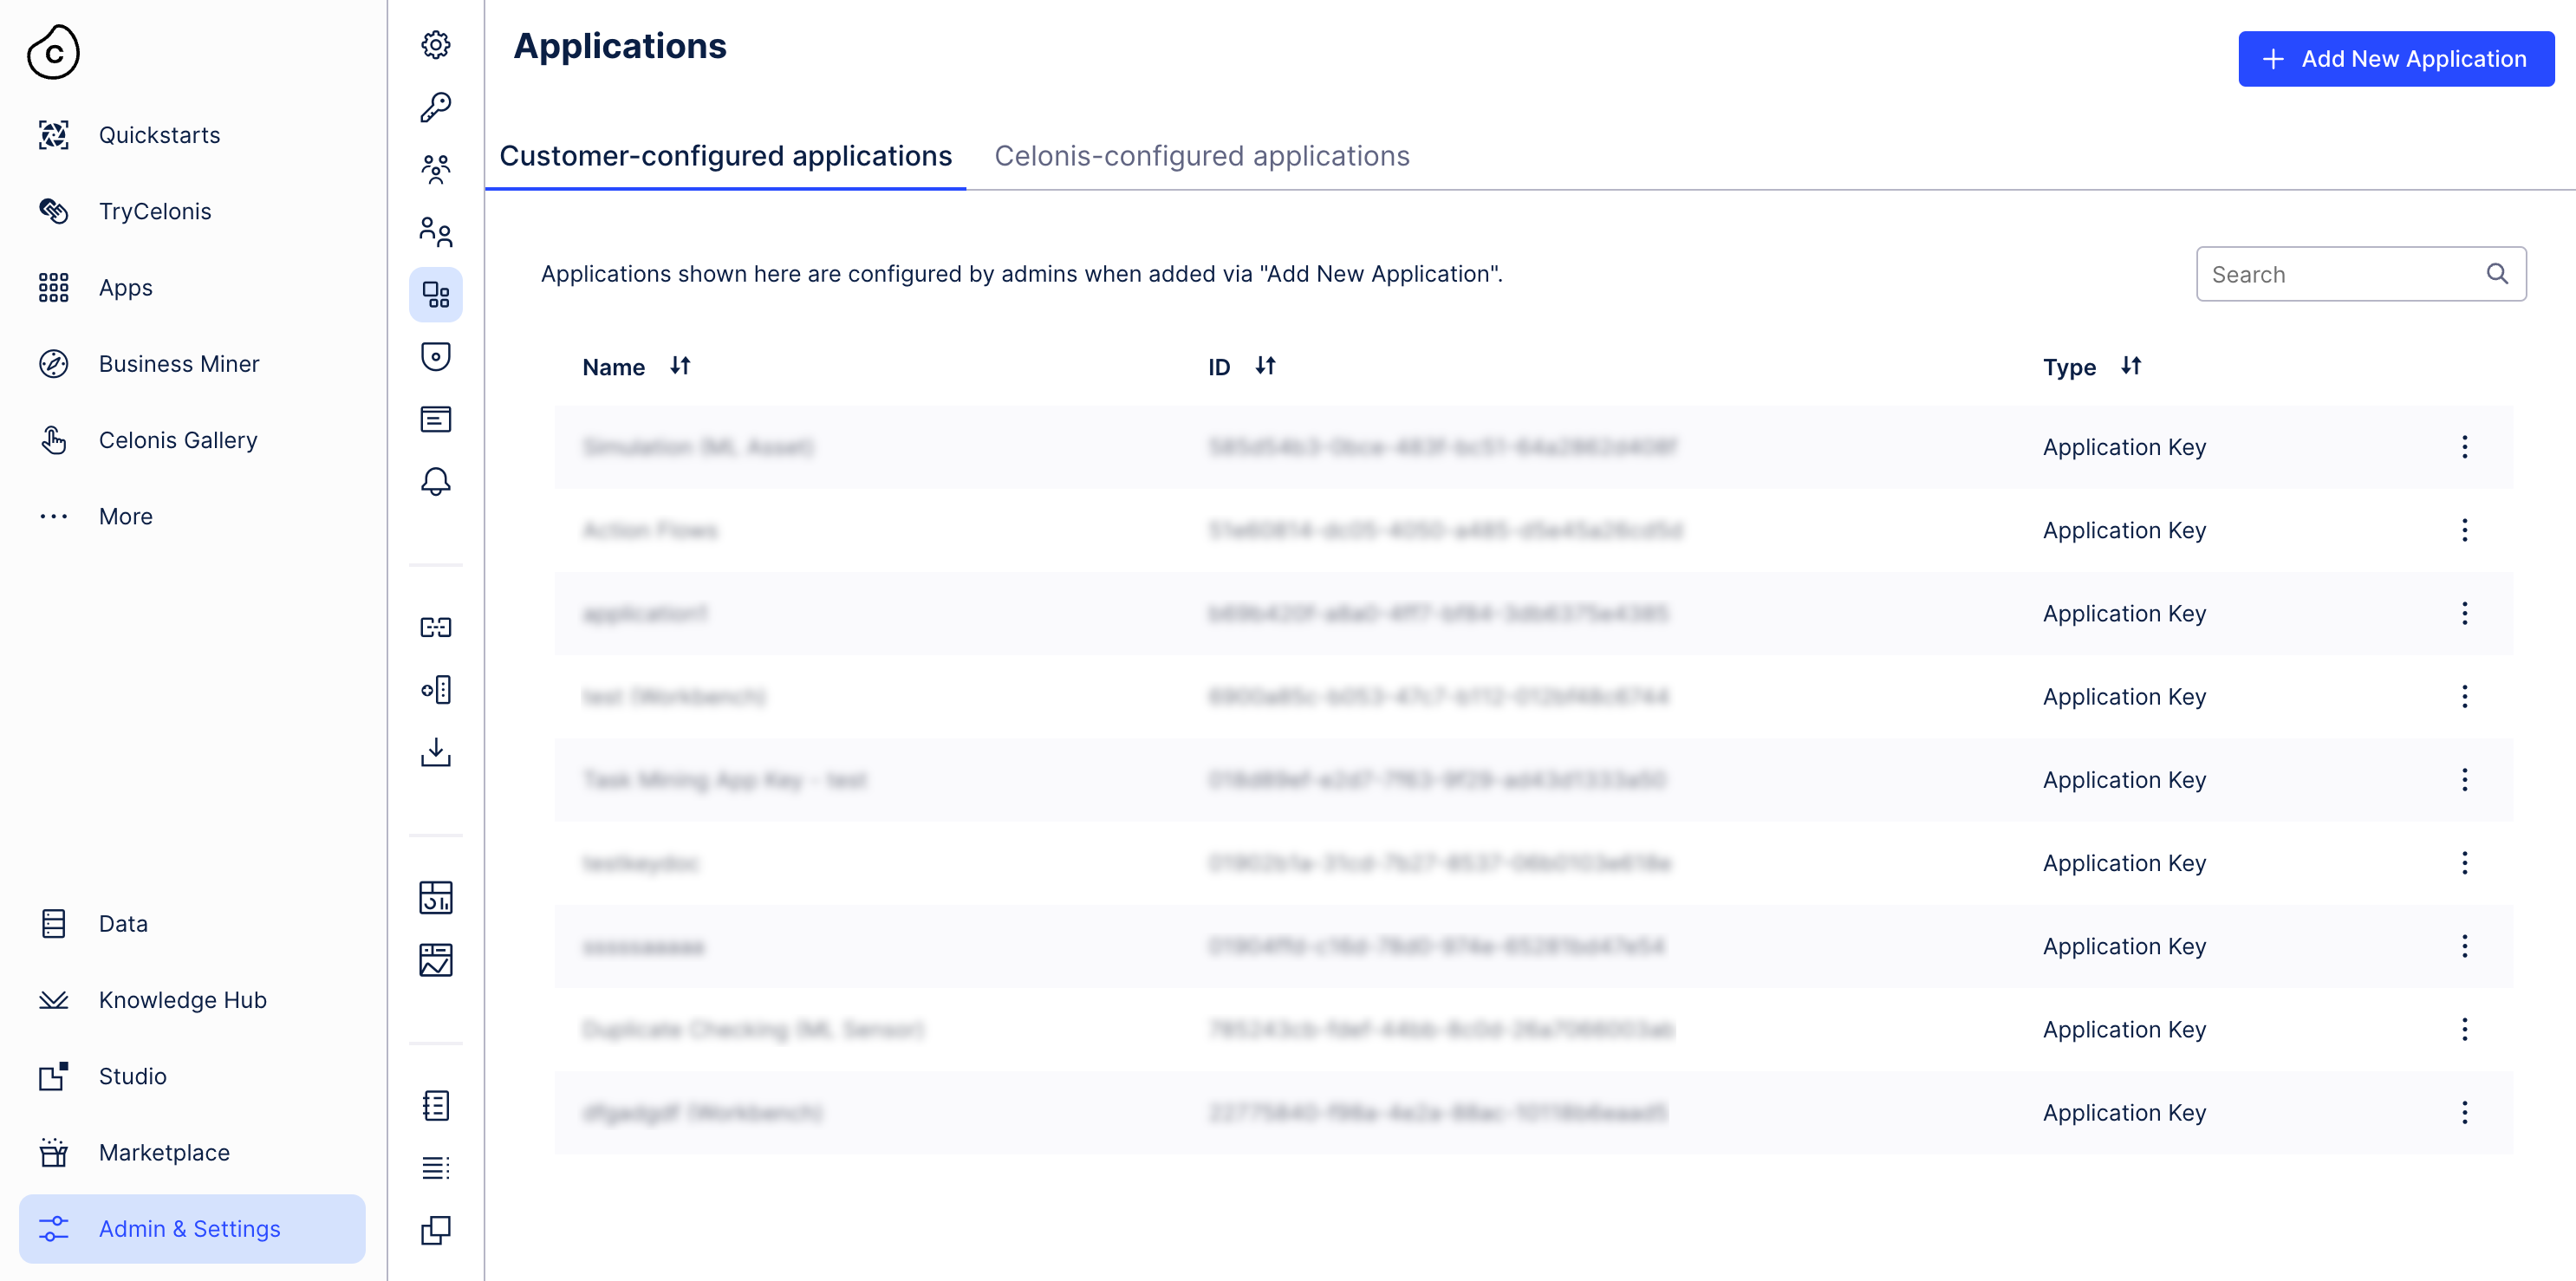
Review the active applications directory to identify existing connections:
Customer-configured: Custom integrations managed by your team administrators.
Celonis-configued: Automated system capabilities (such as Task Mining or On-Premise clients) managed automatically by the platform.
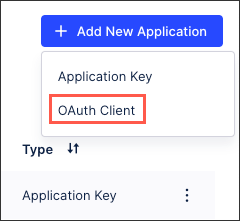
Click Add new application and select OAuth Client.
Configure the client fields using these operational parameters:
Name: Enter a unique identifier (for example, `
O2C_Data_Push_Client` to isolate Order-to-Cash extraction logs).Grant type: Select Client credentials for headless server-to-server pipelines, or Authorization code for user-interactive applications.
Authentication methods:
Client secret basic: Transmits authentication credentials via the standard HTTP Authorization header using the format:
Authorization: Basic encoded_credentials.The value of
encoded_credentialscorresponds to the base64 encoding of the OAuth client’sclient_id:client_secretconfiguration string.Client secret post: Authenticates the client by passing the
client_idandclient_secretparameters within the HTTP request body as form data.
Click Define scopes and select your target resource boundaries (for example, assign `packages:read` to extract continuous data ingestion logs without exposing tenant modification capabilities).
Select the target resource types to map API accessibility boundaries (for example, assign
packages:readto extract continuous data ingestion logs without exposing core tenant modification settings).Click Create.
Copy the generated Client ID and Client Secret immediately upon creation. Celonis displays these credentials only once.
Go to Admin & Settings > Permissions.
Locate your targeted integration service and click Edit (for example, select the
AP_Vendor_Provisioning_Serviceto update transactional access parameters).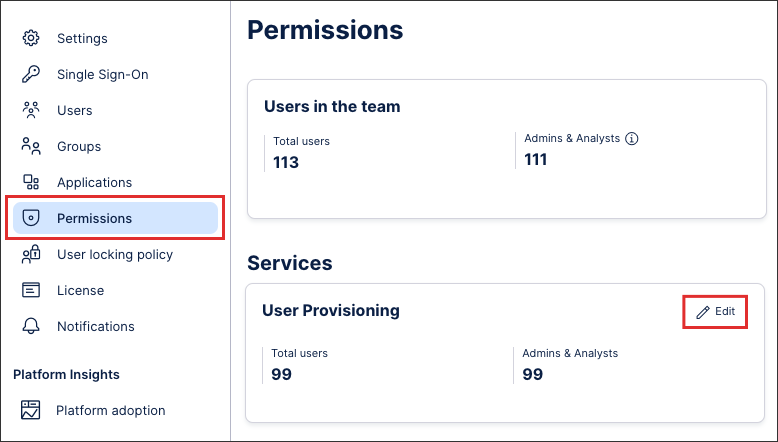
Select the required template for your application and enable SCIM permissions if your workflow requires user synchronization.
Enable manage permissions and select SCIM permissions to authorize programmatic automated identity synchronization.
Click Save.
Append the generated access token to the authorization header of your programmatic API requests using the following format:
Authorization: Bearer ACCESS_TOKEN
The target application holds active, verified functional permissions within your environment.
Regenerate the client secret regularly to maintain credential rotation security across your external pipelines.
Go to Admin & Settings > Applications.
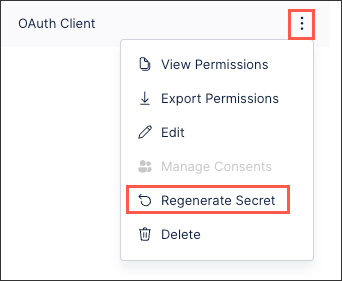
Find your OAuth client and click the three-dot menu next to it.
Select Regenerate secret.
Update the newly generated client secret across all connected third-party integration scripts to prevent credential failure.
Users authorize OAuth clients to access specific platform resources on their behalf during authentication flows. Review active application authorizations regularly to audit access permissions and secure user session data.
To view or revoke application access:
Click your profile avatar and select Edit Profile.
Navigate to the OAuth Client Management section.
Review the directory of applications that hold active consent.
Click Revoke Consent next to any application to immediately terminate its programmatic access to your Celonis resources.
After registering your OAuth client and assigning it the necessary permissions in your Celonis Platform team, you can now use a REST API client such as Postman to make a POST request for your access token.
To do this, you need your token URL:
https://<team>.<cluster>.celonis.cloud/oauth2/token
And in Postman:
 |
You then need to append at least two query parameters to your token URL:
Grant type: This must be "client_credentials" as this is currently the supported grant type for OAuth clients.
Scope: This should be the Celonis Platform services that you have granted permissions to (based on the service string). In our example, we've included Studio:
https://<team>.<cluster>.celonis.cloud/oauth2/token?grant_type=client_credentials&scope=studio
And in Postman:
 |
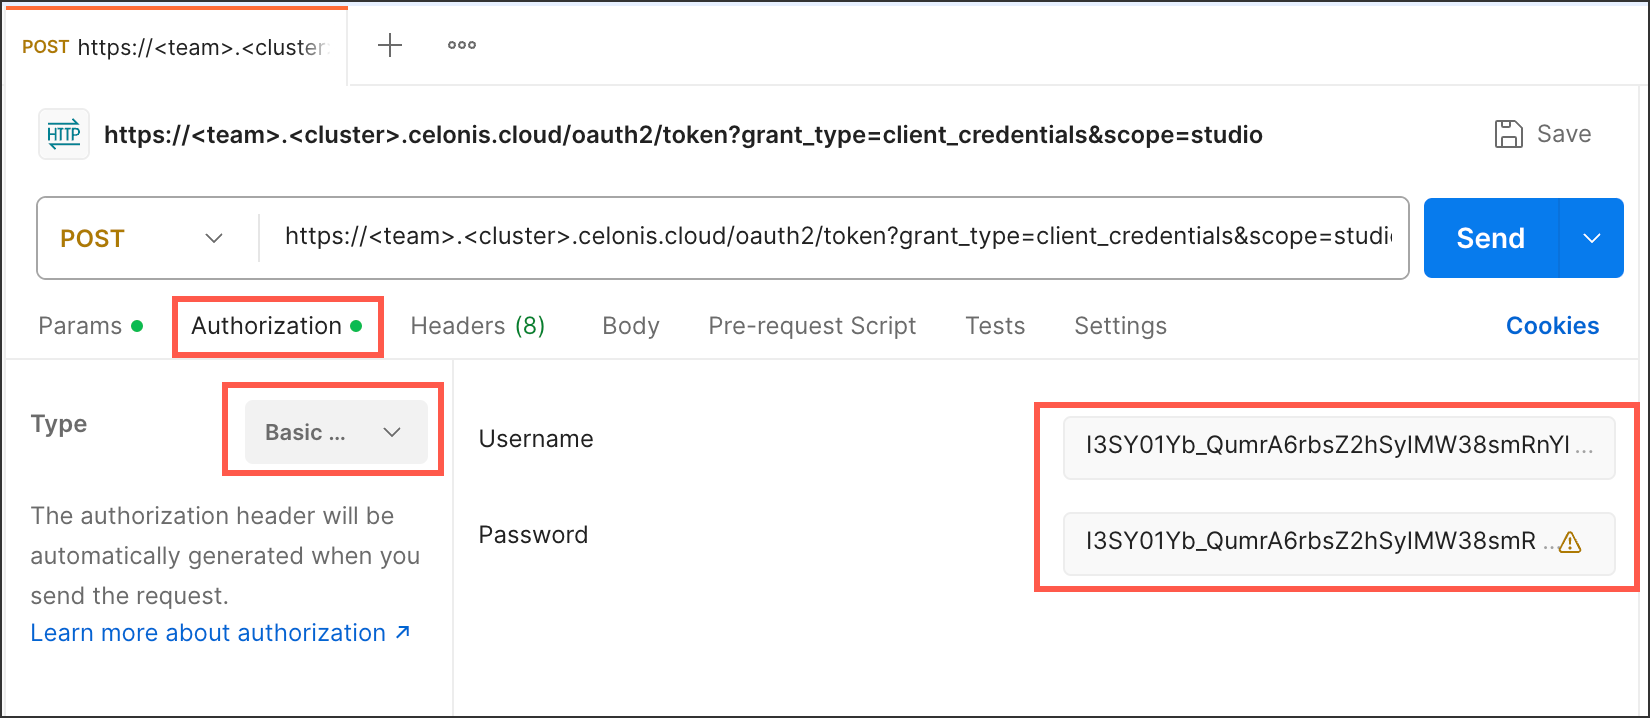
You can then configure the Authorization. In this example, we're using a basic authentication using a username (the client ID) and password (the client secret):
 |
This configuration gives you an OAuth request such as:
curl --request POST \
  --url https://<team>.<cluster>.celonis.cloud/oauth2/token \
  --header 'content-type: multipart/form-data' \
  --form client_id=<client id> \
  --form client_secret=<client secret> \
  --form grant_type=client_credentials \
  --form scope=<scope1 scope2 scopeN>
And running the request returns a response that includes your access token:
{
"access_token": "randomizedAcessToken",
"scope": "scope1 scope2 scopeN",
"token_type": "Bearer",
"expires_in": 899
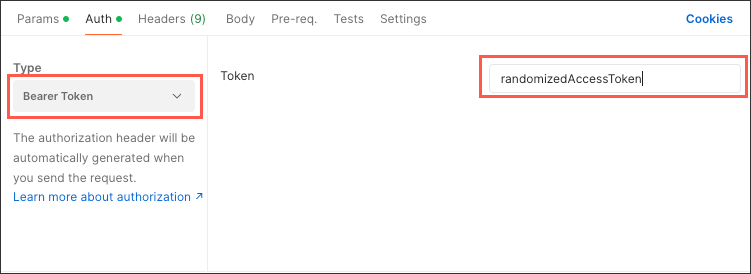
}This access token can then be used with a bearer token authentication method to request access to and information from the Celonis Platform services you need:
 |