Customizing the Workforce Productivity app
You have a variety of options to customize how your Workforce Productivity app looks, using Studio components, or by filtering the data shown in the app.
Before you begin, ensure you have completed the following steps or meet the requirements listed below:
Admin role.
Configured Workforce Productivity app for your organization.
Customizable component | Customization option | Action required |
|---|---|---|
View |
|
For information on customizing and creating Views, see Creating Views. |
Knowledge Model | Edit the calculated attributes and PQL formulas for KPIs in the Knowledge Model used by the Workforce Productivity apl to change how the results are calculated. Note Some event types are filtered out by default so they don't display in the Deep Dive tab of the Workforce Productivity app and aren't used in Task Mining analyses. These filters are set in the Knowledge Model used for your Task Mining project and you can remove or edit them at any time. For more information, see Default event type filtering in the Workforce Productivity app. |
For information on customizing Knowledge Models, see Knowledge Models. |
Data Pool | Create an additional Data Pool which allows:
Note You must create an additional Data Pool as modifying the Data Pool that is created automatically when the Task Mining project is set up is not supported. |
Certain Task Mining event types are automatically filtered out of the Task Mining data as they are of limited value and add 'noise' to the captured Task Mining data. These filtered-out event types are not displayed in the Deep Dive tab of the Workforce Productivity app and are not included in any Task Mining analyses. The event types that are filtered out are:
Task Mining StoppedUser Idle StartedUser Idle EndedSession LockedSession UnlockedSession ConnectedSession DisconnectedSession Remote ConnectedSession Remote DisconnectedAlive
Note
The Non-Alive Events Filter filters out the Alive event type only; all the other event types listed are filtered out by the Non-Null Time Delta Filter. Both of these filters are saved as global filters in the Knowledge Model used for your Task Mining project and you can remove or edit them at any time. For more information, see Knowledge Model Filters. For a complete list of event types, see the Task Mining event reference.
Create a new data pool and select Create from Scratch.
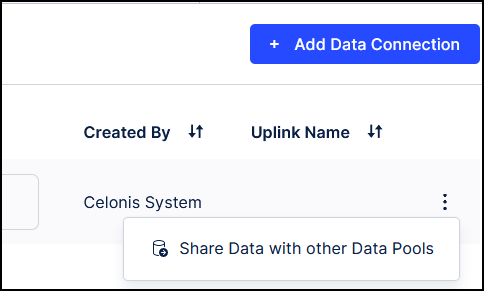
Go back to the data pools and select the Task Mining Data Pool that was created by the Task Mining project. Go to Data Connections, click the three dots next to Global Data Connection and then select Share Data with other Data Pools.
Note
If Global Data Connection is not visible, create a Data Job and an empty Transformation. Global Data Connection will then appear in Data Connections.
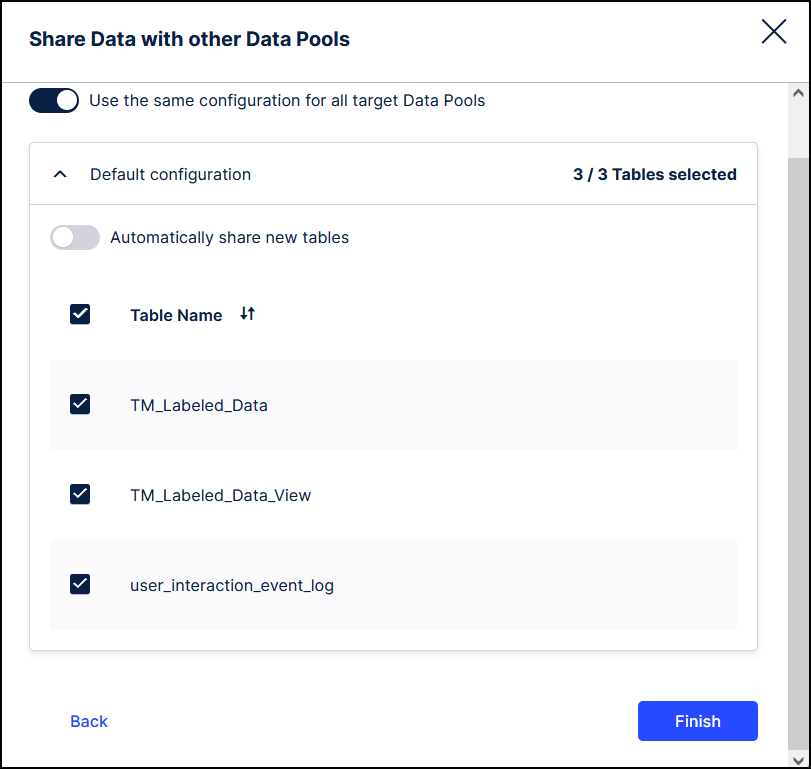
Choose the newly-created data pool from the list and then select all three items to synchronize.
Return to the newly-created data pool. Click Connect to Data Source and then select Import Data from another Data Pool. Click the data connection that you shared in the previous step and then click Synchronize.
Select Create Data Job. Enter a name and then choose Global Data Connection.
Select Add Transformation.
Adding a transformation
Add a transformation that creates a view with the "Comment" and "ActiveElementName" columns from the raw data (user_interaction_event_log_history) table. You will need to adjust the schema name between the <%= %> symbols.
Note
You can check the schema name by clicking the Schema Explorer on the left and selecting the imported connection from the dropdown. Expand one of the tables and click on one of the columns. This adds the selected column to the transformation statement along with the schema and table name. You can then copy the schema name from there.
-- change the column(s) which are needed accordingly. always select the "Id" column as we need that to join the new view to the target table
-- make sure to change the schema name
CREATE VIEW extra_columns AS
SELECT
     Id
     ,Comment
     ,"ActiveElementName"
FROM
<%=DATASOURCE:TASK_MINING_DATA_POOL_-_SCALABLEWFP_GLOBAL%>."user_interaction_event_log_history";
-- the next query recreates the target table as a view by joining the extra_columns view and the target table
-- adjust the columns and the schema accordingly
CREATE VIEW TM_Labeled_Data_View AS
SELECT
tm_labeled_data_view.*
,"extra_columns"."Comment"
,"extra_columns"."ActiveElementName"
FROM
<%=DATASOURCE:TASK_MINING_DATA_POOL_-_SCALABLEWFP_GLOBAL%>."TM_Labeled_Data_View" tm_labeled_data_view
LEFT JOIN "extra_columns" ON 1=1
AND tm_labeled_data_view.Id = "extra_columns".Id
;
Save the transformation and then execute it.
Create a data model and name it. Choose the newly created TM_Labeled_Data_View from the list and then click the view to set it as the activity table:
For Case ID choose the CASEID column.
For Activity name choose the SCREEN column.
For Timestamp choose the TIMESTAMPUTC column.
Select Finish.
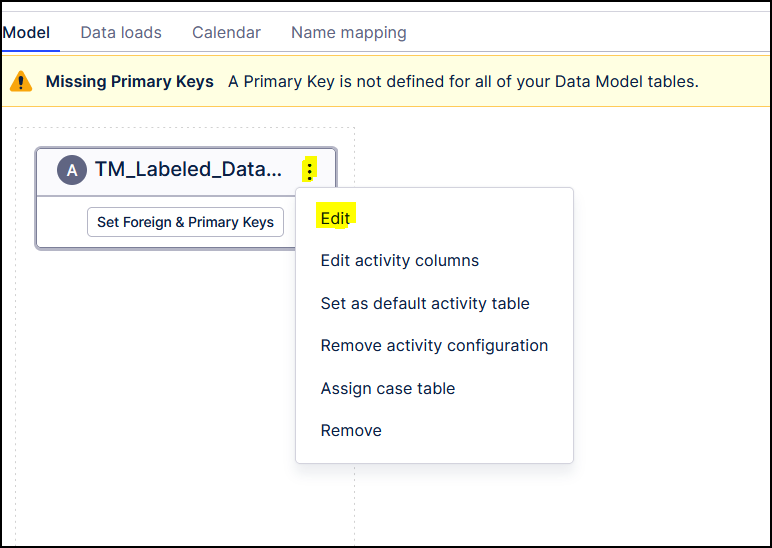
Once the Data Model has been created, click the three dots next to TM_Labeled_Data_View and select Edit.
Enter
TM_Labeled_Datain the Alias field and click Save.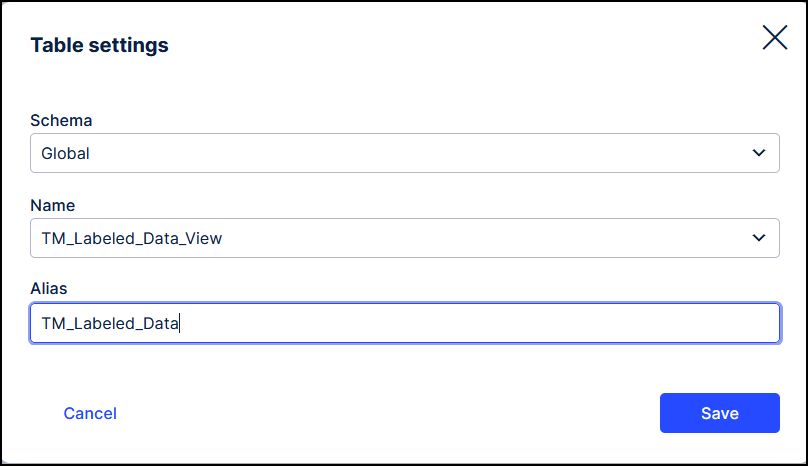
Load the data model.
Go to Studio and expand the package that was created by the Task Mining project. Expand assets and then click on the Knowledge Model. In the upper right corner click on the down arrow next to the data model and choose "Create Data Model Variable". Select the newly created data model from the list.
The custom columns are now available to use in the View.
Note
You can also add custom tables to this data model. Optionally create a schedule to execute this transformation periodically to keep the studio view up to date.
Using Data Pools in Task Mining
By default only those columns are included in the data model which are used in the out of box analysis provided by Task Mining. In case a more in depth analysis is needed or you plan to add custom data, you can add the excluded columns from the user_interaction_event_log_history table or add custom data from your source system.
You can use the filter bar in any Workforce Productivity app tab to narrow down the data displayed. The user filters use metadata from the employees table so you must add this data to the employees table first.
For more information, see Adding employee information options and to understand the user filter, see employees table fields and values.