Creating Process Orchestration overview
Process Orchestration is a Studio asset that allows you to design and manage end-to-end sequence of your business process.
To create Process Orchestration:
In your Studio package, select New asset > Process Orchestration.
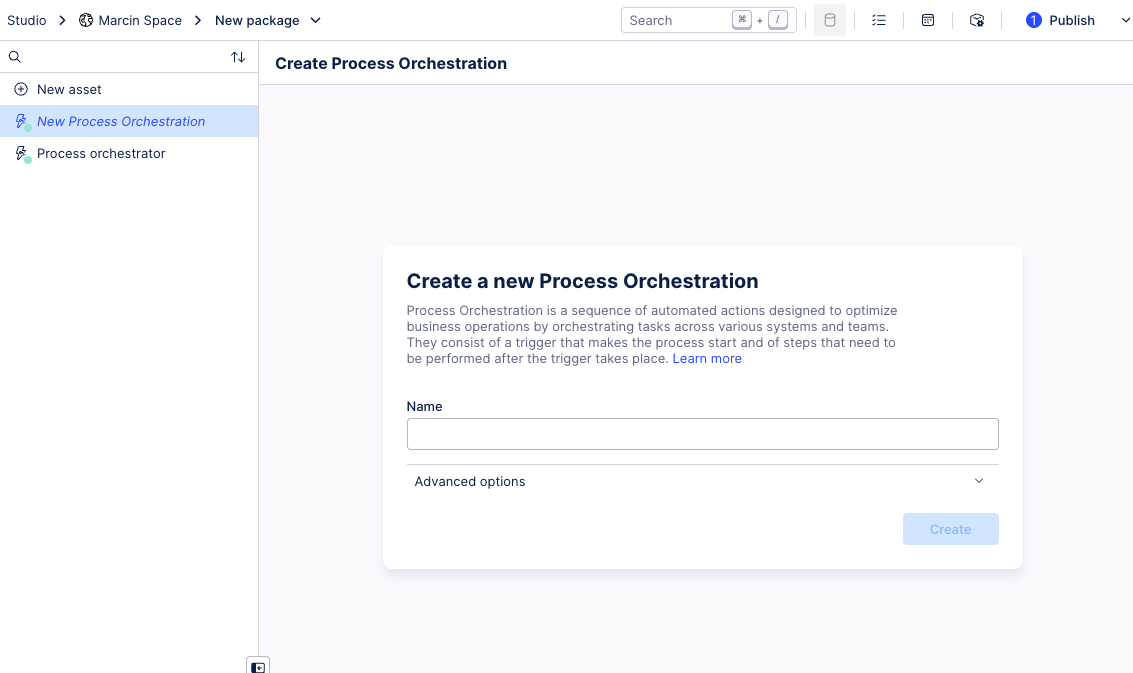
Give your Process Orchestation a name and click Create.
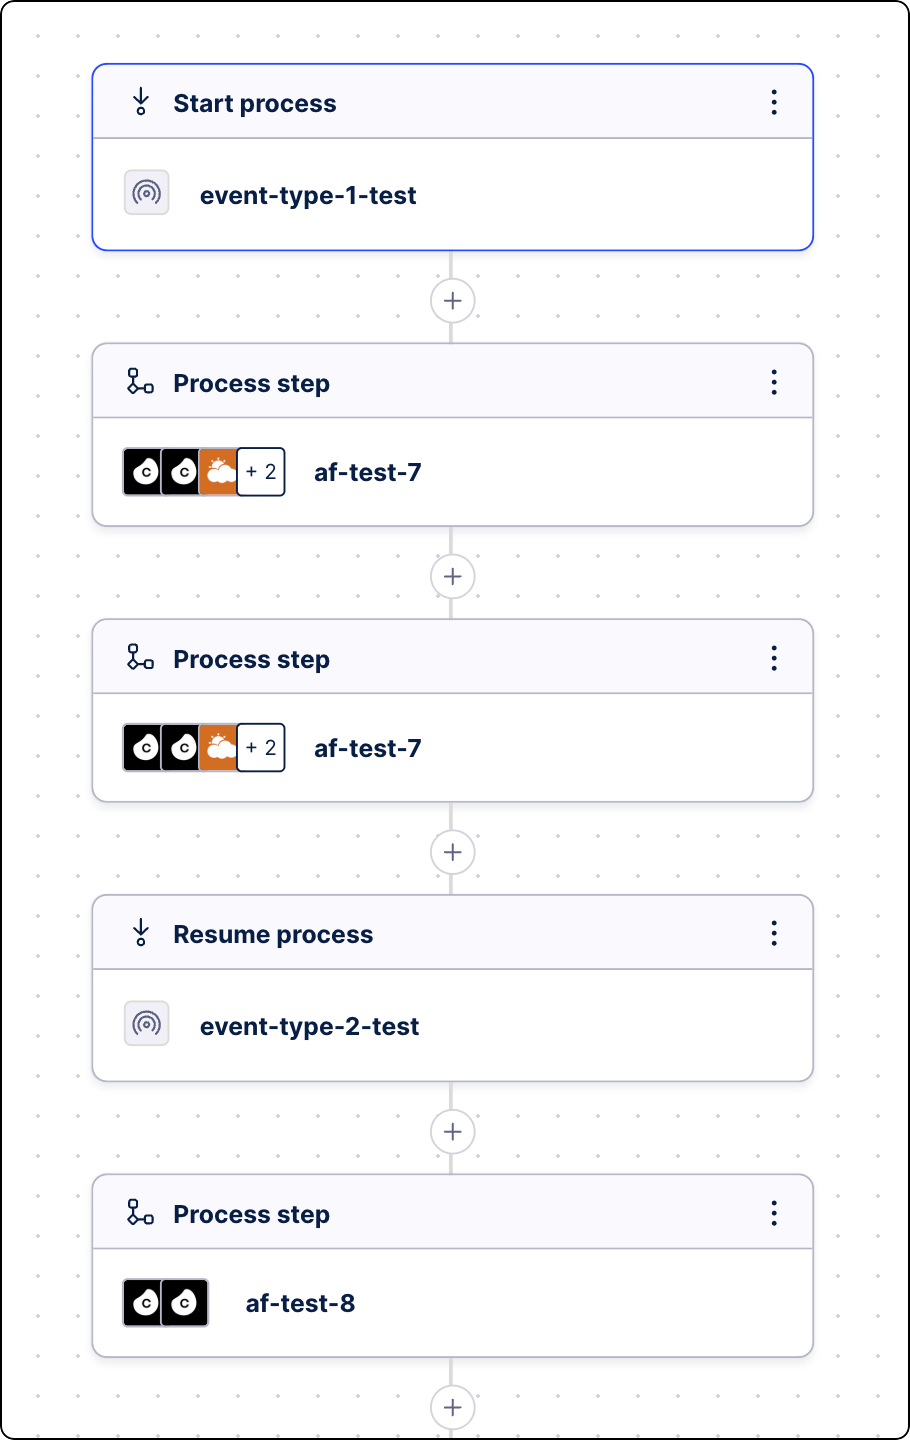
Process Orchestration opens in edit mode. It already has the Process Start step created for you.
Edit the Process Start step by adding an event. This will be a trigger for your orchestration.
From the side panel, click Add event.
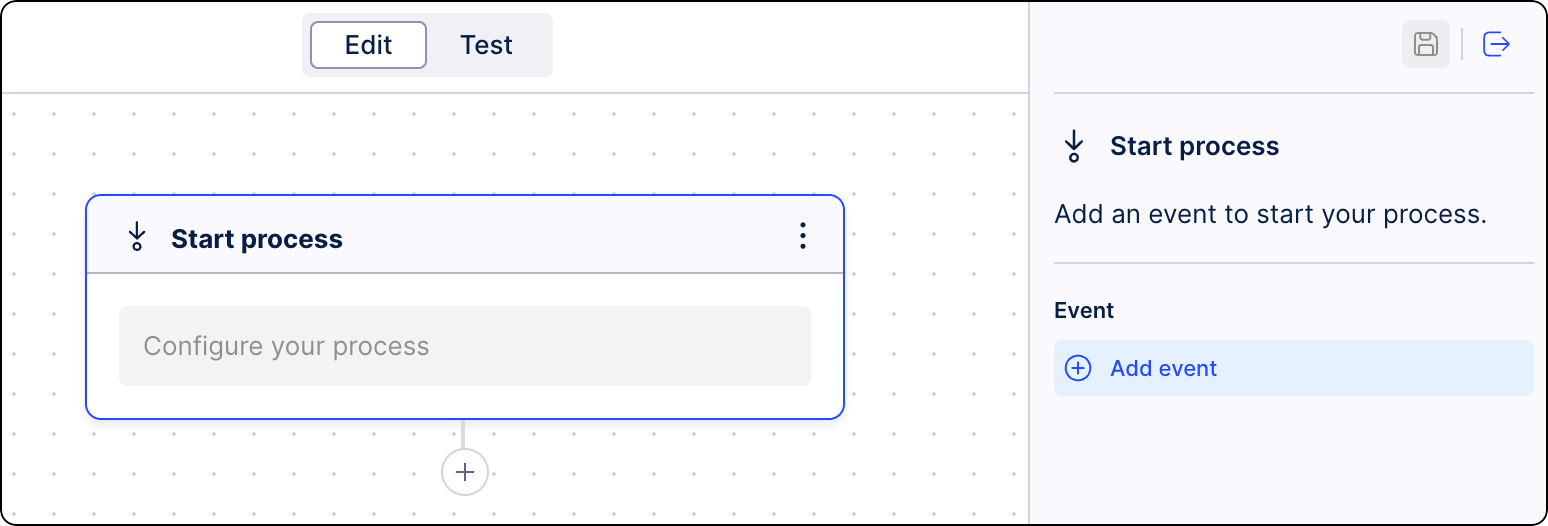
Select from already available events or create a new one. For more information, see Editing start step.
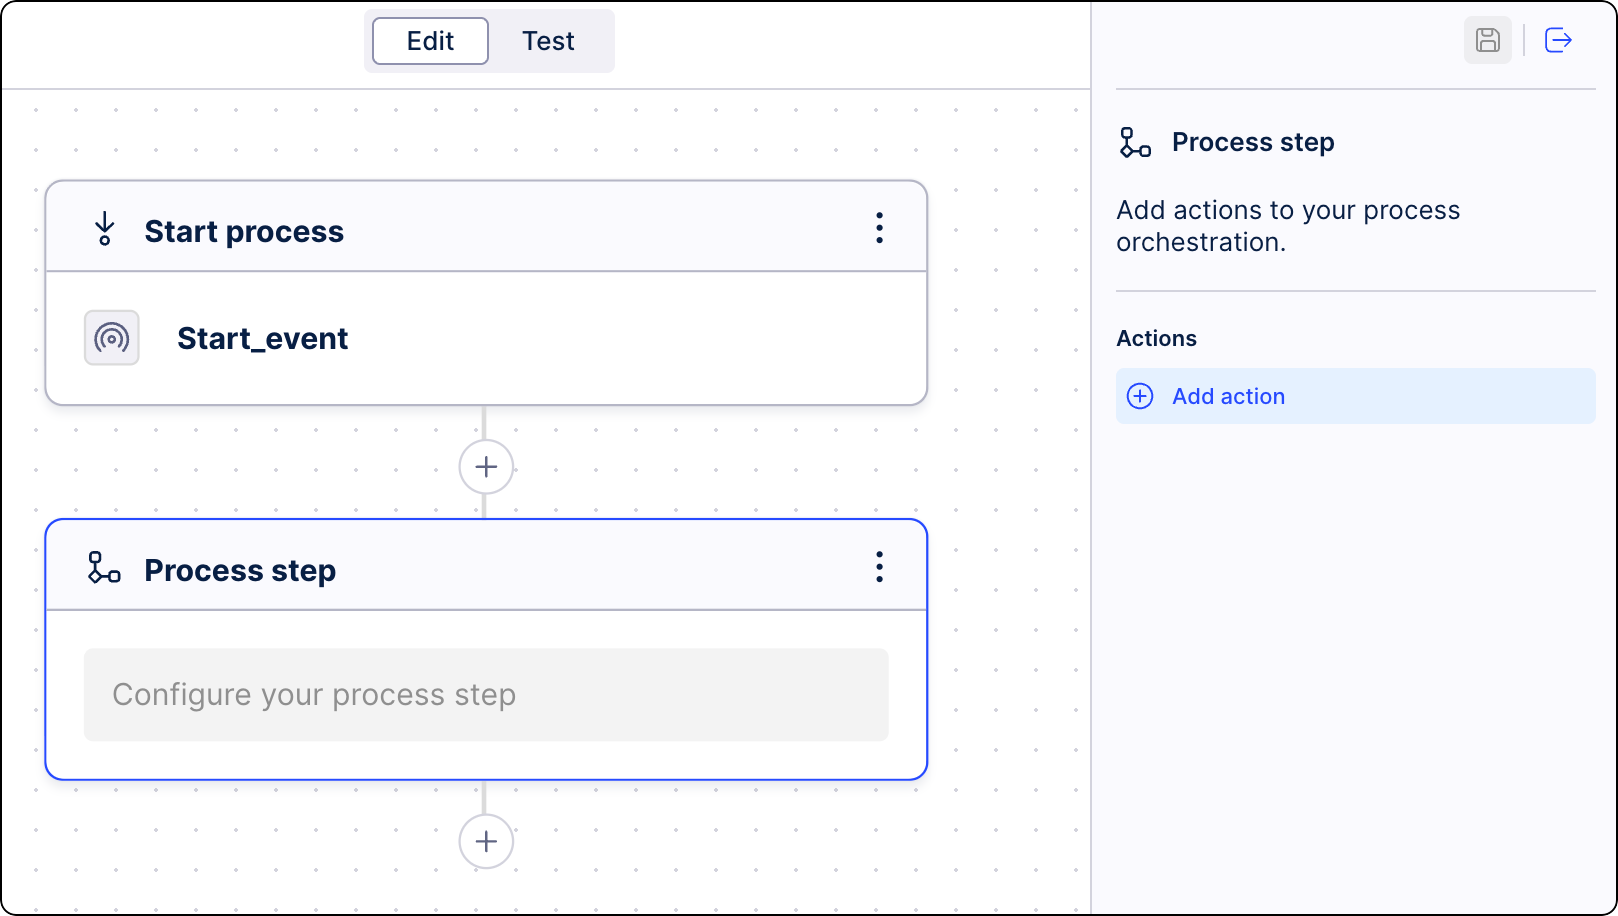
Add Process steps (using the "+" icon), where you can add an Action, like an Action Flow or an AI Agent, and define conditions.
Below the Process start, click the “+” icon, and select Process step.
From the side panel, select Add Action.
Define conditions for the step activation. Click Create conditions. See Adding conditions to Process Orchestration steps.
Select a type of action you want to be taken in this step. Click one of the available tabs: Action Flow, Cloud function, or AI Agents. For more information, see Editing process steps.
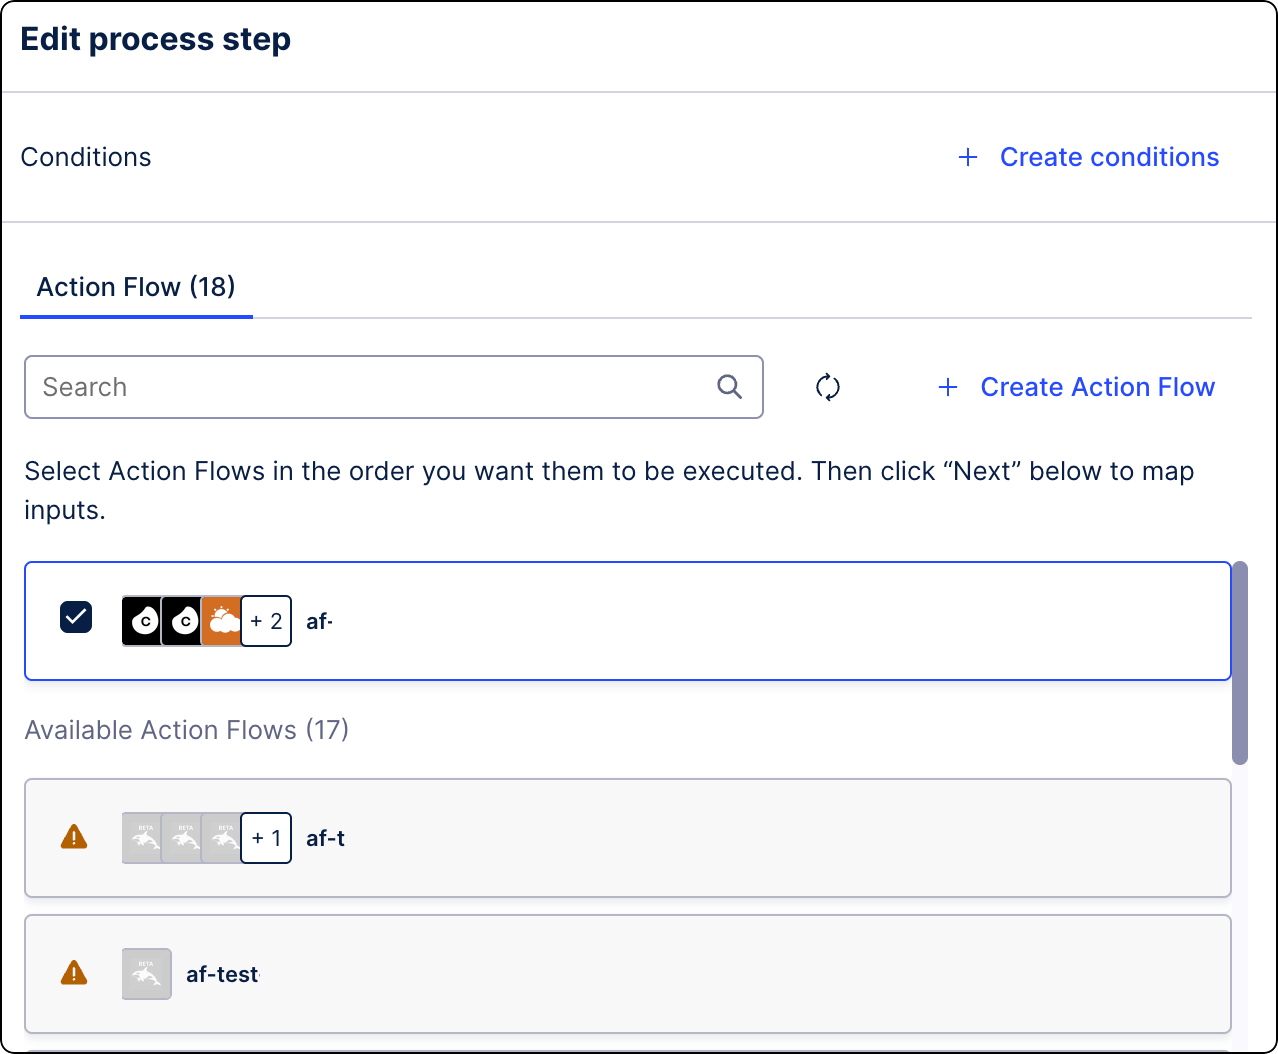
Click Next.
You can add as many steps as needed for your business scenario.
You can also add a Process resume step with an event to unpause a process:
Below the previous process step, click the “+” icon, and select Process resume.
From the side panel, select Add event.
When your process is set up, click Deploy to activate it.
We recommend testing Process Orchestration before deployment. See Testing Process Orchestration.
Your Process Orchestration is now operational.