Creating and granting permissions to application keys
Important
We’re gradually moving from API/Application keys to OAuth 2.0. We recommend that you use OAuth 2.0 or move to OAuth 2.0 for use cases and Celonis API endpoints where OAuth 2.0 is already supported. See Using OAuth 2.0 to find out about OAuth 2.0 and the Celonis Platform and our developer portal for more information on supported Celonis API endpoints.
Creating application keys enables you to give access and permissions to any applications you create, either within your or externally. Once created, an application key must then be granted the necessary permissions within your Celonis Platform (as by default, application keys are created without permissions).
Admins can also receive system notifications whenever a new application key has been created. See: System notifications
Procedure
To create an application key and grant it permissions:
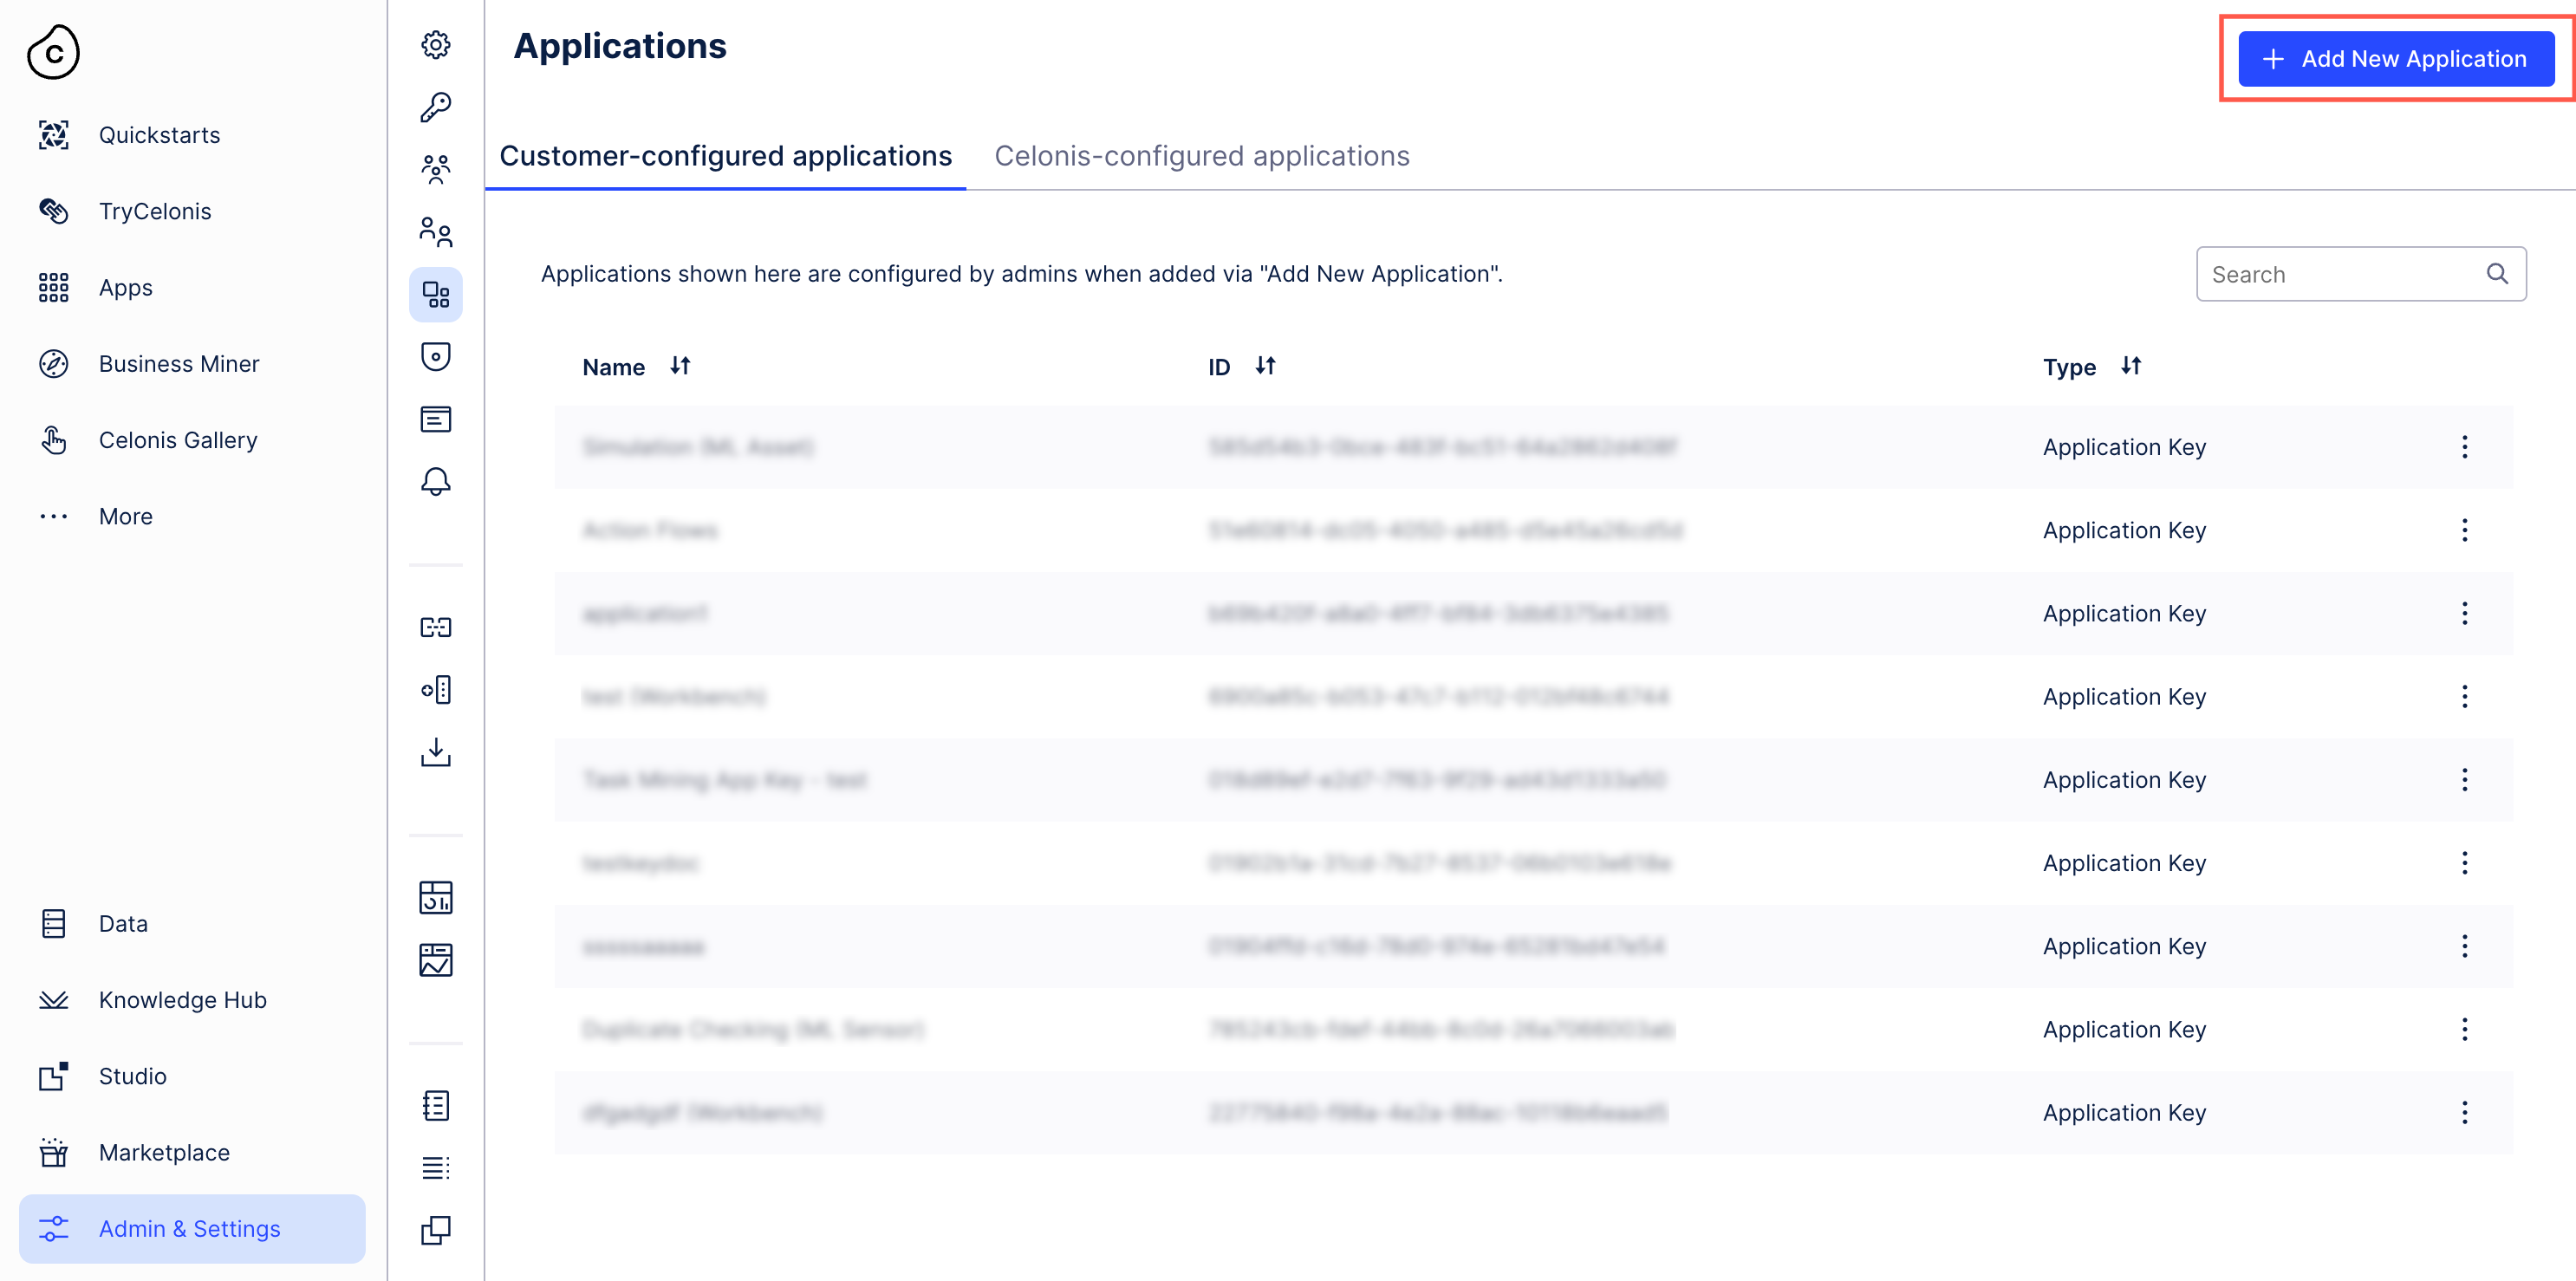
Click Admin & Settings - Applications.
Click Add New Application - Application Key, enter a key name, and then click Save.

Copy the application key displayed.

Note: You can only view an application key once, so make sure to copy it when you create it. If you don't have a copy of the keys on your list, you'll need to create a new one.
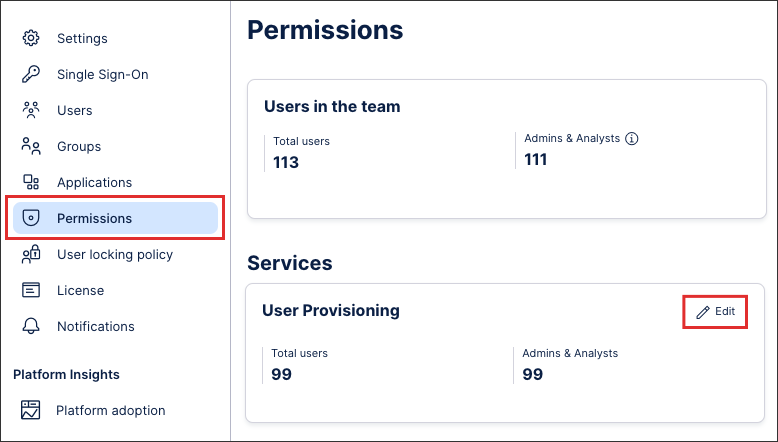
Click Permissions.
Locate the service you need (such as Team, User Provisions, Machine Learning, Data Integration, etc.) and click Edit.
In this example, we’re updating the User Provisioning service.

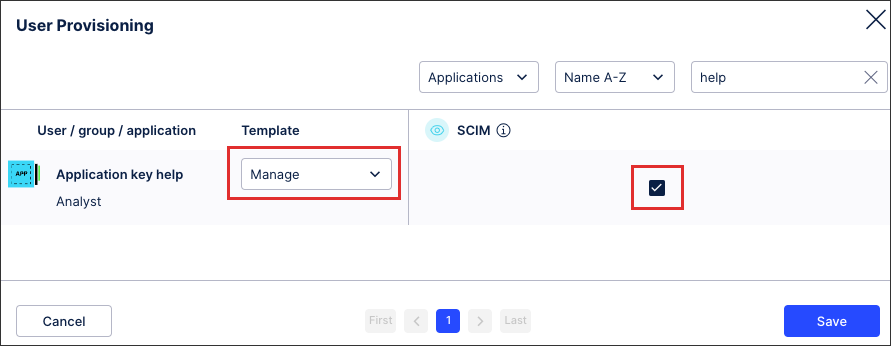
Select the required service permission template for your application and, if required, enable SCIM permissions.
In this example, we are granting our application with manage permissions and enabling SCIM permissions.

Click Save.
Add the application key to the authorization header of your requests using the following format:
Authorization: AppKey APPLICATION_KEY
Your application now has the correct permissions within your Celonis Platform.