Webhooks
Webhooks serve as instant triggers that allow external applications to send real-time data to a Celonis Action Flow. By using a Custom Webhook module, Celonis generates a unique URL that "listens" for incoming HTTP requests (JSON, Form Data, or Query Strings).
To call a third-party webhook (outgoing webhooks) use one of the HTTP modules.
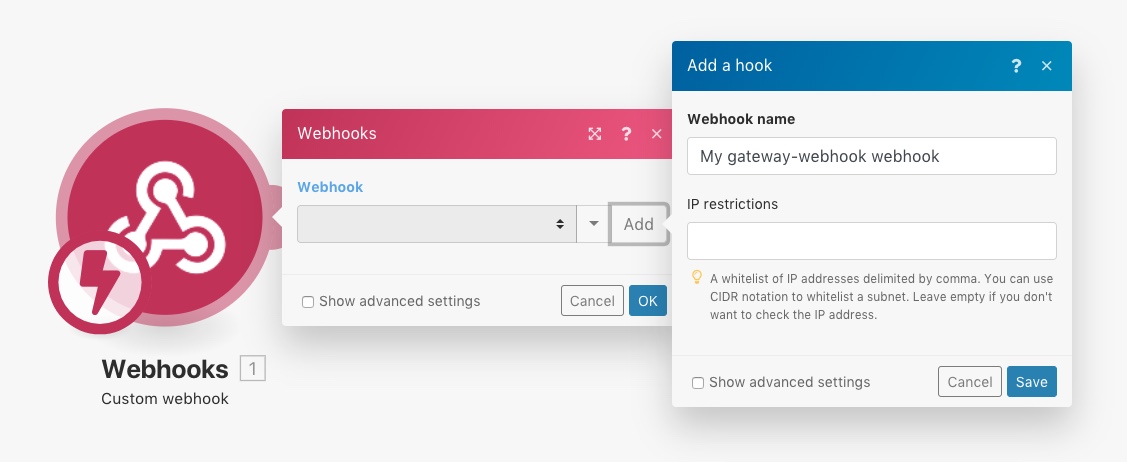
Any application that is connected to the Internet and allows the sending of HTTP requests can send webhooks to Celonis. To connect such an app to Celonis, add the Webhooks > Custom Webhook instant trigger module to your Action Flow. When setting this trigger, click on the Add button next to the Webhook field and enter a name for the new webhook.
Determine the webhook's data structure
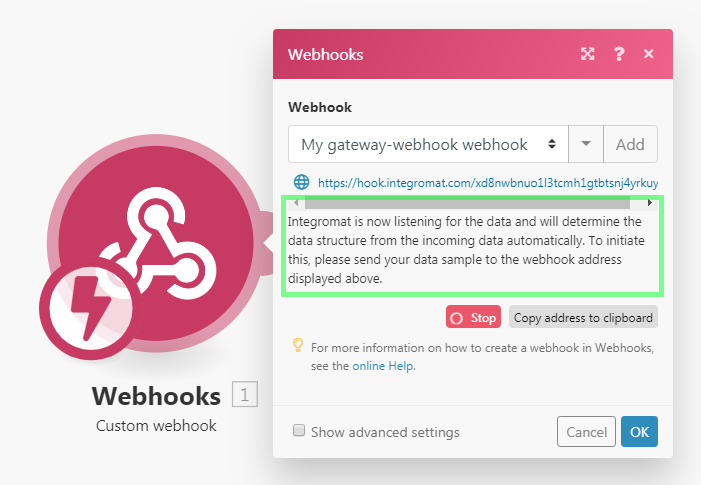
Once you create a webhook, you will see a unique URL that Celonis will listen for. The data sent to this address is first validated and then passed on for processing in the Action Flow. To enable the option to map items outputted from the webhook, Celonis needs to determine the data structure of the incoming payload so the other modules know what to expect from the webhook. That's why Celonis will ask you to send sample data to the displayed address:
There are two ways to supply the sample data:
Generate a webhook in the given service/app where you have registered the webhook. Make a certain change in the service/app that will make the service/app call the webhook, like removing a file, etc.
Send the sample data via the HTTP > Make a request module.
If you would like to use the second option, follow these steps:
Create a new Action Flow with the HTTP > Make a request module and set it up like this:
URL
URL of the webhook
Method
POST
Body type
Raw
Content type
JSON (application/json)
Request content
raw JSON expected in the webhook

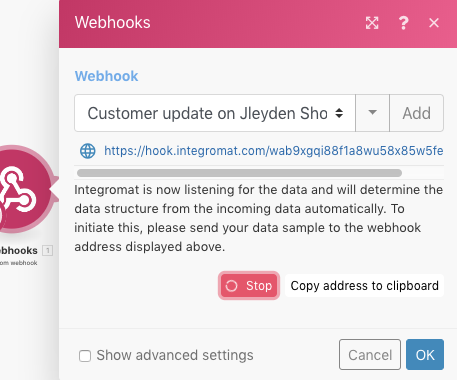
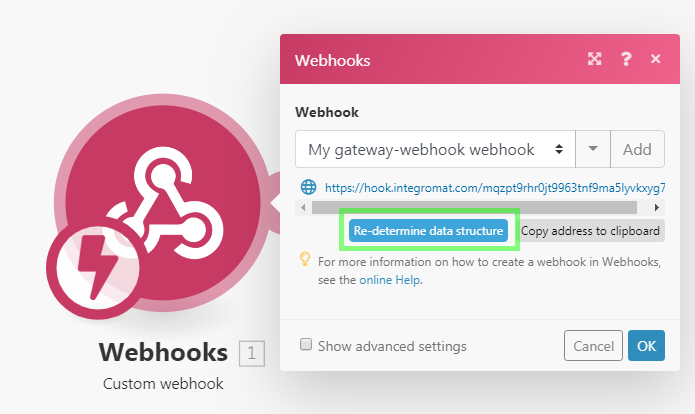
Have both Action Flows (the one with the HTTP module and the one with the Webhooks module) open in separate browser tabs/windows. Open the Action Flow with the Webhooks module and click the "Redetermine data structure" button to make Celonis listen for the data (you don't have to unlink other modules, the data won't be used anywhere):
Switch to the Action Flow with the HTTP module and run it.
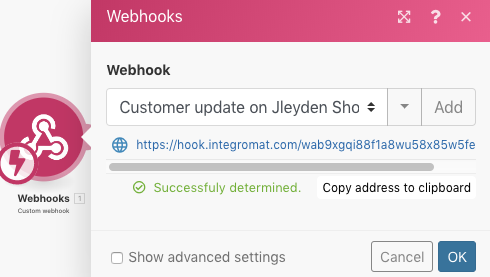
Switch back to the Action Flow with the Webhooks module. If everything went right, the data structure of the webhook should be determined and you should see a message "Successfully determined":
Click OK to save the data structure.
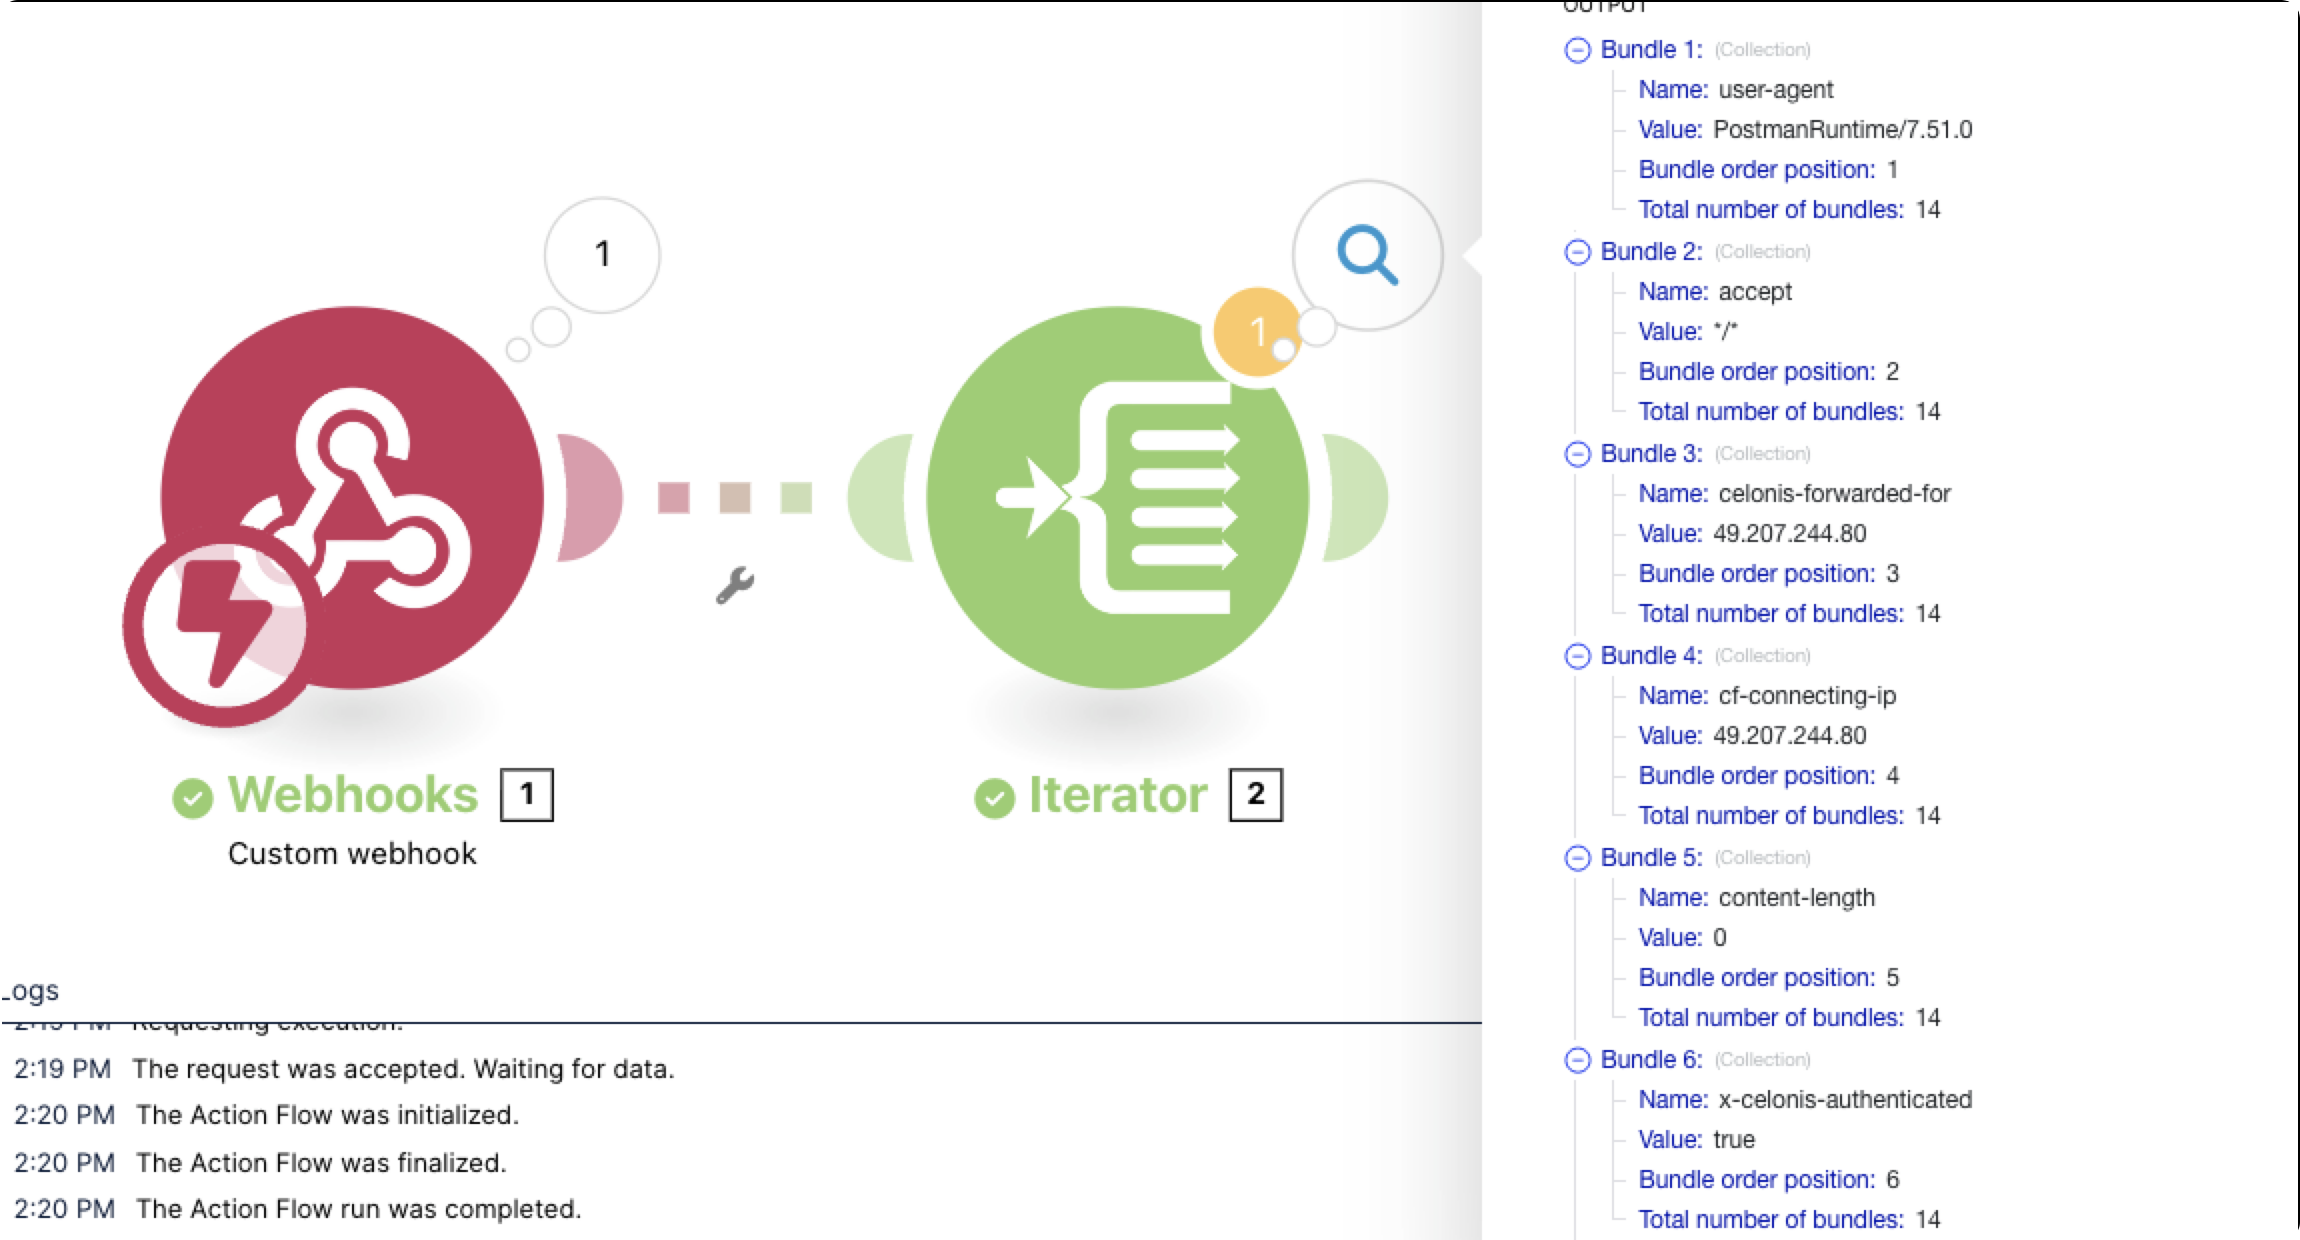
The webhook's items should be now available in the mapping panel for mapping to fields in the configuration of modules connected after the Webhooks module:
The Action Flow listens for the webhook data. If the Action Flow is not active, the data is stored in the queue. Once you activate the Action Flow, all bundles waiting in the queue will be processed sequentially.
Action Flow webhook connection can be secured for public use. To be processed successfully, all calls made to the webhook from outside must include a secure authorization header like AppKey or Bearer token. Once authorized by Celonis, a call is marked as x-celonis-authenticated: true.
To prepare your environment and webhook for public use:
In Celonis Platform, create a new application key. See Adding OAuth client to Celonis Platform.
In external software used for communication with the webhook, use the credentials generated when creating the new key.
Celonis supports 3 formats of incoming data - Query String, Form Data and JSON. Celonis validates all incoming data against the selected data structure and then depending on the settings of the Action Flow, the data is either stored in the queue for processing or processed immediately.
If any part of the data does not pass the validation, Celonis returns a '400 HTTP' status code and specifies in the body of the HTTP response the reason why the incoming data failed the validation checks. If the validation of the incoming data succeeds, Celonis returns a '200 Accepted' status in response.
Query String
GET https://<actionflow_webhook_url>/
Form Data
               POST https://<actionflow_webhook_url>/
Content-Type: application/x-www-form-urlencoded

name=Integrobot&job=automate
Multipart
               POST
Content-Type: multipart/form-data; boundary=---generatedboundary

---generatedboundary
Content-Disposition: form-data; name="file"; filename="file.txt"
Content-Type: text/plain

Content of file.txt
---generatedboundary
Content-Disposition: form-data; name="name"

Celonis
---generatedboundary
In order to receive files encoded with multipart/form-data, it is necessary to configure a data structure with a collection type field that contains the nested fields name, mime and data. The field name is a text type and contains the name of the uploaded file. The mime is a text type and contains a file in the [MIME] format. The field data is a buffer type and contains binary data for the file being transferred.
JSON
               POST https://<actionflow_webhook_url>/
Content-Type: application/json

{"name": "Integrobot", "job": "automate"}
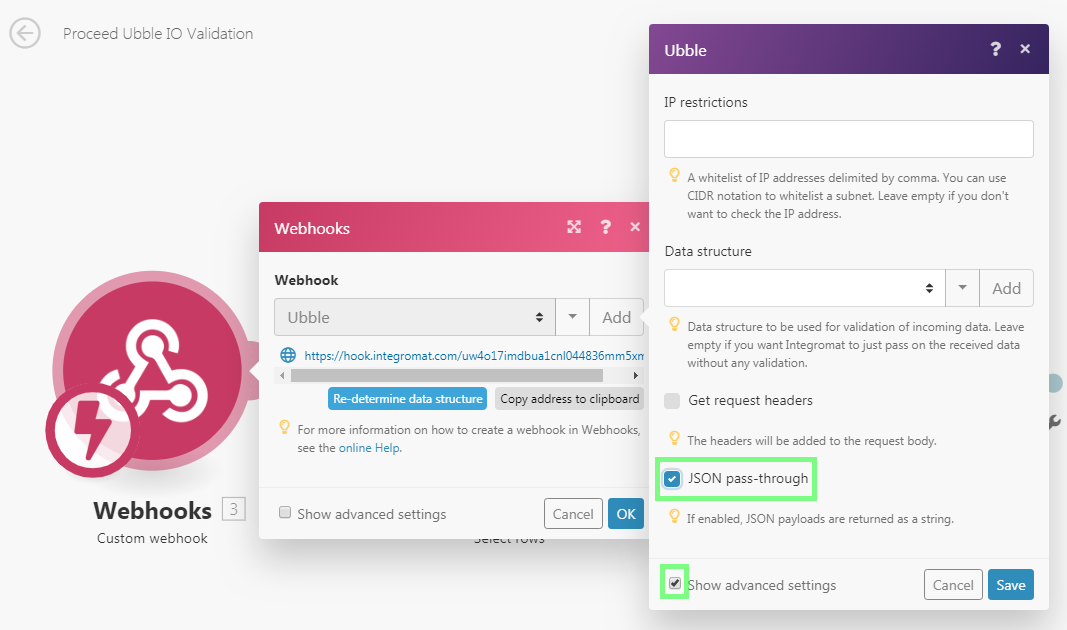
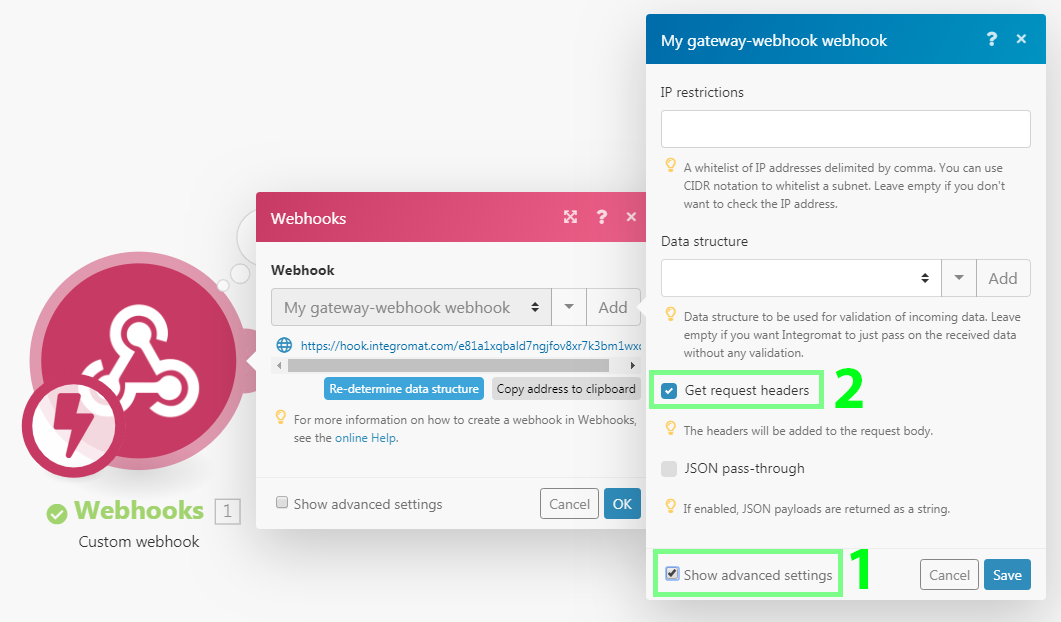
PRO TIP: If you wish to access the original JSON, open the webhook's settings:
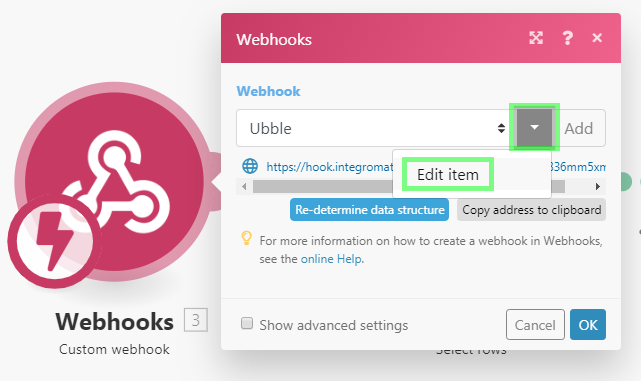
and enable the JSON pass-through option:
Maximum allowed webhook's payload size (Content-Length) is 5 MB (5.242.880 bytes) regardless of the subscription tier.
To access the webhook's headers, enable the Get request headers option in the webhook's setup:
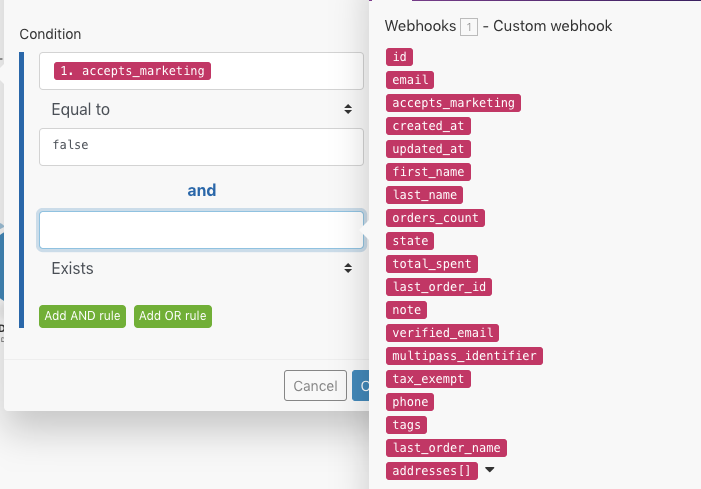
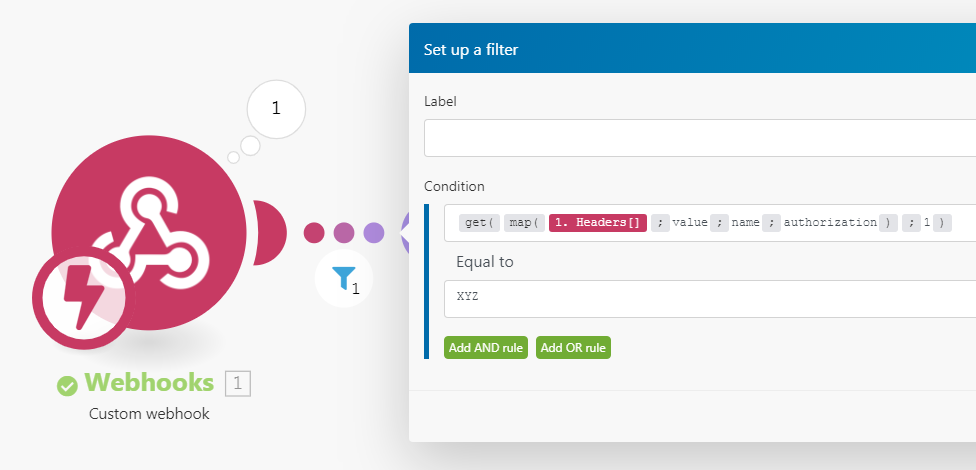
You can then extract a particular header value with the combination of map() & get() functions. The example below shows a formula that extracts the value of the authorization header from the Headers[] array. The formula is used in a filter that compares the extracted value with the given text to pass only webhooks if there is a match.
See Mapping an array's element with a given key for further information on obtaining an array's element with a given key.
The default response to a webhook call contains just a simple text, "Accepted" and the response is returned to the webhook's caller right away during the execution of the Custom Webhook module. You can easily test it like this:
Place the Custom Webhook module in your Action Flow.
Add a new webhook in the module's configuration.
Copy the webhook's URL to your clipboard.
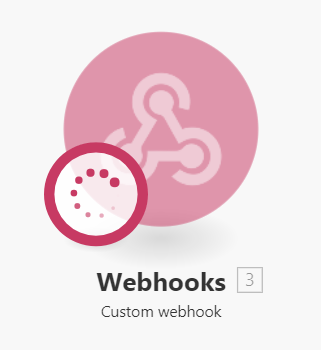
Run the Action Flow - the Custom Webhook module should be waiting for the webhook call (see on the right)
Open a new browser window, paste the copied URL in the address bar and press Enter.
The Custom Webhook module will be triggered and the browser will display the following page:

These are default responses when the Action Flow does not contain the Webhook Response module:
HTTP status code | Body | |
Webhook accepted in the queue | 200 | Accepted |
Webhook queue full | 400 | Queue is full. |
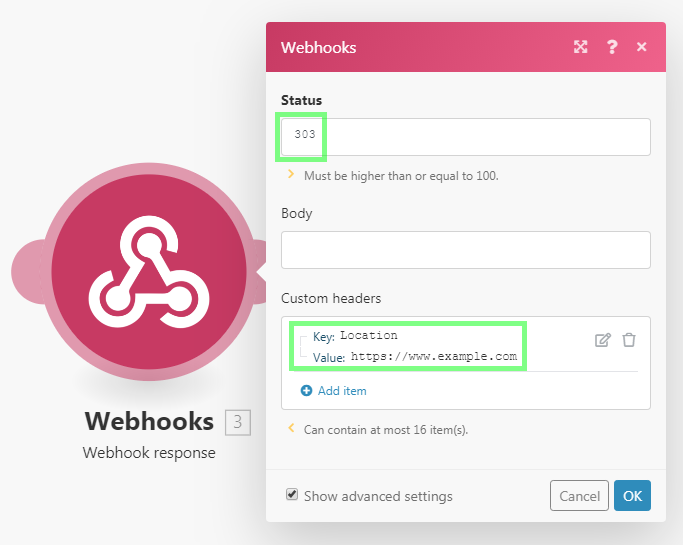
If you wish to customize the webhook's response, employ the module Webhook Response. The configuration of the module contains two fields: Status and Body. The Status field should contain HTTP event status codes like 2xx for Success (e.g. 200 for OK), 3xx for Redirection (e.g. 307 for Temporary Redirect), 4xx for Client errors (e.g. 400 for Bad Request), etc. The Body field should contain anything that will be accepted by the webhook's call. It can be a simple text, HTML, XML, JSON, etc. It is advisable to set the Content-Type header to the corresponding mime type text/plain for plain text, text/html for HTML, application/json for JSON, application/xml for XML, etc.
These are additional default responses when the Action Flow does contain the Webhook Response module:
HTTP status code | Body | |
Action Flow encounters an error | 500 | Action Flow failed to complete. |
The timeout for sending a response is 40 seconds. If the response is not available within that period, Celonis returns a '500 Internal Error' status.
HTML Response example
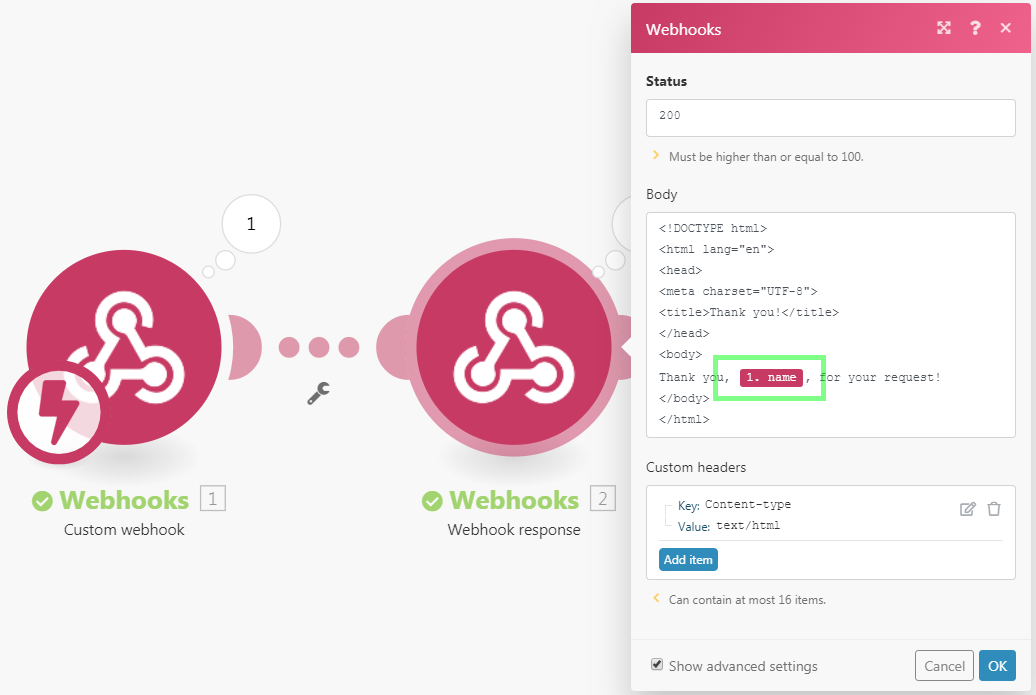
Configure the Webhook Response module as follows:
Status | 2xx success HTTP status code, for example | ||||
Body | HTML code, for example: <!DOCTYPE html>
<html lang="en">
<head>
<meta charset="UTF-8">
<title>Thank you!</title>
</head>
<body>
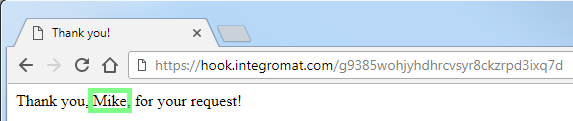
Thank you, {{1.name}}, for your request!
</body>
</html> | ||||
Custom headers |
|
It will produce an HTML response that will be displayed like this in a web browser:
Redirect example
Configure the Webhook Response module as follows:
Status | 3xx success HTTP status code, for example | ||||
Custom headers |
|
Please see the Custom Mailhook documentation.
Missing items in the mapping panel
If some items are missing in the mapping panel in the setup of the modules following the Webhooks > Custom Webhook module, click on the Webhooks > Custom Webhook module to open its setup and click on the "Re-determine data structure" button:
Then follow the steps described in the section Determine the webhook's data structure.