Migrating individual Analysis assets to Views
You can manually migrate individual Analysis assets to Studio Views, allowing you to use them with our enhanced View editing experience. These are mandatory tasks if your Analysis uses a load script, though they can also be optionally undertaken if you want to just migrate individual assets at any time.
To migrate individual Analysis assets to a View, follow these steps:
Step 1: Checking for Analysis load script and choosing filter
Load scripts automatically run when the Analysis is opened by a user, ensuring that configured filters or settings are applied to the content. If your Analysis is using a load script, you must select the migration filters you want to use in your View.
To check if your Analysis is using a load script:
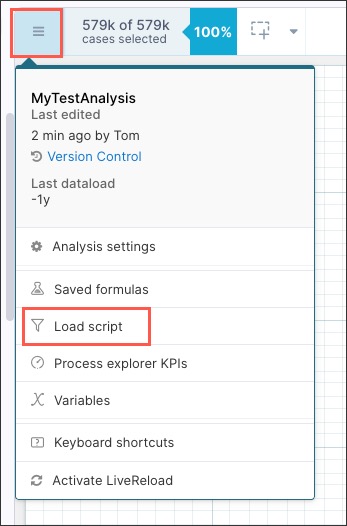
Open the Analysis in edit mode and click Options - Load Script:
Is a load script being used?
YES: If your Analysis is using a load script, you must choose a type filter to use with the migration. See: Migration filter types.
NO: Proceed to Step 2: Exporting the saved formulas and their variables to the Knowledge Model.
Migration filter types
Type | Description | Steps |
|---|---|---|
Global Knowledge Model filter | By making a filter global it is going to be applied to all PQL statements in this Knowledge Model. This is how the Analysis load script behaves. However, the difference is that the Knowledge Model is most likely used by several Views. Thus this setting makes sense if this filter should be applied to all PQL code of all Views using this Knowledge Model. |
|
Knowledge Model filter that is referenced by the View | You can reuse the filter statement in one View, or several as well as for individual component filters, but not all Views need to be filtered by it (compared with the global setting). This makes sense if you have several Views in one Package that, before migration, were several Analyses with different load scripts. They still use the same data model and share metrics and attribute definitions and thus the same Knowledge Model. |
|
Local View level filter | If there is no need to reuse this Filter for other Views or individual components you can also just save the filter statement locally in the View filter. |
|
Before proceeding with this step: Go to your Analysis settings and saved formulas. Check whether your saved formulas are stored locally or in a Knowledge Model.
For example, in the below screenshot most of the formulas are already in the Knowledge Model, only one saved formula was stored locally on the Analysis. The export tooling will allow you to export this local saved formulas to the Knowledge Model.

If your saved formulas are already stored in a Knowledge Model, proceed to Step 4.
If your have one or more saved formulas stored locally, export them to the Knowledge model that you want to use for the View.
Scope of the export saved formulas and variables tool
This tool allows users to export Saved formulas in Studio Analysis, and any formulas and variables used in those into the Knowledge Model KPIs in the same package. Therefore no permission management is required while exporting.
To export formulas to a Knowledge Model in another package ensure that the same data model used is available in the destination package. You can do this through Package Settings, see Variables. You can use the “Copy to” option to copy the Analysis to the destination package.
Important
Variables that are not used in a saved formula will not be migrated with this tool. This is to avoid cluttering the Knowledge Models with unused content. Most likely these variables are used directly in component configurations and will need to be migrated manually as part of the component migration. See ???.
If your Analysis is connected to a Knowledge Model already, then saved formulas from the source “Knowledge Model” will not be selectable for export (to avoid duplication in the Knowledge Model).
Steps to export saved formulas to a Knowledge Model
This GIF shows steps 2 to 9 below.
Make sure there is a Knowledge Model in the same package of the Studio Analysis to be migrated.
Learn more about what a Knowledge Model is and how it's used.
Create a new Knowledge Model if you do not yet have one by following the directions in Creating a Knowledge Model within an existing package.
Ensure the same Data Model is used in this Knowledge Model as the Studio Analysis. A different Data Model being used will cause formulas to break.
Go to Edit mode in the Studio Analysis you are exporting from.
Click the hamburger menu in the upper left and select Saved formulas.
Click Export to Knowledge Model to start the export.
In the dropdown, choose the Knowledge Model to which you are exporting the formulas and their associated variables.
Only Knowledge Models in the same package will appear in the dropdown.
A warning message will appear if you select a Knowledge Model that does not share the same Data Model with your Studio Analysis, but you are able to proceed if necessary with the selected Knowledge Model.
Select the formulas that you’d like to export:
Search by name through the search bar.
Select the formula you would like to include in the export by checking the checkbox next to the formula.
Or click the checkbox on the header row to include all selectable formulas in the export.
Note
When exporting saved formulas to the Knowledge Model, we pay special attention to saved formulas that have the exact same name or the exact same PQL statement as existing KPIs in the Knowledge Model. This is to avoid overwriting any existing formulas in the Knowledge Model and help prevent duplicate KPIs.
Same name: Saved formulas that have the exact same name as already existing KPIs in the Knowledge Model, will not be selectable for export. Any component using the saved formula will automatically reference the Knowledge Model KPI in the View and the reference will be automatically adjusted.
Same PQL with a different name: If there is an existing Knowledge Model KPI that uses the exact same PQL but has a different name as your saved formula, we highlight this visually. You can decide 1) if you want to export the saved formula to the Knowledge Model anyway or 2) if you prefer to manually update the components in the View to use the already existing KPI.
If you still want to export the saved formula, you will need to modify the formula either in Studio Analysis or in the Knowledge Model.
Any variables nested within selected saved formulas will also be exported, and they are also included in this duplication check.
Click Export to export the selected formulas.
When the export is complete, you will see a success message.
Close the window by clicking Done or go to the Knowledge Model by clicking Open Knowledge Model.
Click Open Knowledge Model to validate the export. On the KPI page of the Knowledge Model, find the Saved formulas.
Note
You will not see any variables in the Knowledge Model immediately. You can find the variables directly in the PQL editor when using the Saved formula in a component in a View.
Before proceeding with this step: Check if the sheet from which you plan to start migrating components has a sheet load script.
Click the settings icon.
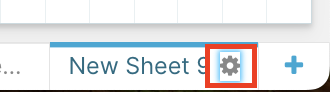
Select the Load Script tab.

If it does not have a sheet load script, proceed to
If it does have a sheet load load script, choose a filter type from the table below:
Type | Description | Steps |
|---|---|---|
Knowledge Model filter referenced by the View tab | This is useful if you expect to reuse the filter statement for other Views, tabs, or components. |
|
Local View level filter Local View or tab-level filter | If you don't need to reuse this filter for other purposes, you can simply save the filter statement locally in the View or tab filter. |
|
Scope of the tool
The Copy & Paste component tool allows you to export components built in Studio Analysis to a View. Component filters are automatically migrated with all mappable configurations. Some components or component settings are not yet covered.
To learn more about available components in Analysis vs Views, refer to the Studio feature availability matrix.
Steps to copy one or more components from Analysis and paste into a View
Make sure there is already a View where you intend to copy the component into. This View should also use the same Knowledge Model that you export your saved formula to, in order to avoid component breaking after export. Refer to Views for how to create a new View.
To make it easier, you can open two different browser tabs in parallel - one tab with the Analysis you want to migrate and another with the new View.
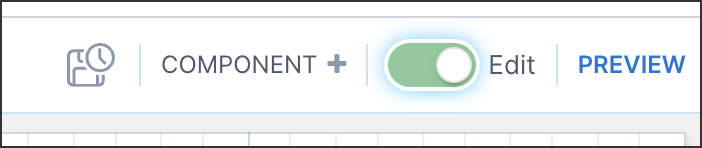
Switch to Edit mode in the Studio Analysis from which you are copying components.
To choose the components you want to copy, you can:
select individual components to copy them one-by-one;
select multiple components by clicking on the first component, holding down the CTRL key as you select additional components, and then pasting the selected components into your View all at once;
select all components in the Analysis by pressing CTRL + A so you can then paste them in to your View all at once;
Right-click on any selected component and click Copy to View.
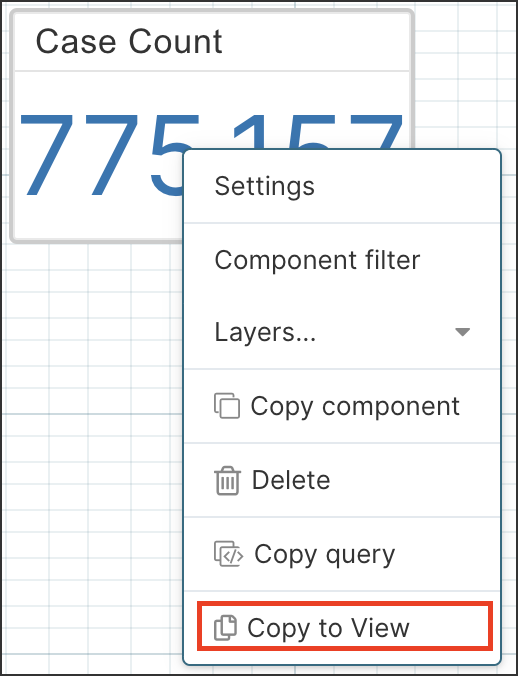
You will see a notification on the right side of the screen that the components have been successfully copied.

Note
If a selected component cannot be copied, a yellow notification will display indicating which components could not be copied.
Open the View you’d like to paste the component into and select Edit mode.
To make it easier, you can open two different browser tabs in parallel: one tab with the Analysis you want to migrate, and another with the new View.
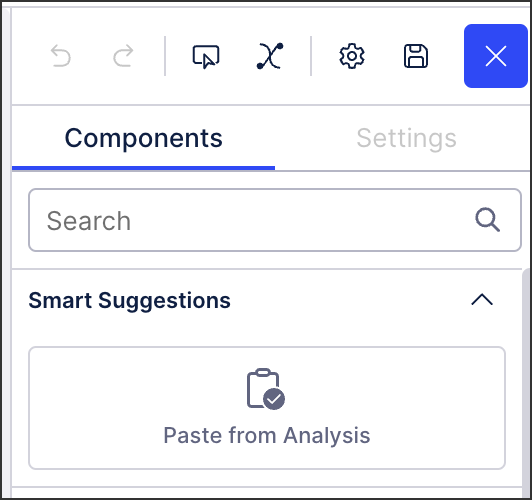
Click Paste from Analysis on the right side panel under Smart Suggestions to paste the components or use the CTRL + V or CMD + V keyboard shortcuts.
Once the components are copied and pasted into your View, you can manually arrange the components to create the desired layout and edit the copied components directly in the View as needed.
Troubleshooting
Here are some tips on troubleshooting if components throw (expected) errors after pasting the component in Views that require manual fixes.
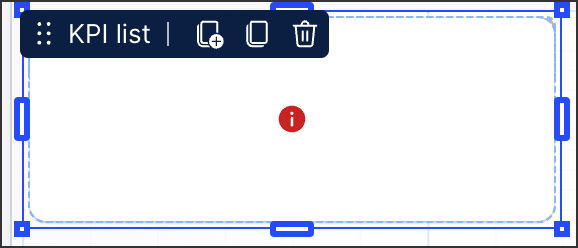
Error message or no data
You may see an error or no data is displayed. This is likely caused by a missing formula in the Knowledge Model.
 |
You can click into the PQL editor for more information and resolve the issue by creating the missing formula or parts of the formula in the Knowledge Model used in this View.
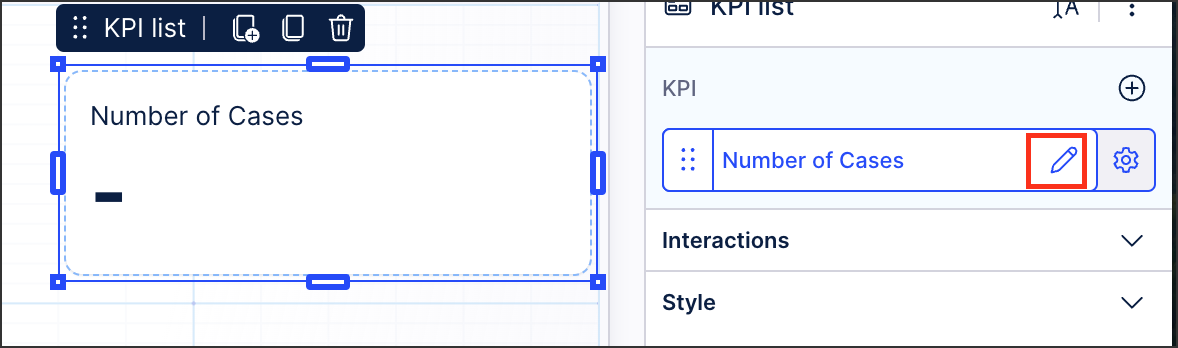 |
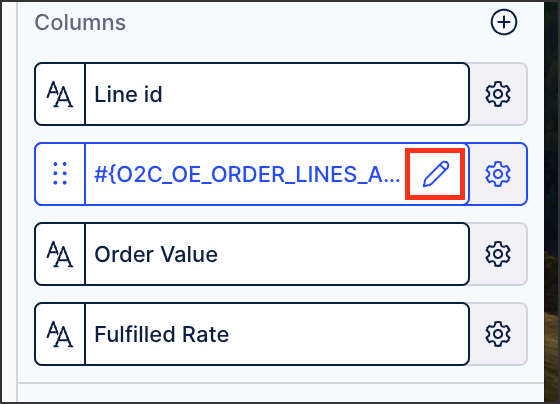
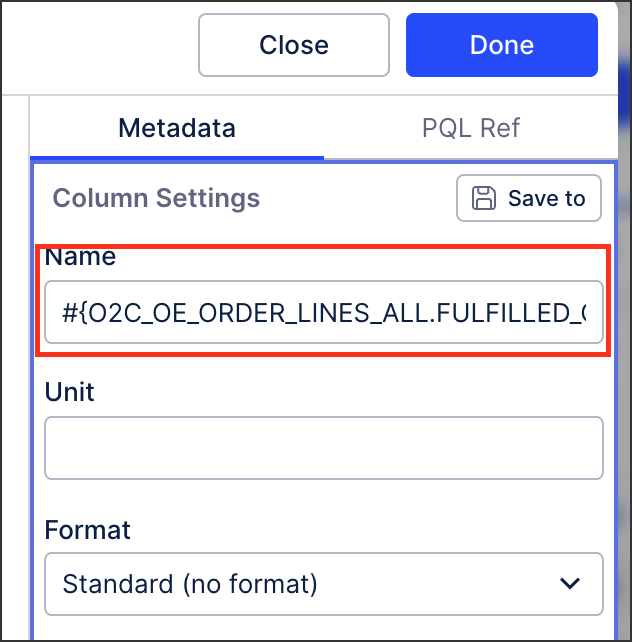
Column names do not appear as expected
You may see column names that do not appear as you expect, which is not unusual for columns where only the default name is used.

To make the names more readable, you can edit them in the “Columns” section of the Settings panel.
 |
 |