Set up the OCDM for the app
Here's how to connect the data from KPI Logging Combined DM data pool to Transformation Hub in Views data pool.
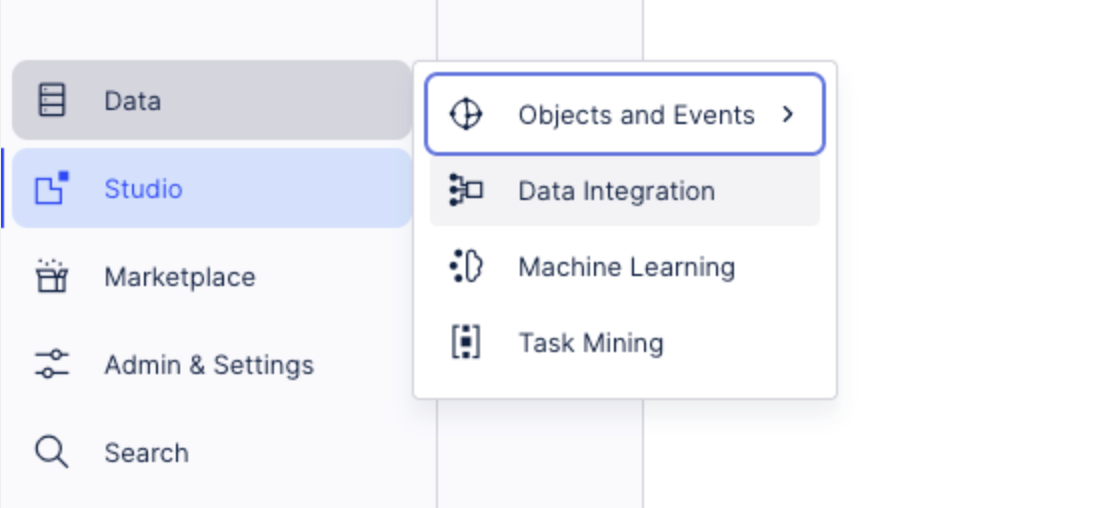
Access Data Integration.
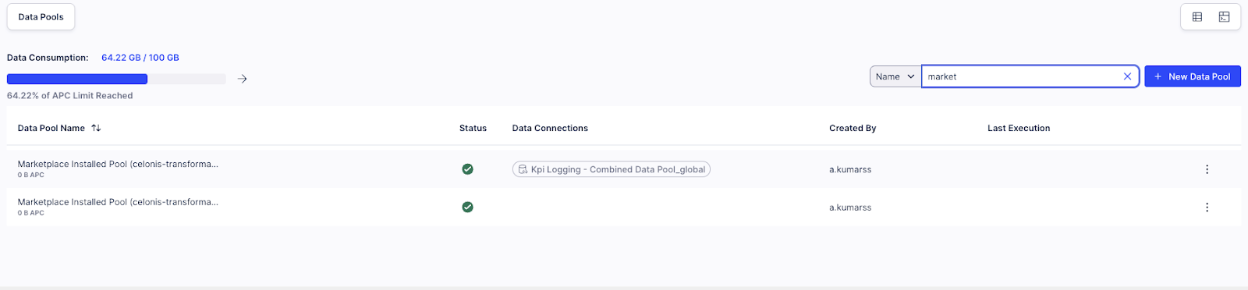
Search for ‘Marketplace Installed Pool’, you will be able to find the auto generated data pool.
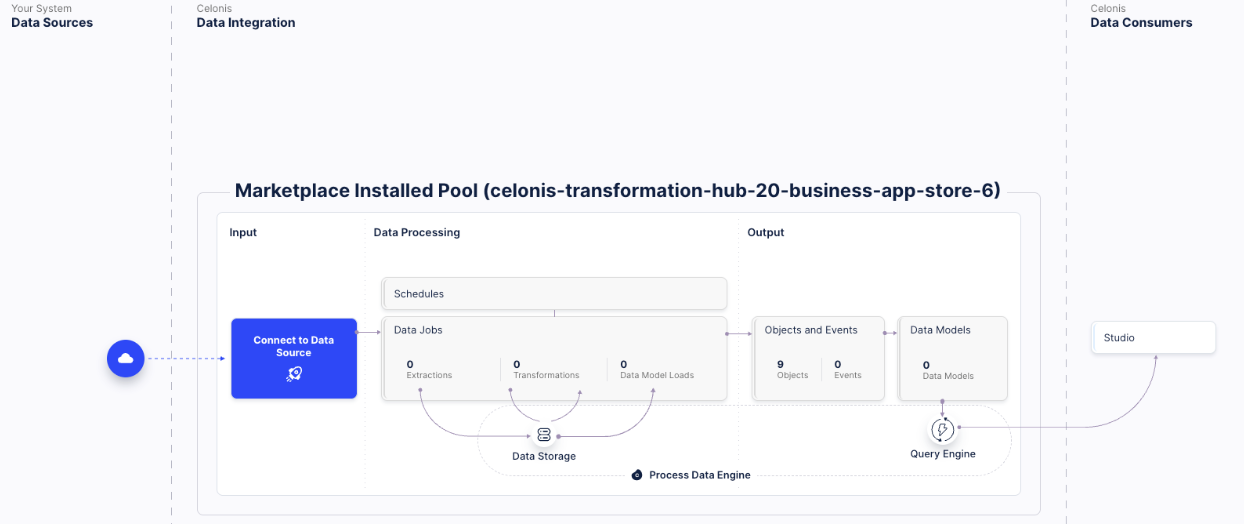
The data pool will have pre-populated objects within the OCDM pool. There should be a total of 9 objects.
Now, it's time to import the data from KPI Logging - Combined Data Pool. Go to Data Integration again and choose the KPI Logging - Combined Data Pool.
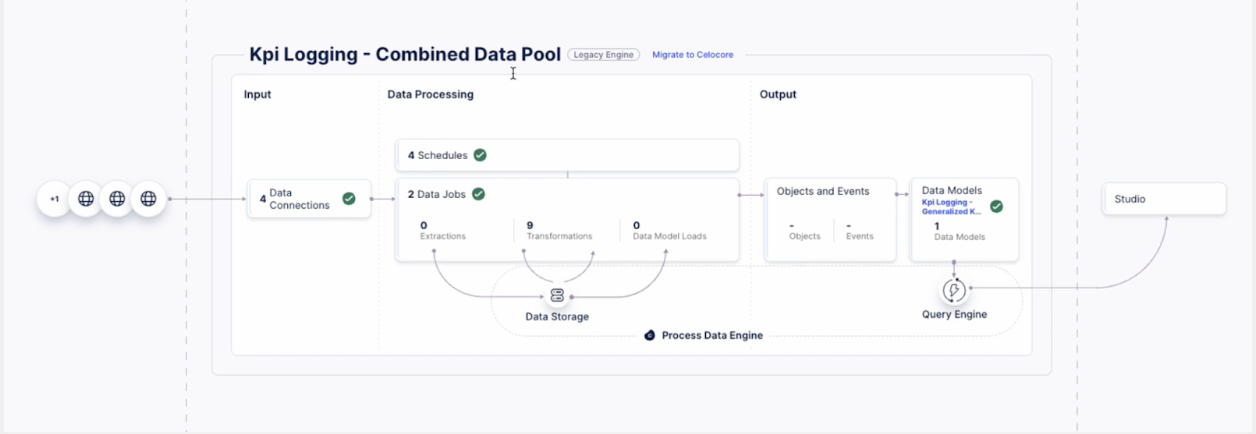
Access Data Connections and for the ‘Global Connection’ choose the option to ‘Share Data with other data pools’.

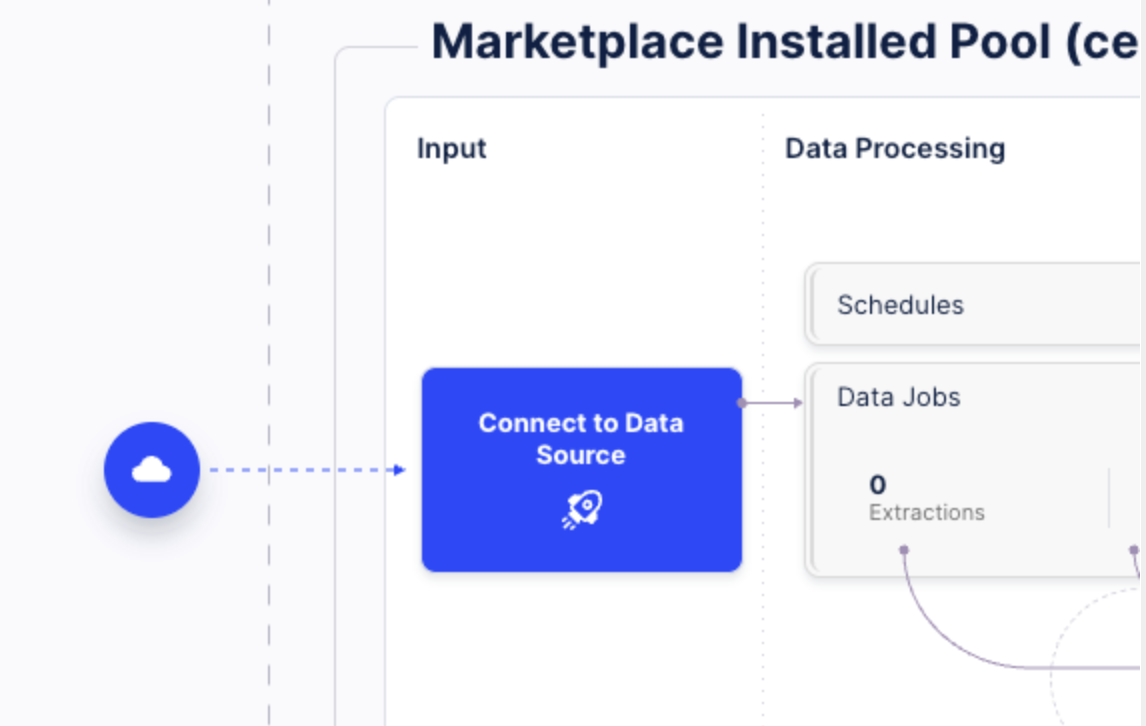
Select the ‘Marketplace installed pool’ from the options and click Next. Enable the option to ‘Automatically share new tables’ and click ‘Finish’.Once done, go to the ‘Marketplace installed pool’ and click on ‘Connect to Data Source’.
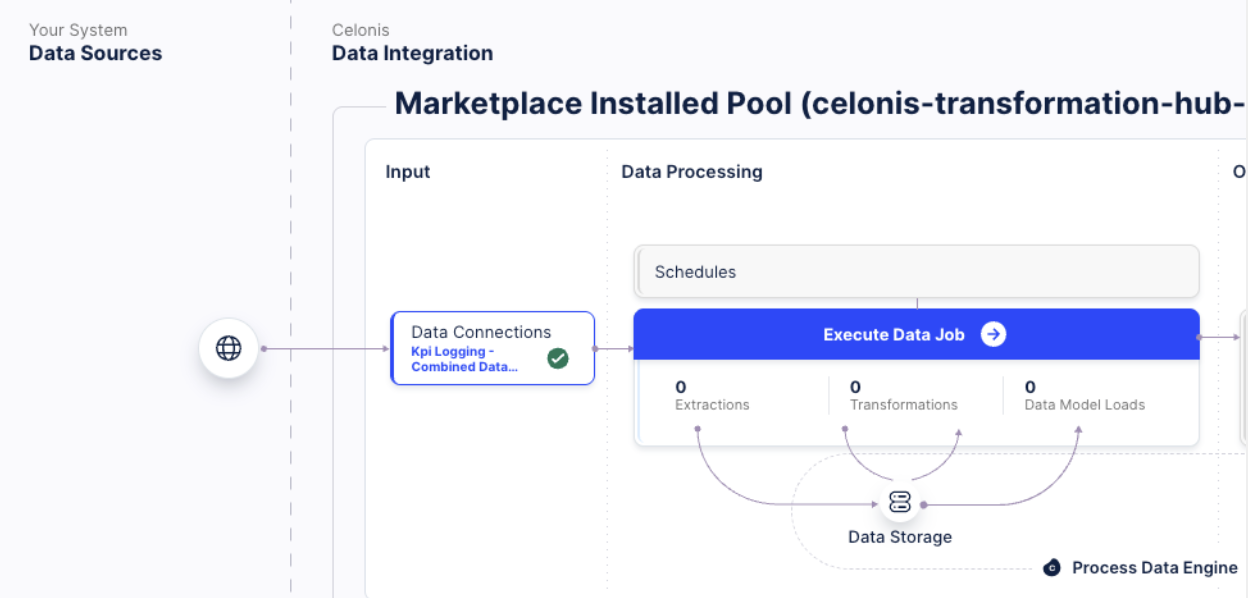
Select the option to ‘Import Data from another Data Pool’, select the Global Data connection from the source data pool (KPI Logging - Combined Data pool) and click Next. Enable ‘Automatic Synchronization’ and click on ‘Synchronize’.

Once done, you should be able to view the Data Connection Setup.
Access the OCDM and click on Transformations.
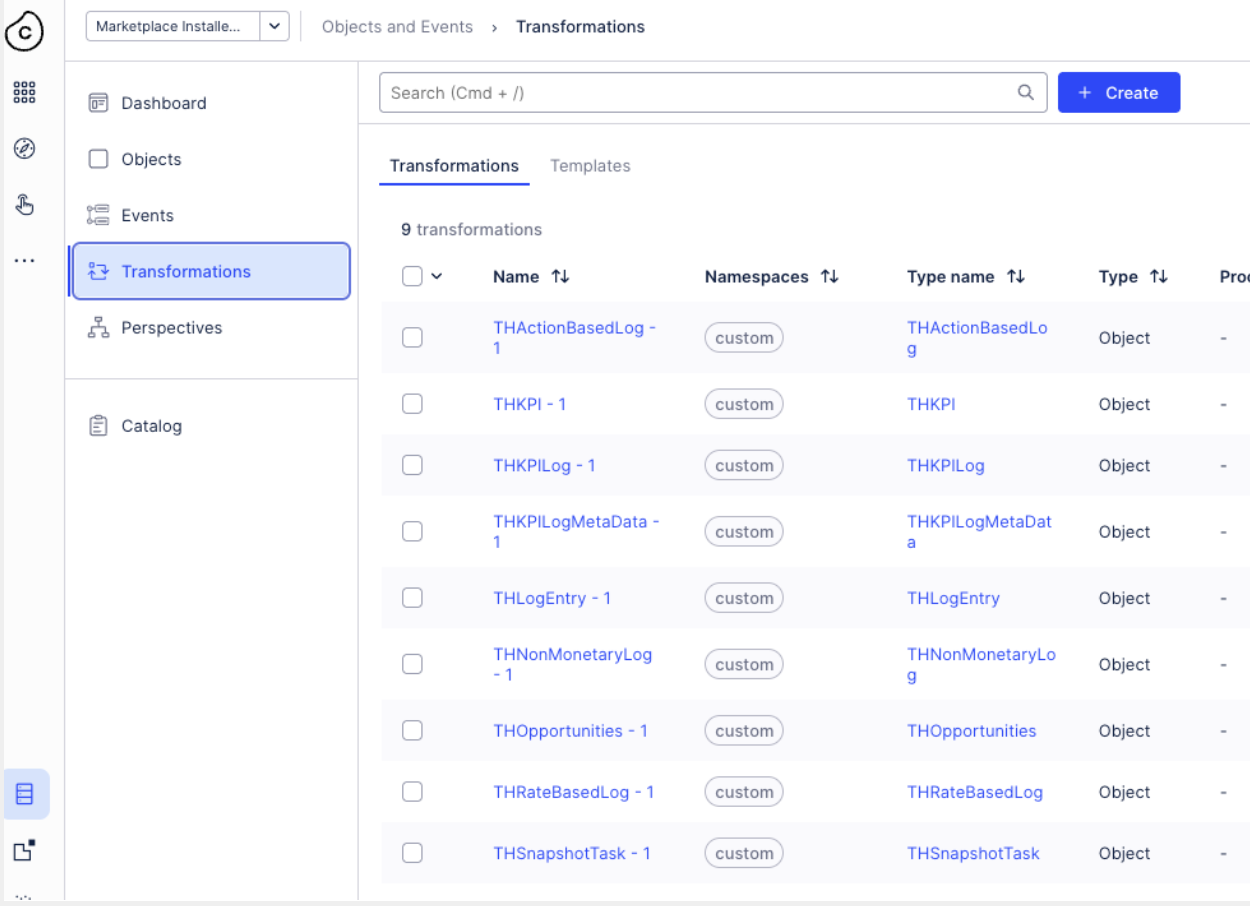
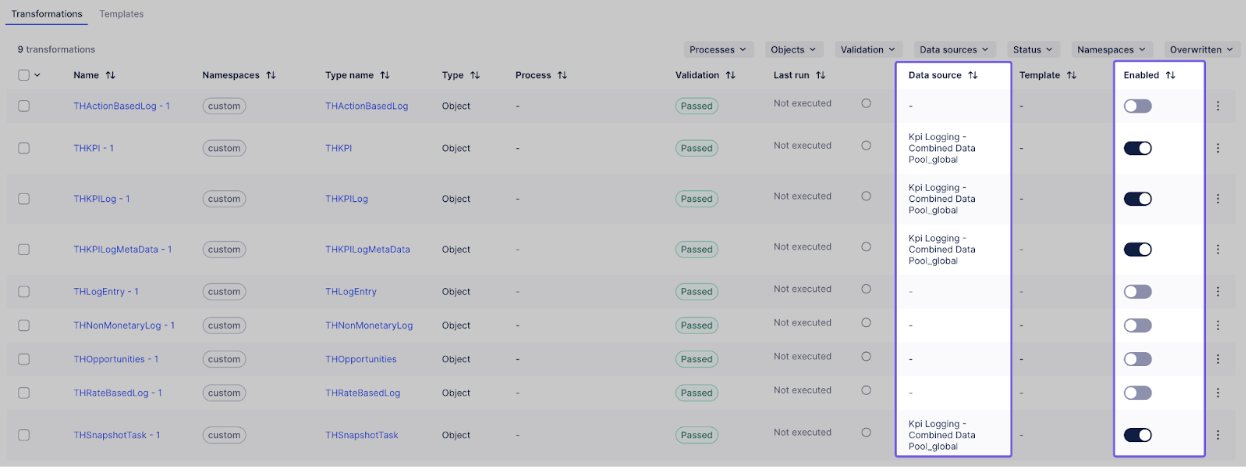
As part of the initial setup, enable transformations for the following four objects:
THSnapshot - 1
THKPI - 1
THKPILog - 1
THKPILogMetadata - 1
Disable transformations for the rest of the objects.
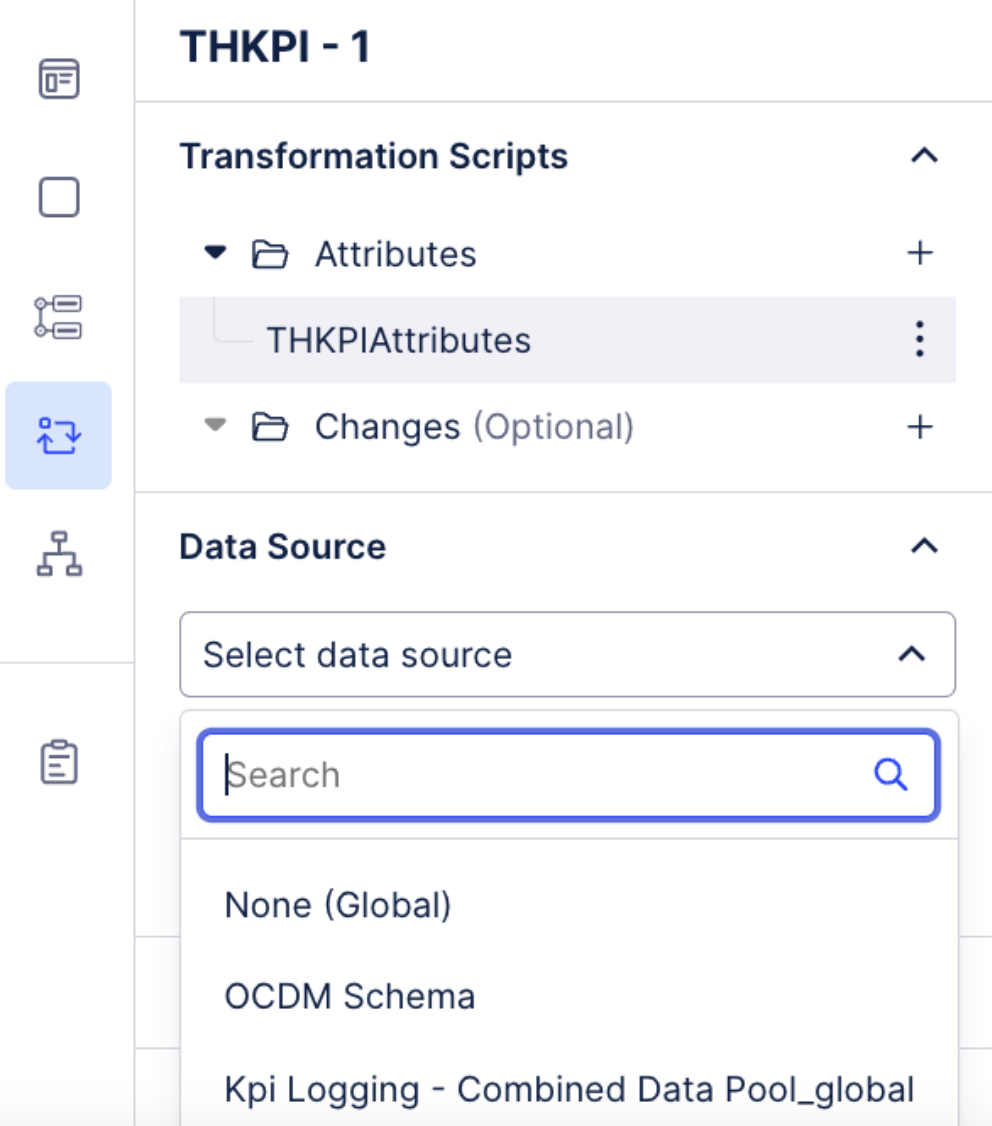
Select data source for all the four objects as KPI Logging Combined Data Pool.
Click on ‘Save with Validation’ for the transformations across all the 4 objects.
Once done you should be able to view the KPI Logging Combined Data Pool as the data source for all the 4 objects.
Create a Version and deploy to ‘Development’.
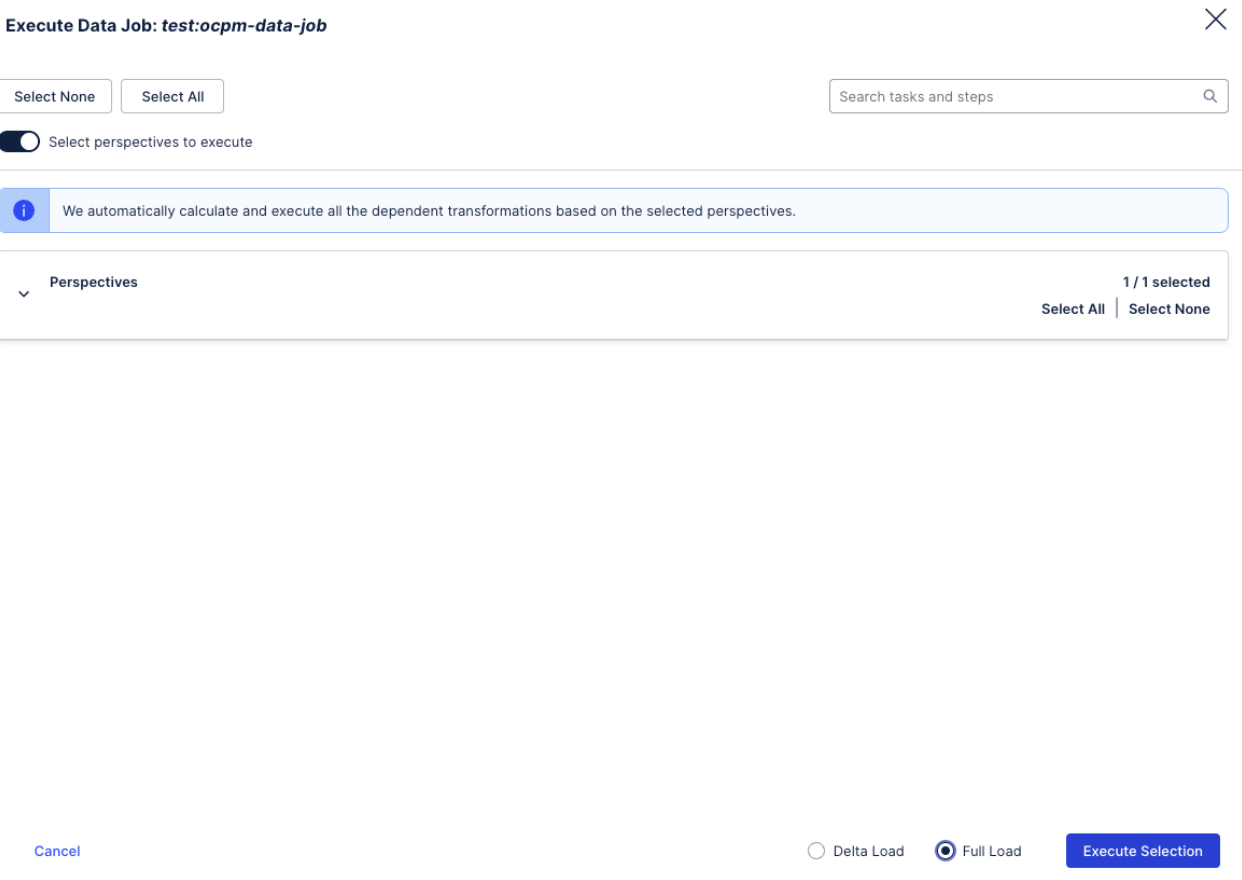
Access the Data Jobs, and execute the data job (all transformations, full load).
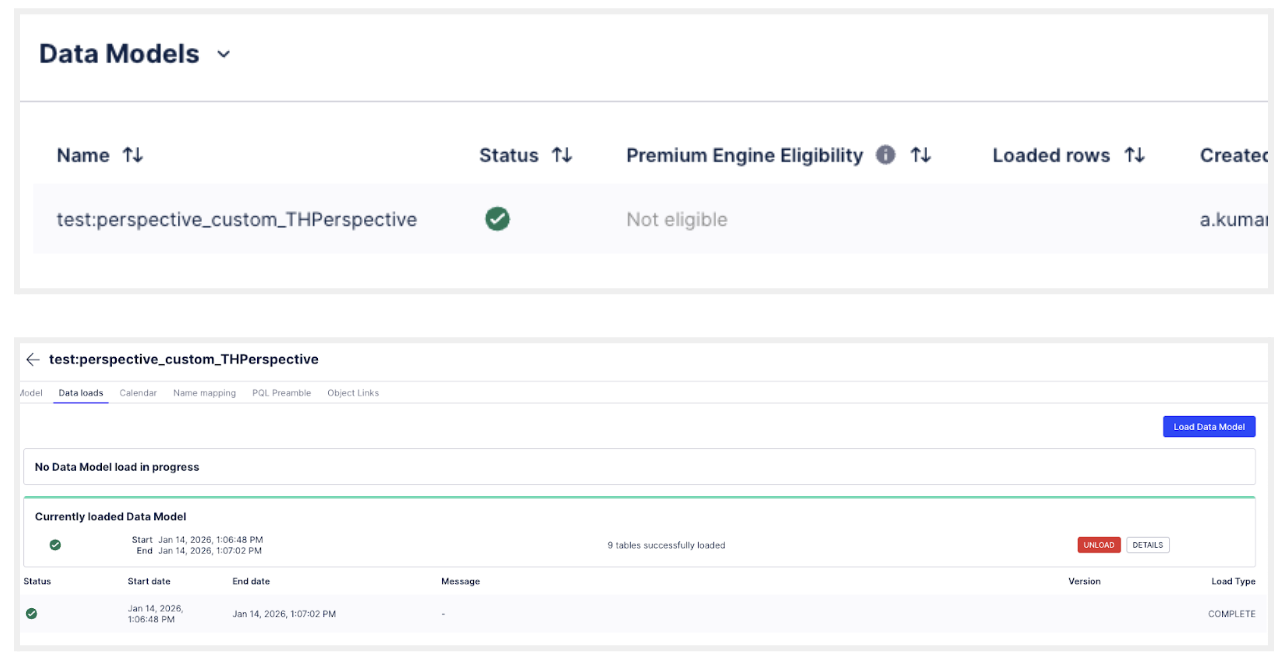
Access the Data Model, go to the Data Load section and Load the DM. It should take a few seconds to load. You should be able to see the following once done:
Assign Data Model Variable. Go back to the Studio package where you have installed the app to assign the Data Model variable.
Navigate to Package Settings and choose Variables.
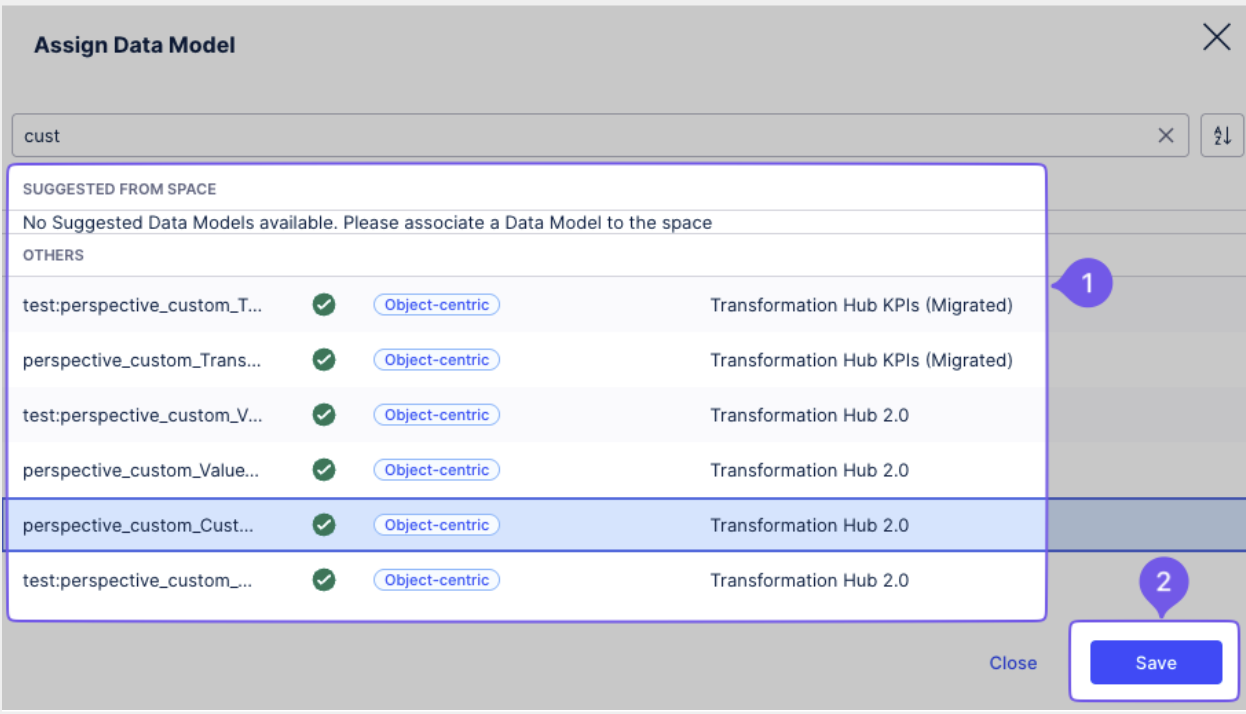
Click on Assign Data Model.
Select the perspective that you have just created via OCDM in the Marketplace installed pool. Here is the perspective name - ‘test:perspective_custom_THPerspective’.
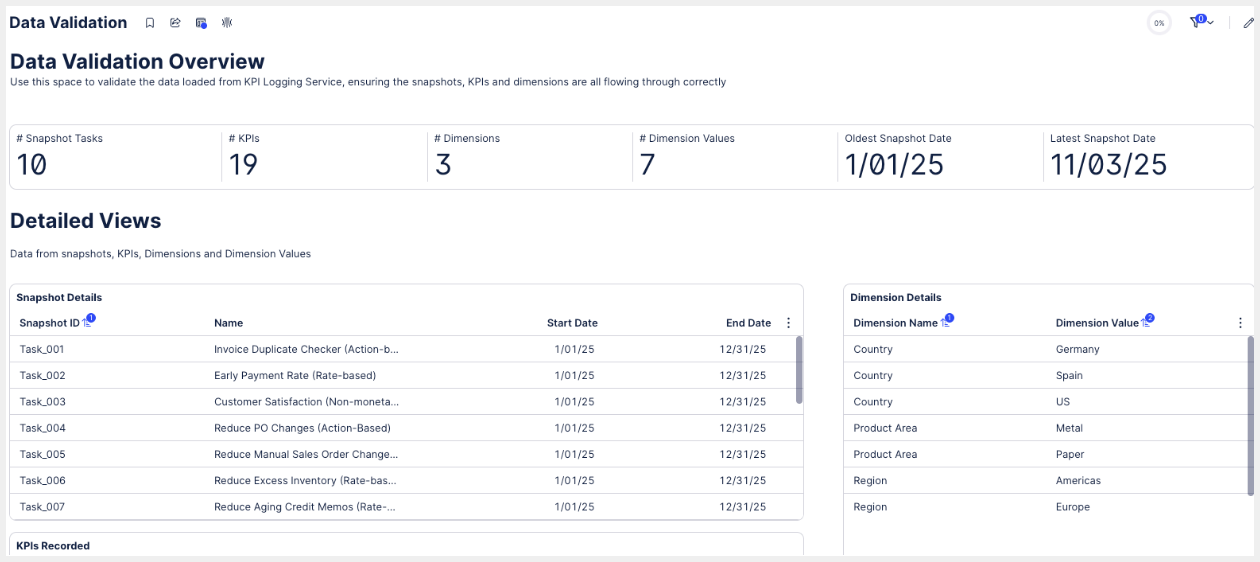
At this point, you should be able to view the data recorded from the snapshots in the ‘Data Validation’ view in the installed app.
Create a version and deploy the Knowledge Model to Production.
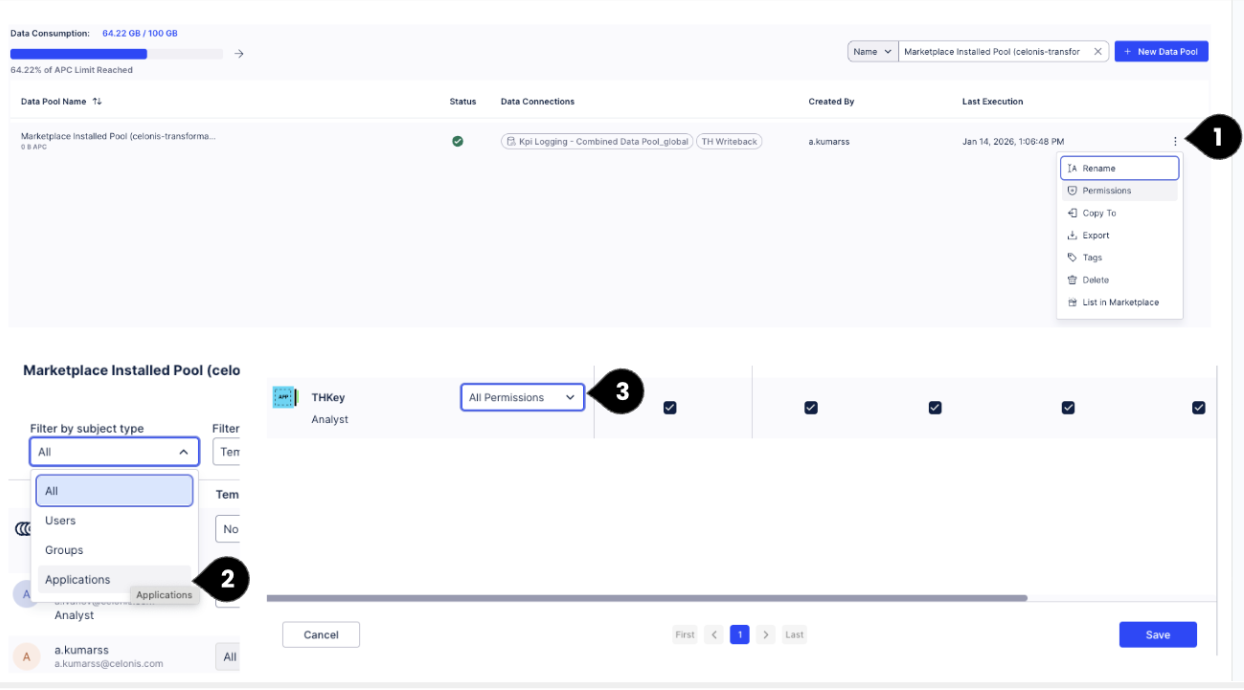
Create an App Key, by accessing ‘Admin & Settings’ (1), Applications (2) and Add New Application (3). Save the App key code, as you will not be able to access it later. If you only have analyst access to the package, have your admin create the app key. Once the admin creates the app key, they will get the app key code (alphanumeric code) from the system. They will have to copy this app key code and share it with you.

Grant permissions to the App Key at the package level [Editor Access].
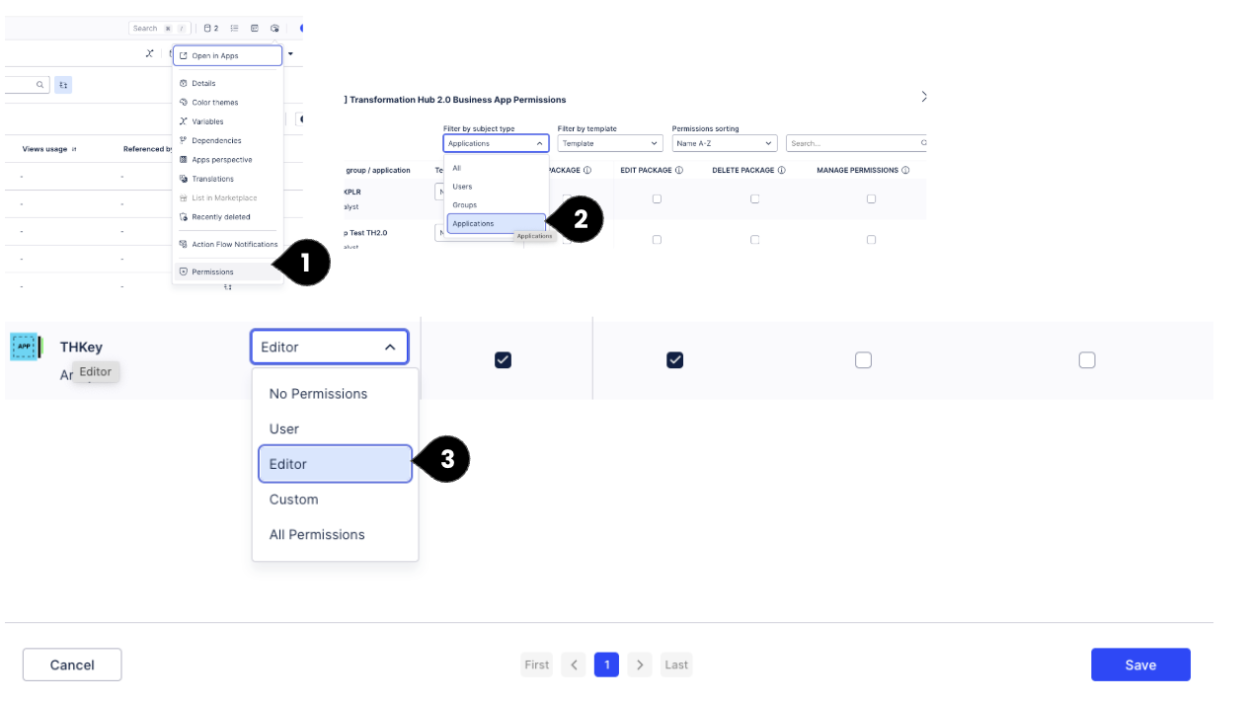
Grant permission to the App Key at the data pool level for the Marketplace installed data pool [All permissions].