Creating and using stereotypes
You can use stereotypes to extend BPMN notation for your specific use cases, such as adding custom icons or domain-specific terminology.
The following sections explain how to work with stereotypes in Celonis Process Management.
Before you begin, ensure you have completed the following steps or meet the requirements listed below:
You must have the Administrator role to create and edit stereotypes
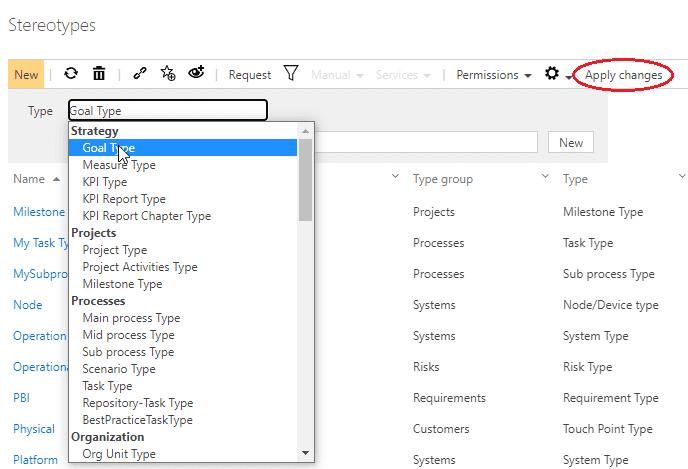
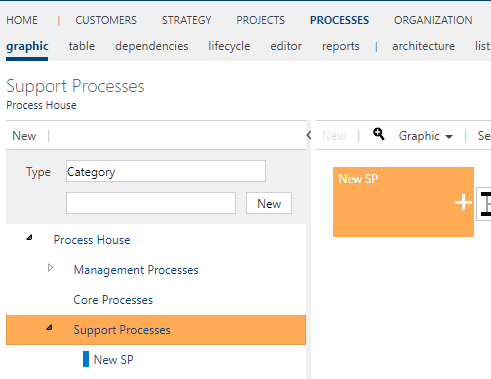
In the Admin area, go to the Stereotype tile in the section “Configure”.
Go to the dropdown to select the process or object to which a stereotype should be added.
From the drop-down list, select the desired Type for which the stereotype should be applicable. Assign a name and click the New button or confirm with the Enter key. Click Apply Changes to save.
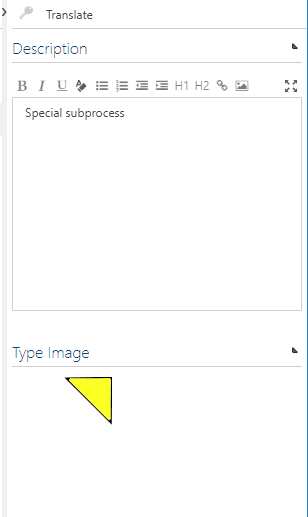
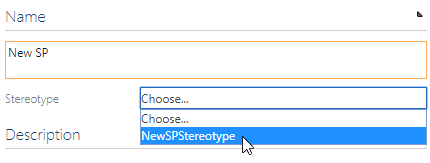
Now you can enter a description on the right side. Also you can add an image like a symbol for the stereotype.
Note
Images must be transparent and no larger than 100 x 250 pixels.
Navigate to the process and from there to the graphic.
Select the process that should have a stereotype. The process type must be the same type as the stereotype.
Expand the Name area in the detail content. You can now select the stereotype in the dropdown.
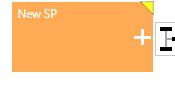
Once the change is saved, you can see the image on your process.