Create Public Form Link (Action Flow)
This module allows you to create a shareable link for one or multiple forms so that they can be easily accessed and submitted through a web browser. It acts as the essential bridge for human-in-the-loop interactions, linking external form submissions back to the active Orchestration Engine process using unique instance IDs and specific event triggers.
In Studio, go to your package and click New asset > Action Flow.
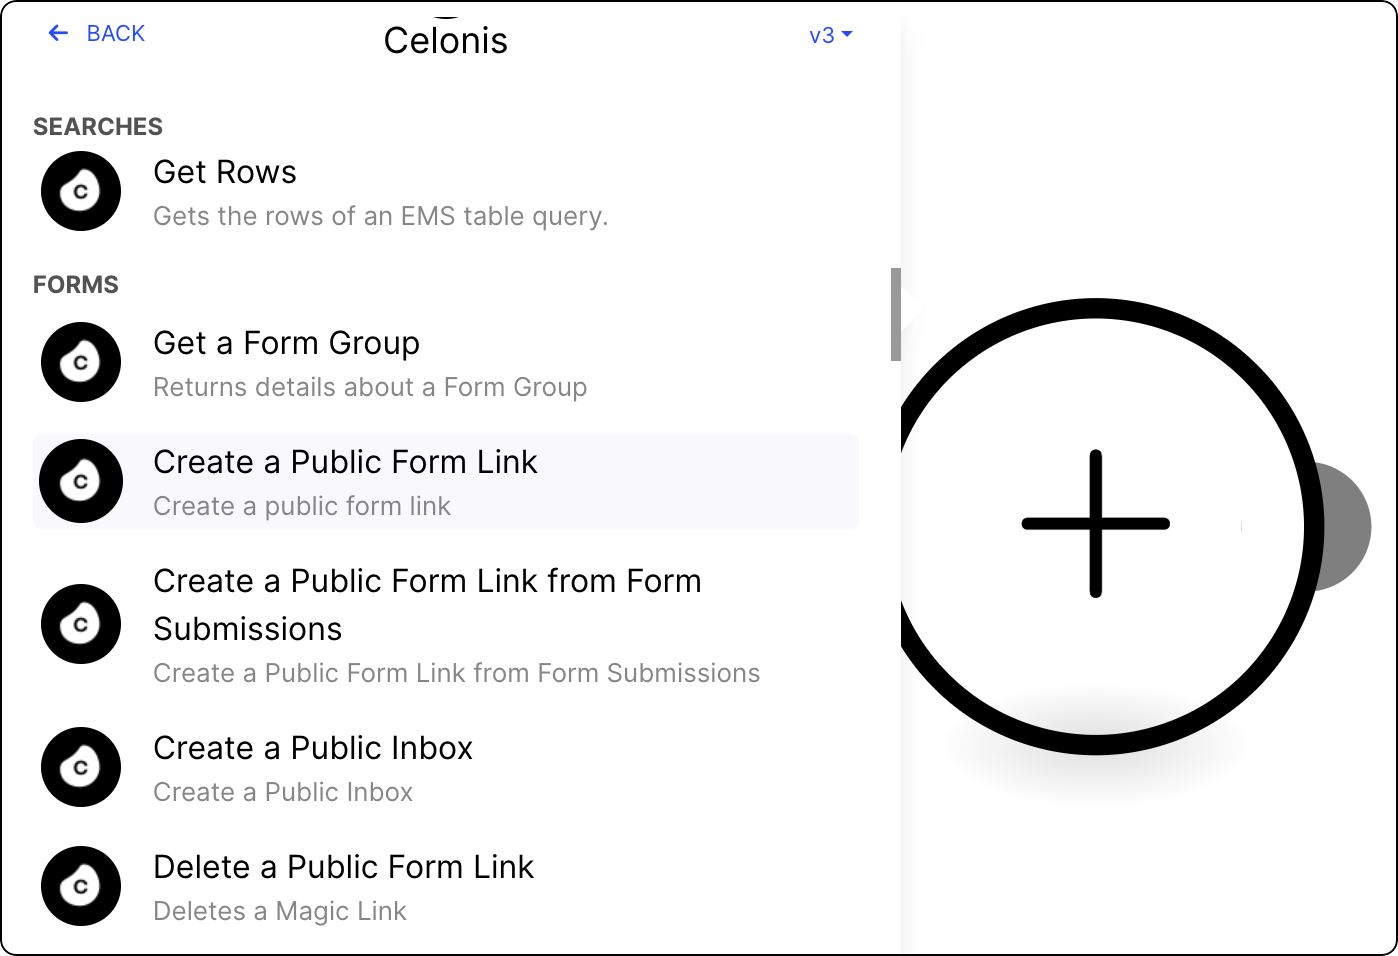
Click Add module and from the list select Celonis > Create a Public Form Link.
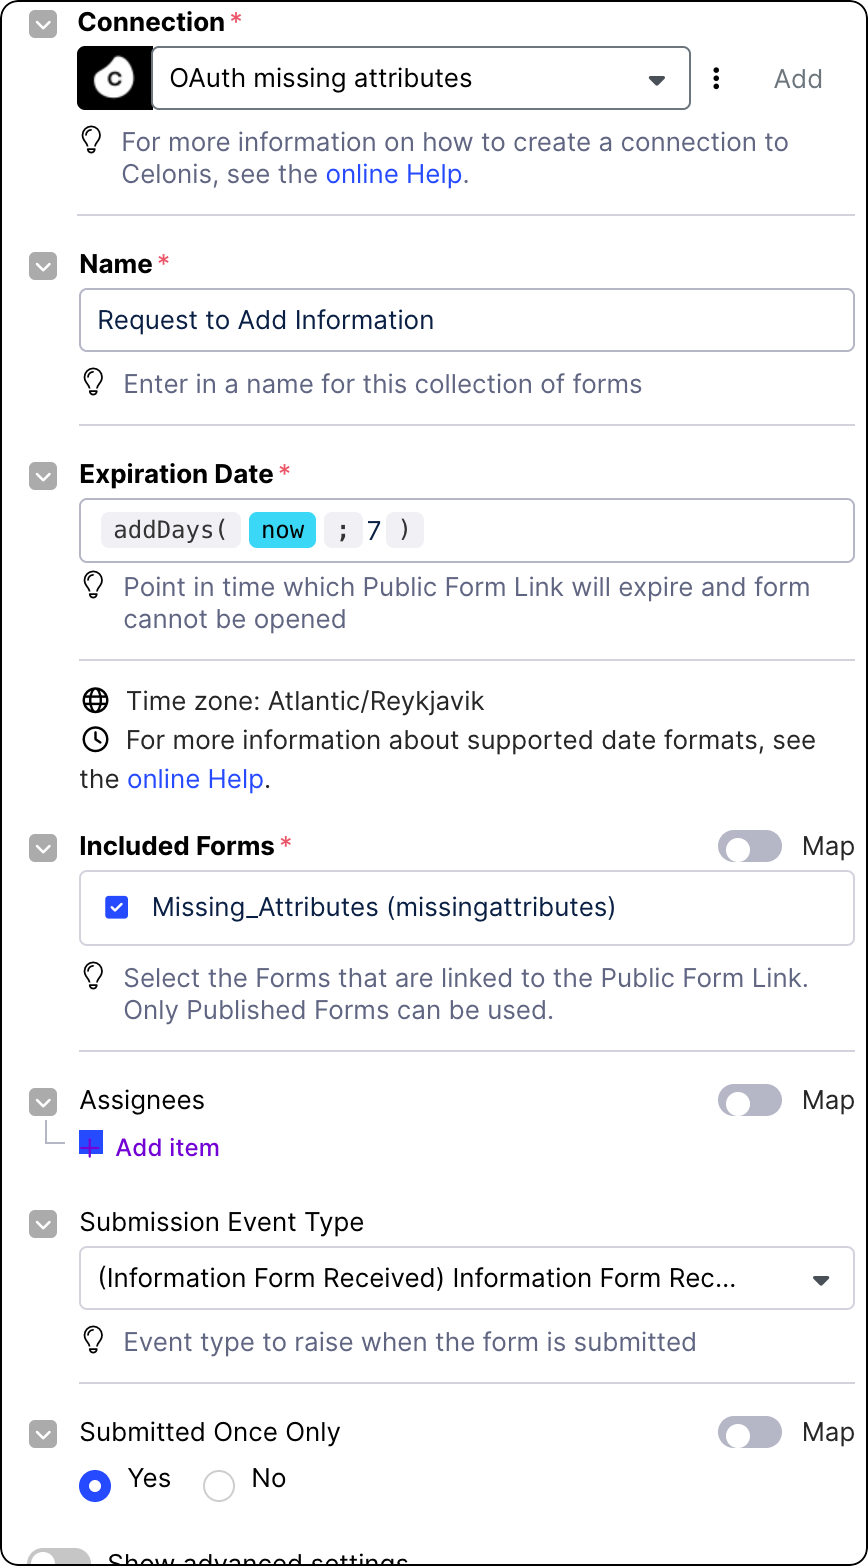
Select from existing OAuth 2.0 connections, or create a new one. See Registering your OAuth client in the Celonis Platform.
Enter the name for your Form.
Set the Expiration date for your link.
Your public link will stop working from that day onwards. By default, links are set to expire within seven days.
Select the Forms you want to make available from the public link.
The list displays only published Forms from this package.
(optional) Add Assignees to define users who can open the shareable link.
This setting allows you to make the Forms accessible only to selected users.
(optional) Select Submission Event Type.
From the drop-down list, select the event that will be sent back to Process Orchestration the moment a user submits their Form.
(optional) Decide if you want to allow multiple submissions of the same Form.
(optional) Add custom JSON attributes.
You can define custom JSON attributes that can be mapped inside the Form editor and stored against a shareable link. This securely pre-populates your Forms with vital process context, making the human-in-the-loop interaction faster and easier for the end user.
Create a custom JSON attribute and give it a specific key name. For example,
expectedDeliveryDate.Assign a dynamic value from your process to this key.
In your Form builder, select a specific field and set its default or calculated value by entering:
data._magicLinkCustomAttributes.mydata
The
mydatavalue must be replaced with the key name of the JSON attribute. Using the earlier example, this could be:data._magicLinkCustomAttributes.expectedDeliveryDate
When the user clicks their shareable link, the Form dynamically pulls this exact workflow data to automatically pre-populate the field for them.
(optional) Set the language of your Form.
By configuring it with a specific language key, the module automatically translates the generated Form link into the recipient's language based on your pre-defined Studio translation maps.
(optional) Select the Digital Process Instance ID.
Digital Process Instance ID, often abbreviated to dpInstanceId, connects your generated Form to your overarching workflow, like Orchestration Engine. dpInstanceId ensures that all data captured in the Form is saved to the correct process context and that the correct waiting workflow is successfully woken up upon submission.
Click Save.
Version and deploy the package your module is in. See Versioning and deploying packages.
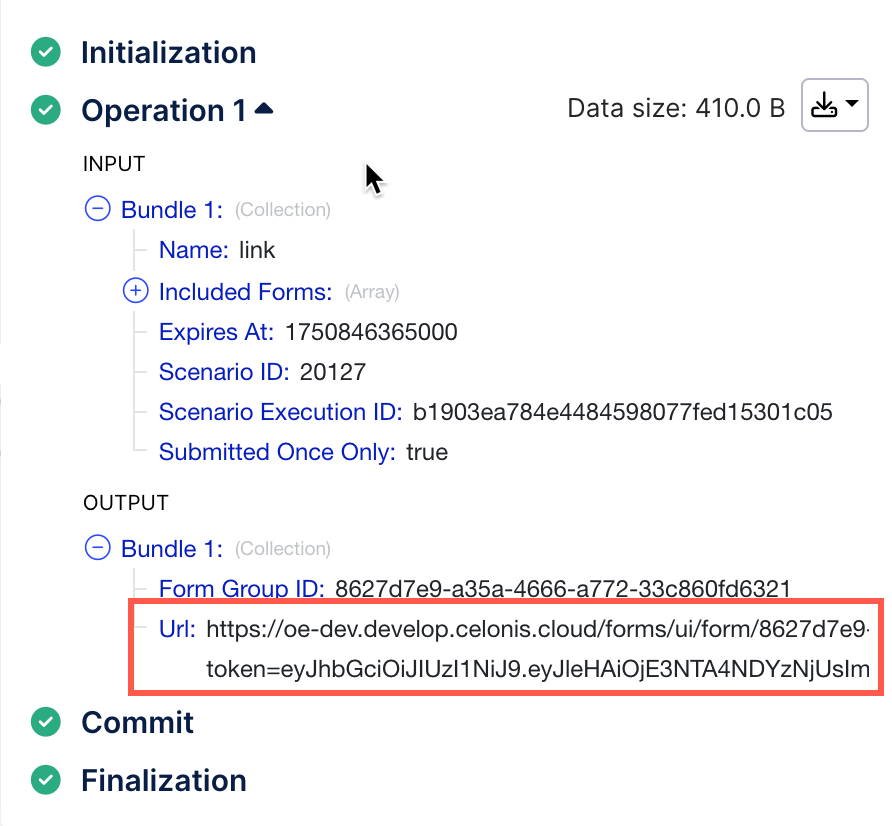
Your Action Flow module is ready for use. Once you run it, you can see the URL to the forms you selected in the Action Flow's output.