Creating and managing Celonis for Consulting projects
By creating a project, you establish a dedicated workspace to upload client data, perform process mining, and uncover actionable insights. Completing this setup ensures that your engagement is correctly classified for your Center of Excellence (CoE) and that the appropriate data hosting and credit allocations are applied.
To create a Celonis for Consulting project:
From the Celonis for Consulting Hub, click Projects and Create Projects.
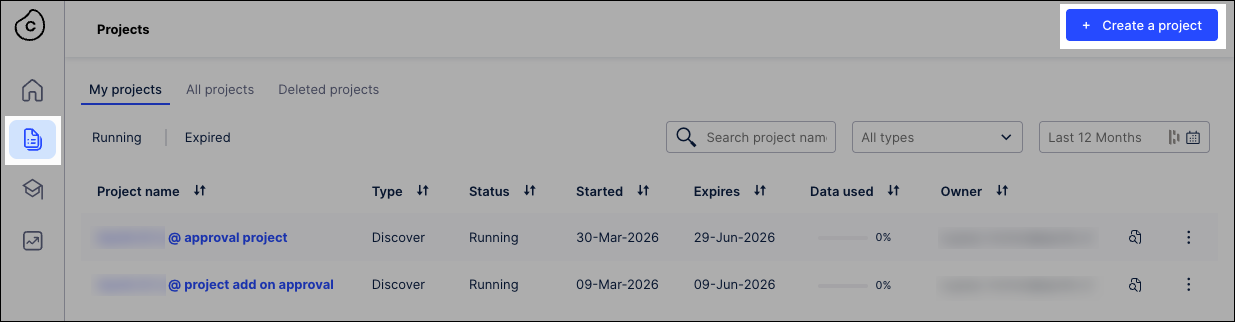
Select a Celonis for Consulting project plan by clicking Get (Plan Name).
For an overview of available project plans, see: Celonis for Consulting.

Configure your project using the following fields:
Project basics:
Project Name: A unique identifier for your engagement. It must be between 1 and 30 characters and contain only letters, numbers, and spaces.
Hosting Location: The geographic data center where your project environment and data will be hosted.
Project Settings:
Project Data Limit: Displays the storage capacity for the project (fixed at 1000 GB).
Credits: Indicates how many service credits will be consumed from your available balance (typically 1 Credit per project).
CoE (Center of Excellence) Details:
Internal Project Code: A custom code used by your organization's administrators to track and validate the project request.
Region: The specific business region or organizational unit responsible for the project.
Client and Project Classification:
Client's Full Legal Name: The official name of the organization you are conducting the consulting project for.
Process: The specific business process being analyzed (e.g., Accounts Payable, Procurement).
Engagement Type: The nature of the consulting work, such as Digital Transformation or M&A.
Source System: The underlying ERP or software system where the data originates (e.g., SAP, Oracle, Salesforce).
Click Next.
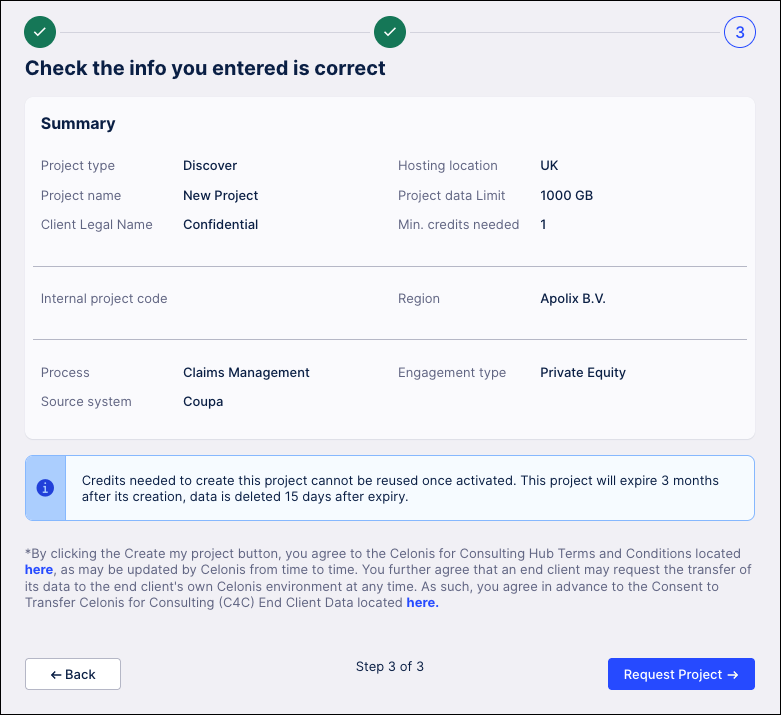
Confirm your project details and then click Request Project.
The project is now sent for approval. Once the request is processed, you will typically receive access to the project space where you can begin uploading data and building your process mining analyses.
When you click the Request Project button, several automated processes are triggered to provision your environment. Here is what happens behind the scenes:
Credit consumption: The system deducts the required amount from your organization's credit balance. Note that these credits cannot be reused once the project is activated.
Environment provisioning: Celonis sets up a dedicated, high-performance workspace with a data limit in your selected Hosting Location.
Lifecycle timer starts: The project is officially created with a 3-month lifespan. After this period, the project will expire, and all data within it will be permanently deleted 15 days post-expiry.
Legal and compliance alignment: By requesting the project, you are formalizing the agreement to the Celonis for Consulting Hub Terms and Conditions and consenting to potential data transfers if the client later moves to their own Celonis environment.
CoE Validation: Your Internal Project Code and Region are recorded for administrative tracking and auditing by your Center of Excellence.
Once your engagement is underway, you can use the management tools in the Projects tab to maintain and scale your workspace. These options allow you to adapt the project environment as your client’s needs evolve, whether you are extending a deadline or expanding technical capabilities. By actively managing your projects, you ensure that your data remains accessible for the full duration of your consulting mission and that you are following the latest Celonis methodologies for value realization.
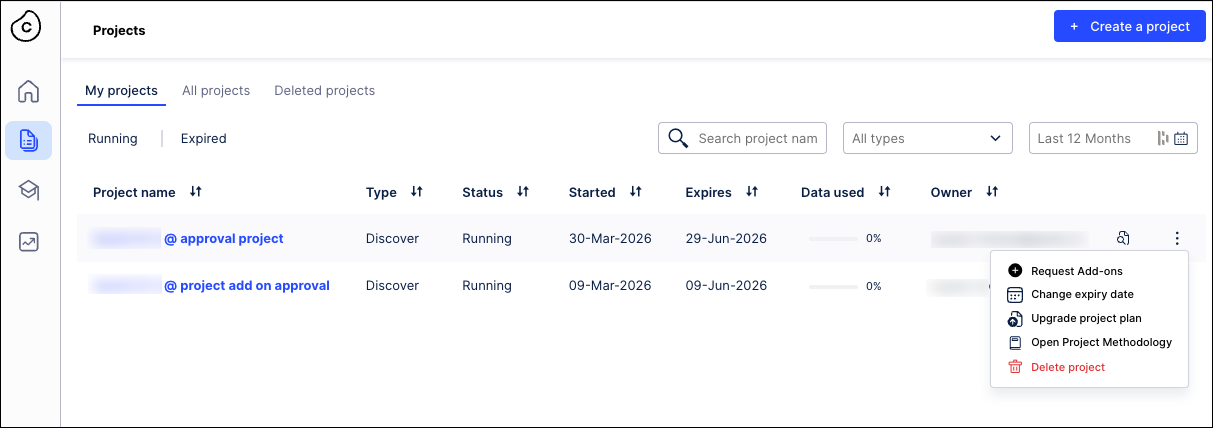
When managing existing projects, you have the following options:
Request add-ons: You can enhance your project’s functionality by requesting additional modules or features beyond the initial setup.
Change expiry date: You have the flexibility to extend your project’s lifespan to match your actual engagement timeline, preventing premature data deletion.
Upgrade project plan: If your data volume or processing requirements grow, you can move to a more robust plan to keep your analysis running smoothly.
Open project methodology: You can access structured frameworks and best practices to guide your team through each phase of the consulting lifecycle.
Delete project: Once you have delivered your final insights and no longer need the environment, you can permanently remove the project to maintain a clean workspace.